
Omnichannel messaging by Ringover allows you to centralize your customer communications across WhatsApp, Messenger, Instagram, Google Reviews, and Outlook. In this guide, you’ll learn how to meet prerequisites, activate each messaging channel, and assign conversations to your agents.
Prerequisites
- An active subscription to the Unified license.
- Administrative permissions on your Ringover Dashboard.
- Verified administrator access for the respective platforms (Meta, Google Business, Microsoft).
Set up and configure Omnichannel messaging channels
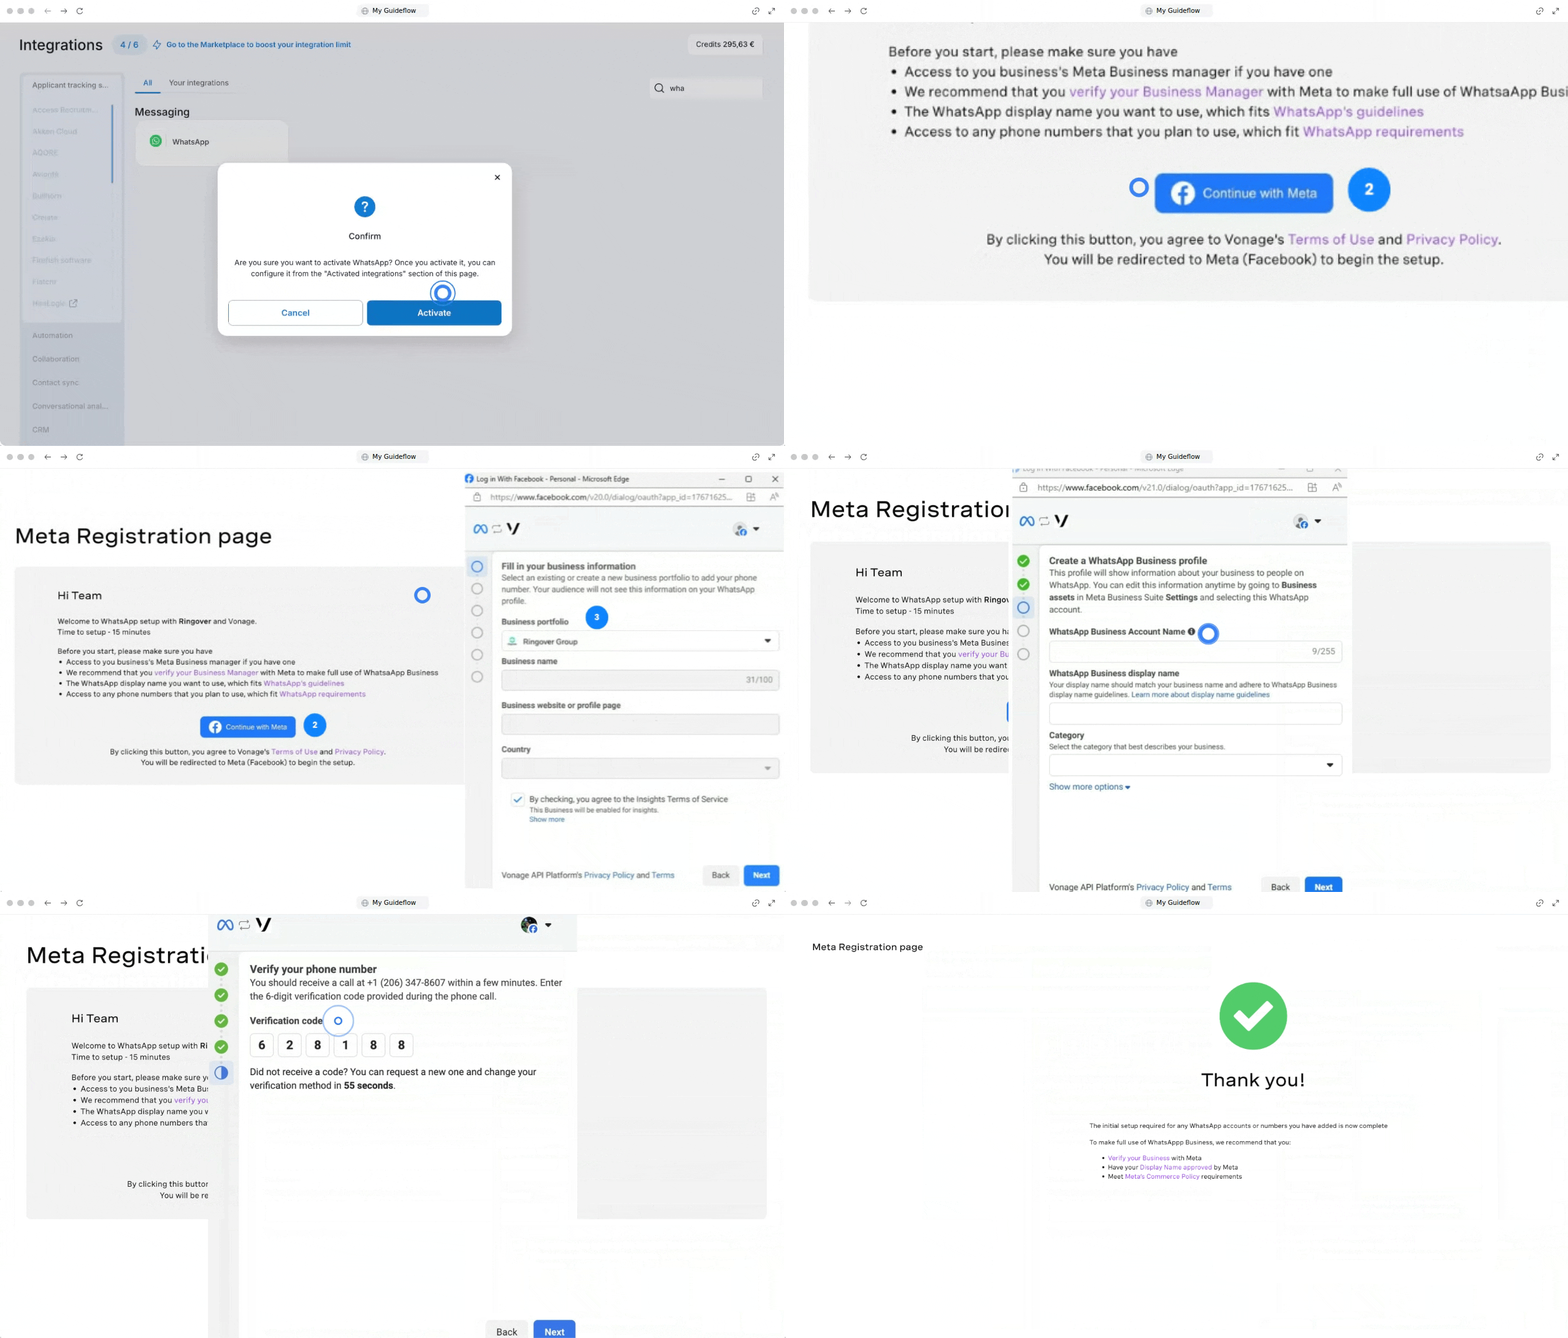
1. Connect WhatsApp Business
Link a verified Meta account to handle incoming WhatsApp Business messages directly in Ringover.
Check those articles for more information :
🔗 How to integrate WhatsApp Business with Ringover
🔗 How to create Whatsapp message templates in Ringover
- Go to your Ringover Dashboard > Integrations.
- Select your verified Meta account.
- Create or connect your WhatsApp Business account.
- Select or assign the designated user or group.
- Verify your phone numbers via a verification call.
2. Connect Messenger
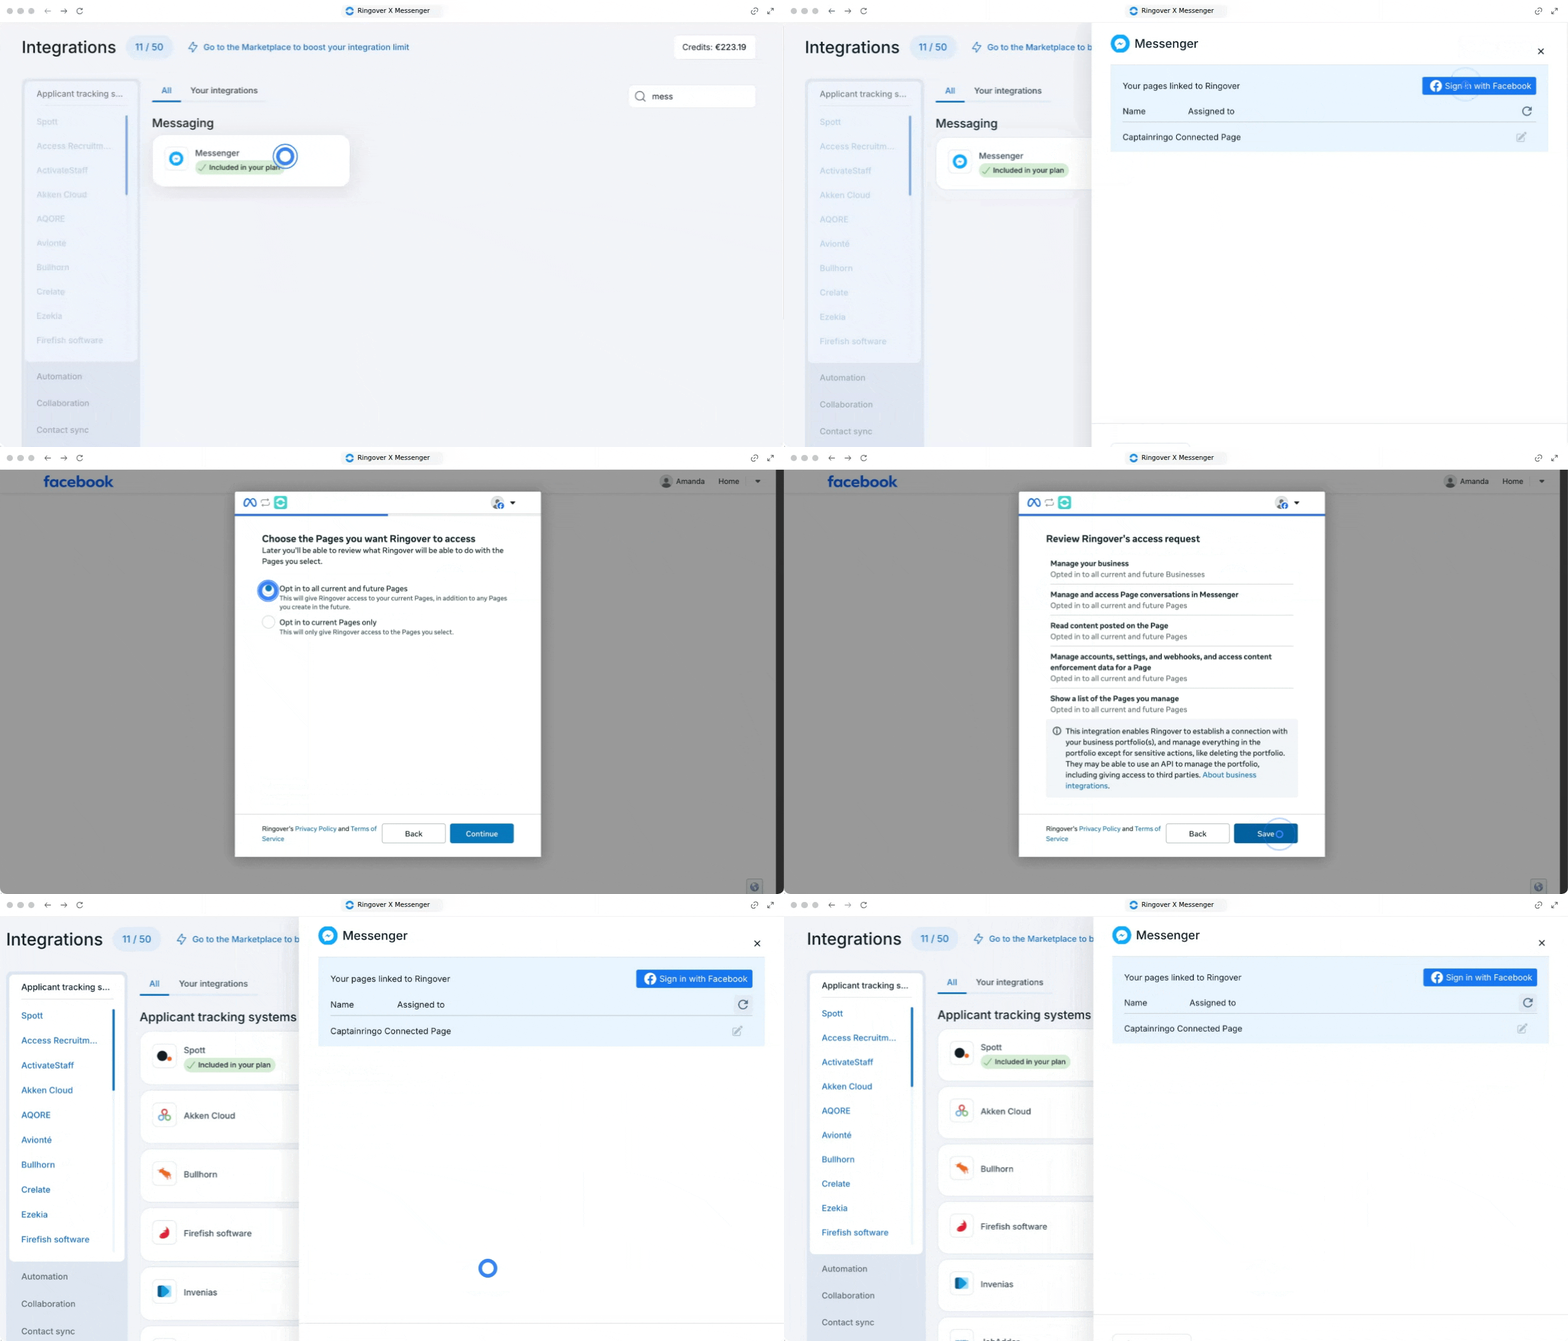
Integrate Facebook Messenger to receive page messages in your Web App inbox.
- Go to Integrations and click Activate under Messenger or "Sign in with your Facebook" account.
- Accept the permissions.
- Log in to Facebook in the pop-up window, select your business page, and accept all permissions.
- Return to the Messenger integration page in Ringover and click the Pencil icon next to your connected page.
- Assign the page to an agent or agent group.
3. Connect Instagram Professional
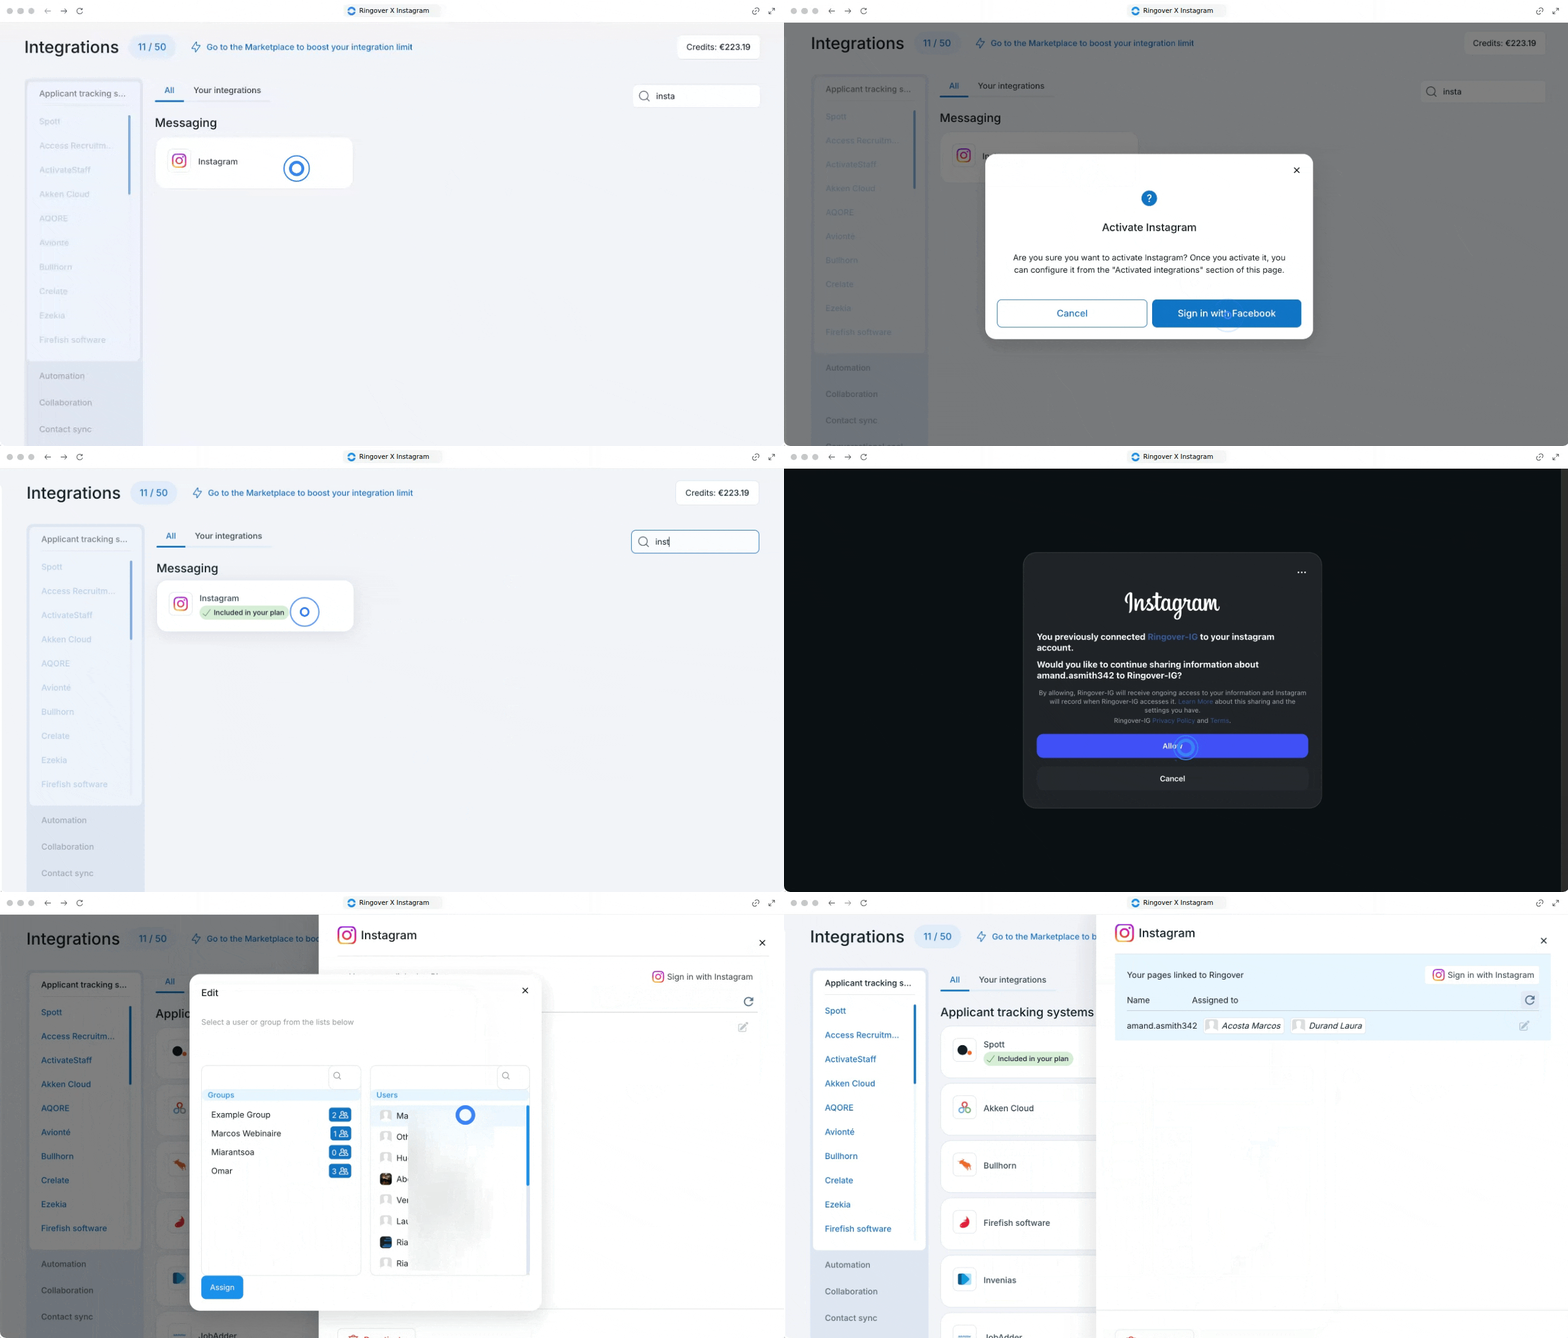
Route Instagram direct messages directly to your designated agents.
- Go to Integrations and click Activate under Instagram or "Sign in with Instagram".
- Log in to Instagram via the pop-up and grant permissions.
- Select the agent or agent group responsible for handling incoming direct messages.
4. Connect Google Reviews
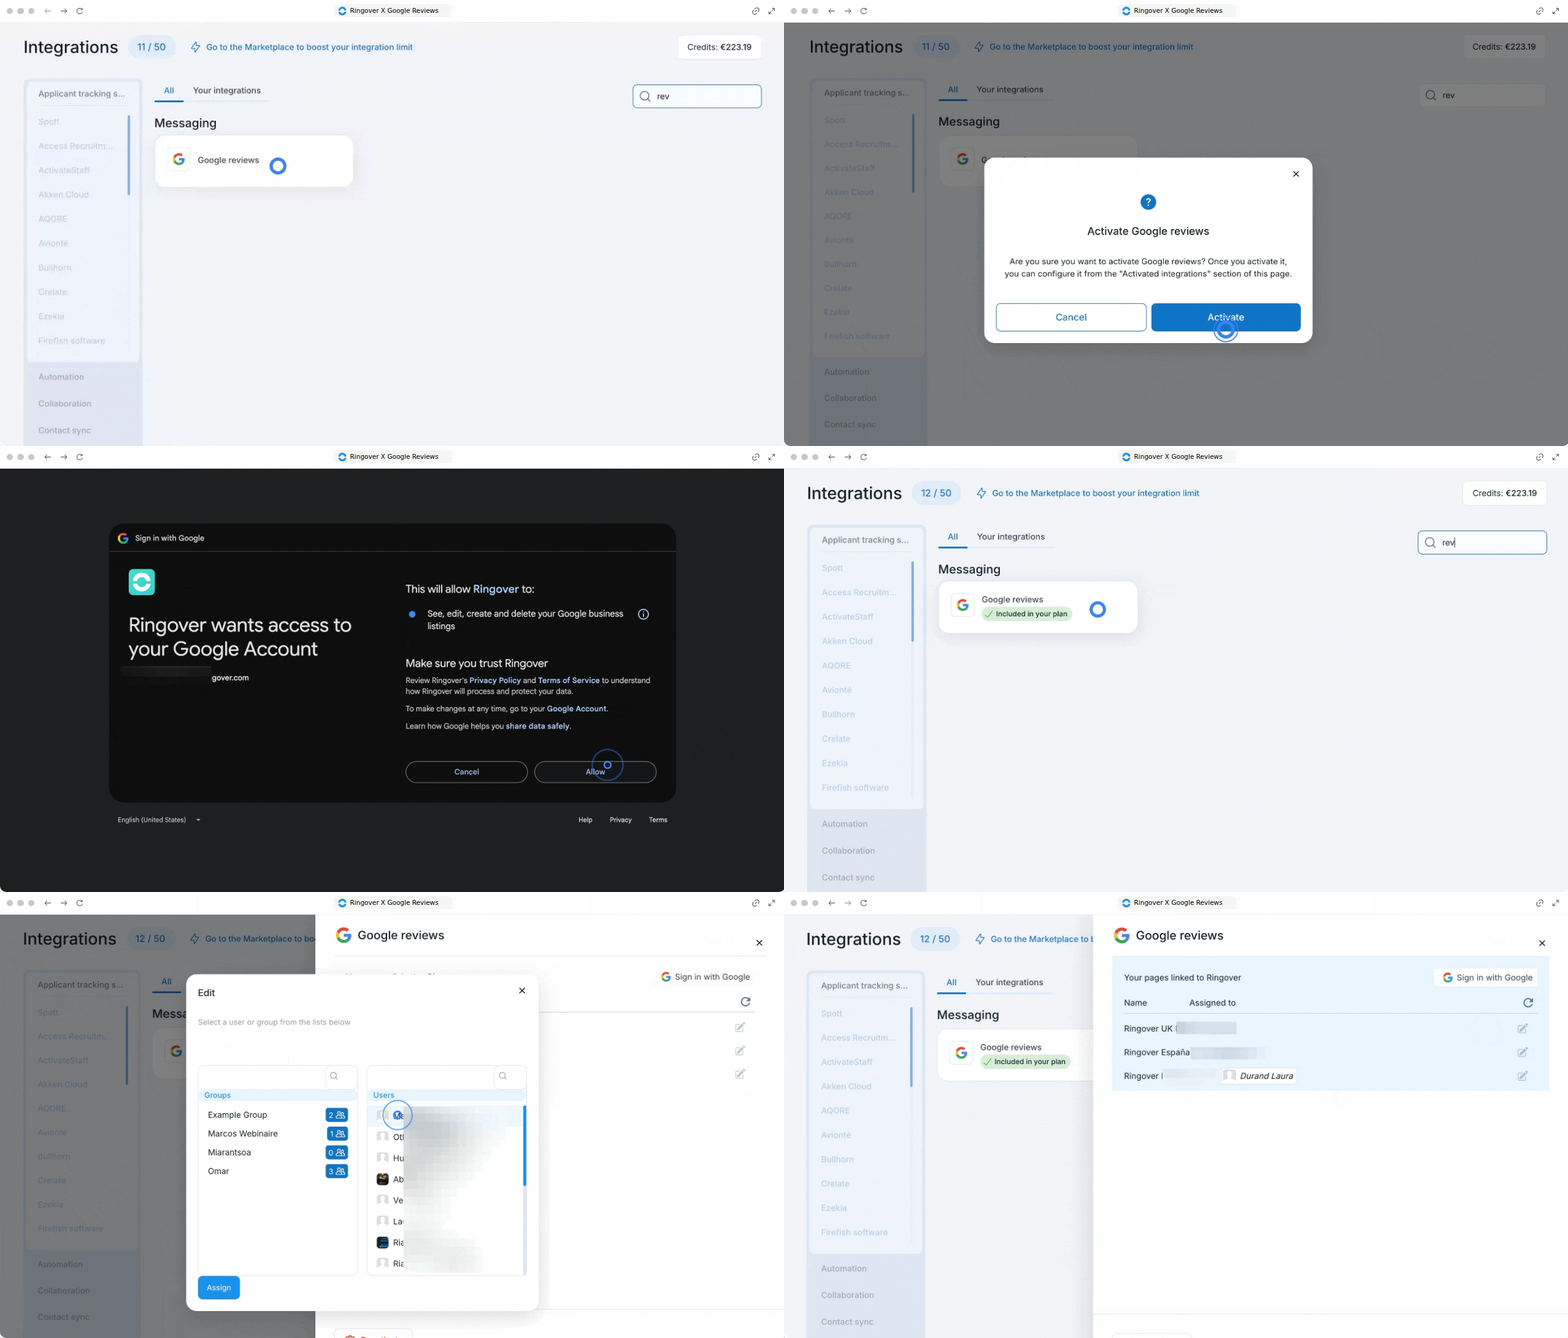
Receive and respond to customer reviews on your certified Google business account.
- Ensure your Google Business account is certified.
- Go to Integrations and click Activate under Google Review.
- Sign in with your Google account in the pop-up.
- Assign the connected account to an agent or group with the add-on activated.
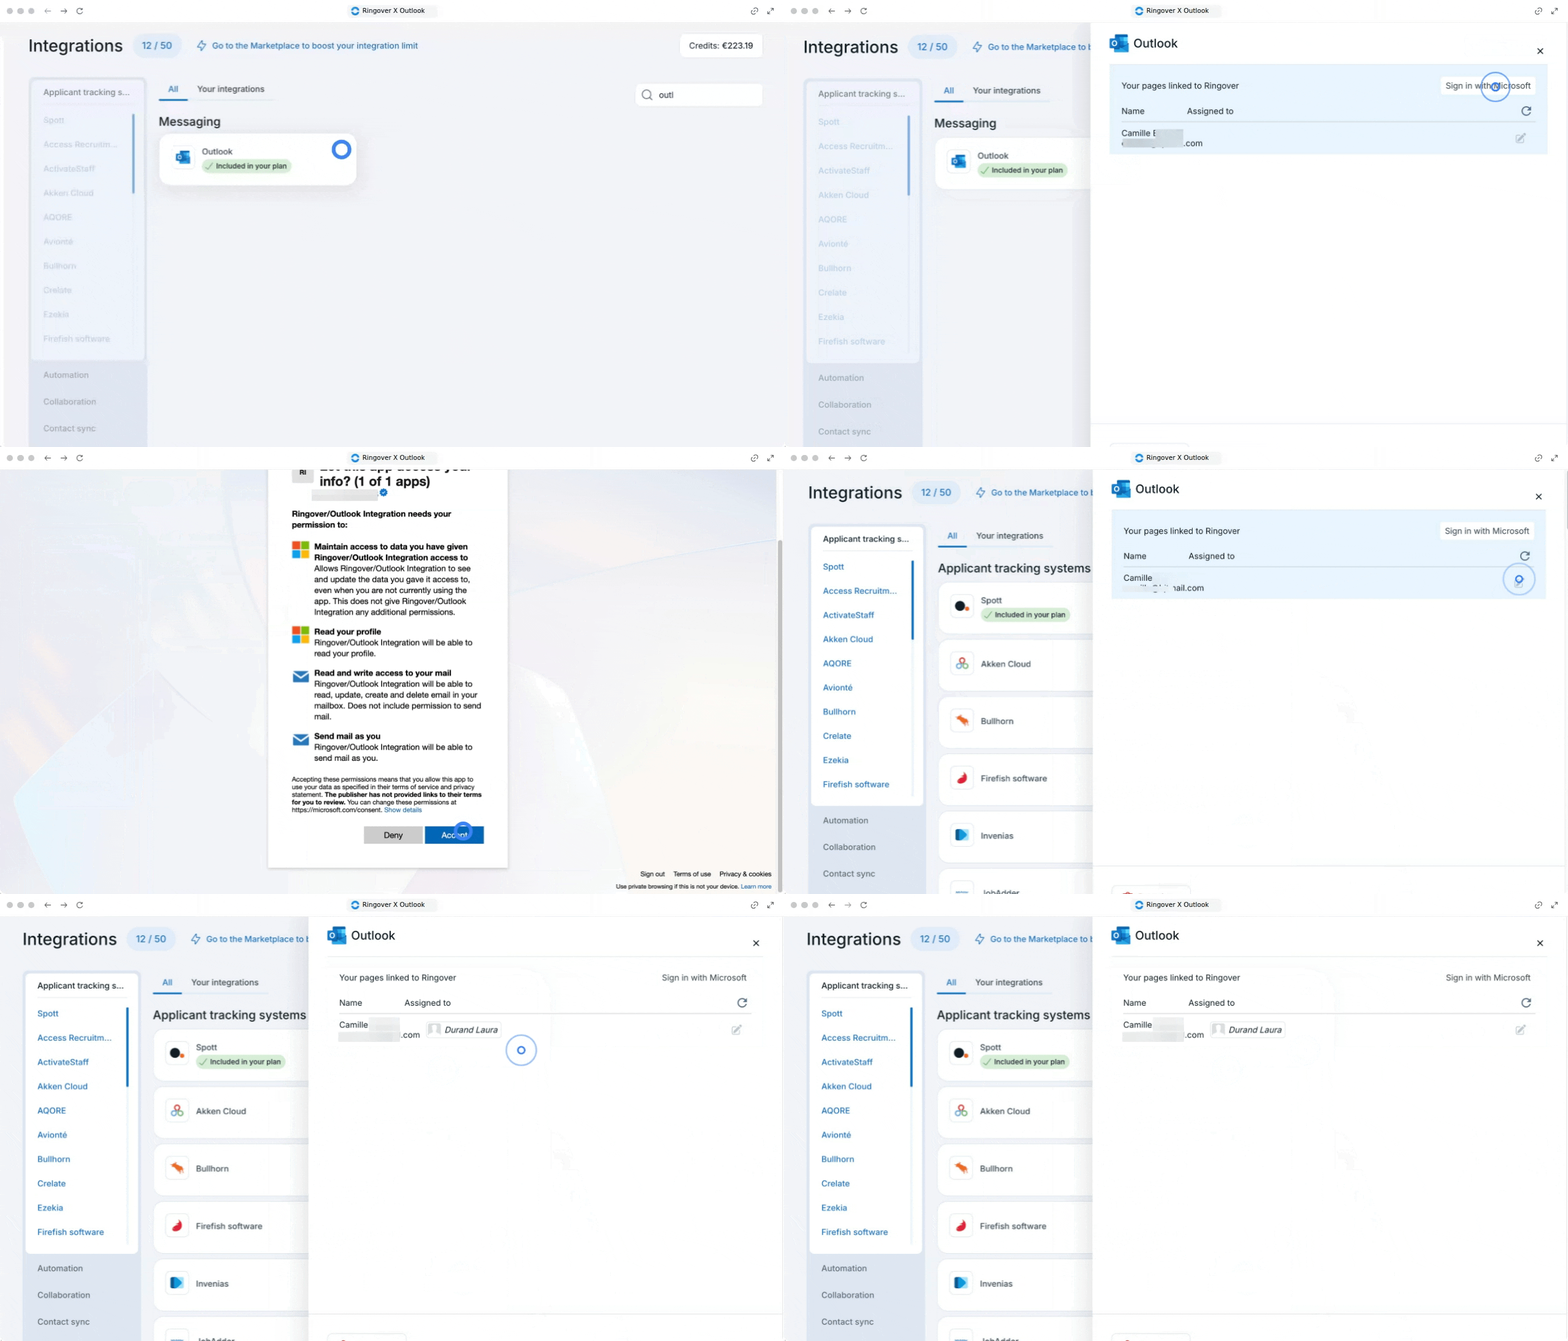
5. Connect Outlook Email
Centralize incoming and outgoing email communications directly inside your Web App messages tab.
- Go to Integrations, locate Outlook, and click Activate or "Sign in with Microsoft".
- Confirm the activation, then click Configure.
- Click Sign in with Microsoft and enter your credentials.
- Click the Pencil icon to change user or group assignments if needed.
🎉 You now know how to configure Omnichannel messaging channels and can seamlessly manage all customer conversations in one place!