
This article provides a detailed explanation of the IVR (Interactive Voice Response) steps available in Ringover, including the purpose of each step and the meaning of every configuration setting. It is designed to help administrators understand how to build, customize, and optimize inbound call flows using features such as call queues, nested IVRs, external routing, AI agents, SMS automation, call scripts, and end-of-call surveys.
Available IVR Steps
1. Ringover Users
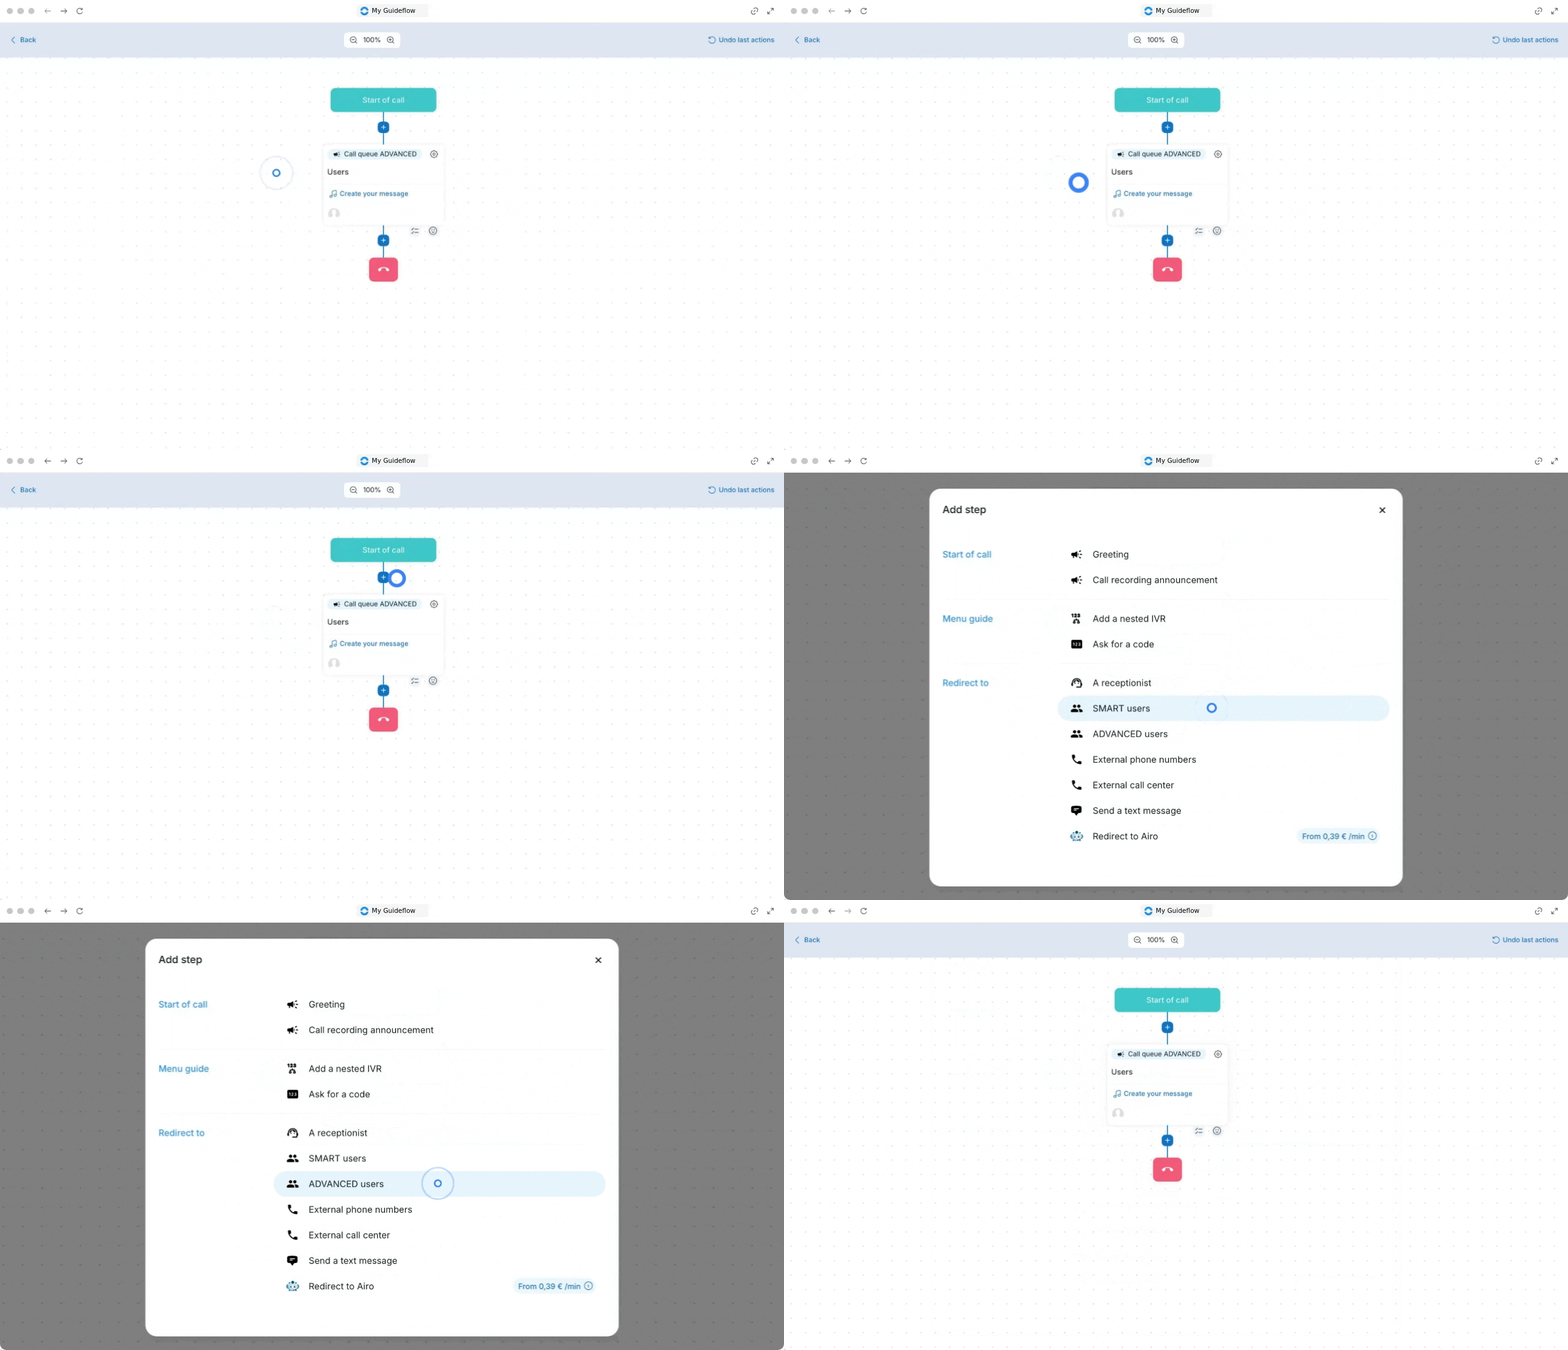
The Ringover Users or Call Queue step routes incoming calls to one or multiple Ringover users.
Add users and groups
Add one or several Ringover users or groups to receive incoming calls. Queue configuration depends on the license type:
Business and Advanced queues allow both users and groups.
Smart queues only allow users.
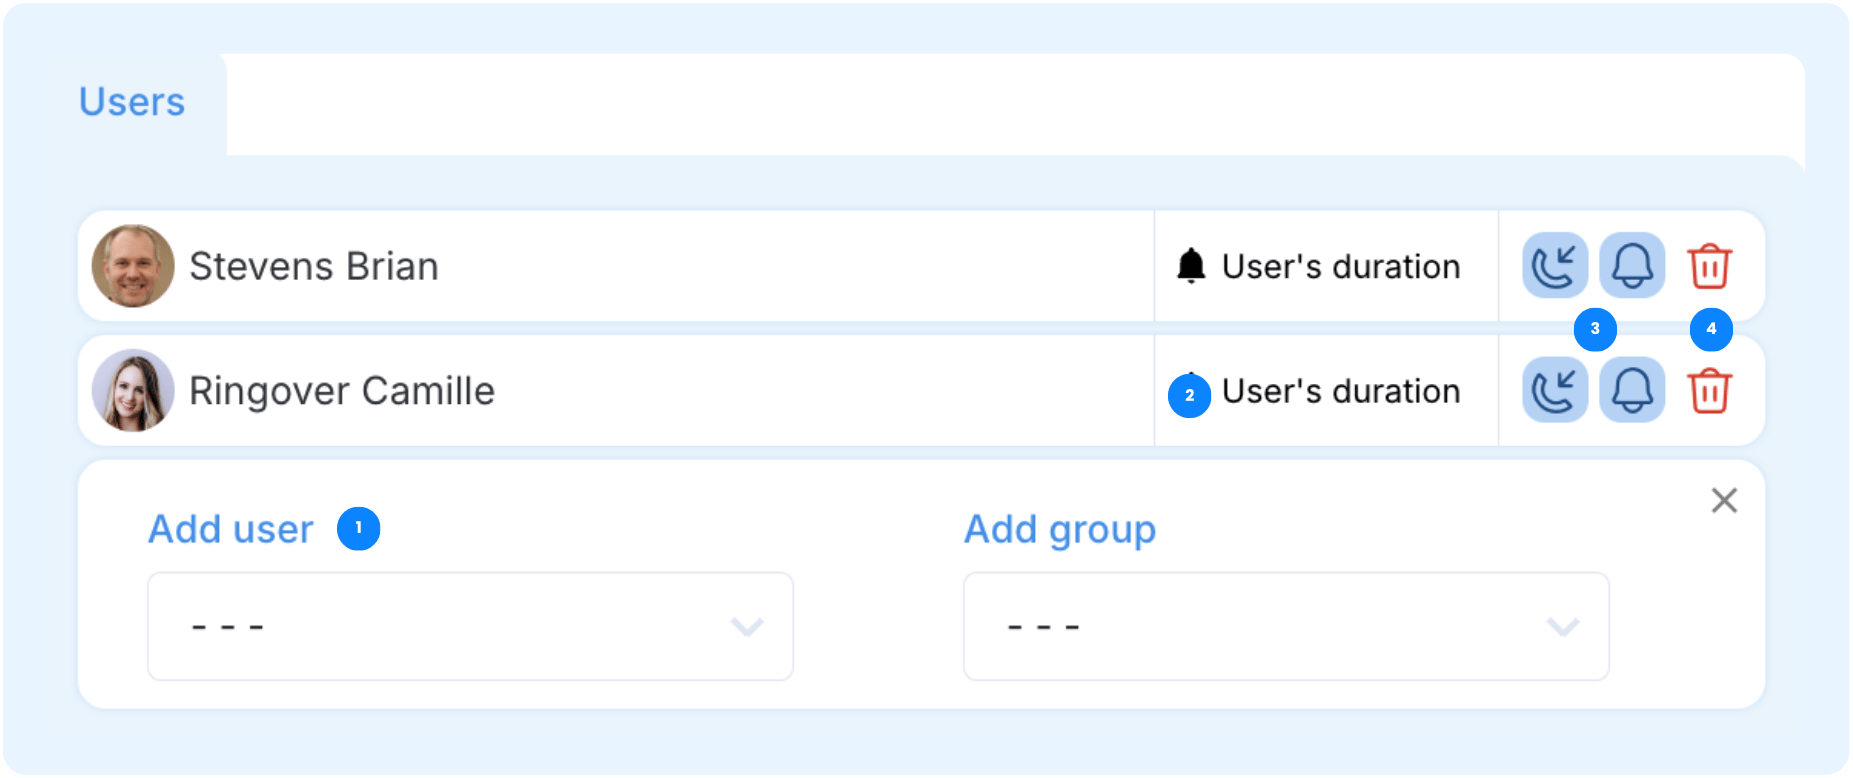
Available actions
Add users and groups: Adds another user/group to the queue.
User duration: Defines how long a user or group rings before the call moves to the next routing action.
Receive calls and/or Notifications: Allows the user to receive calls and/or notifications.
Delete button: Removes the user from the queue.
You can also define the order in which users or groups are called when the Cascading forwarding mode is enabled.
Call forwarding modes
The call forwarding mode determines how incoming calls are distributed between the users configured inside the queue.
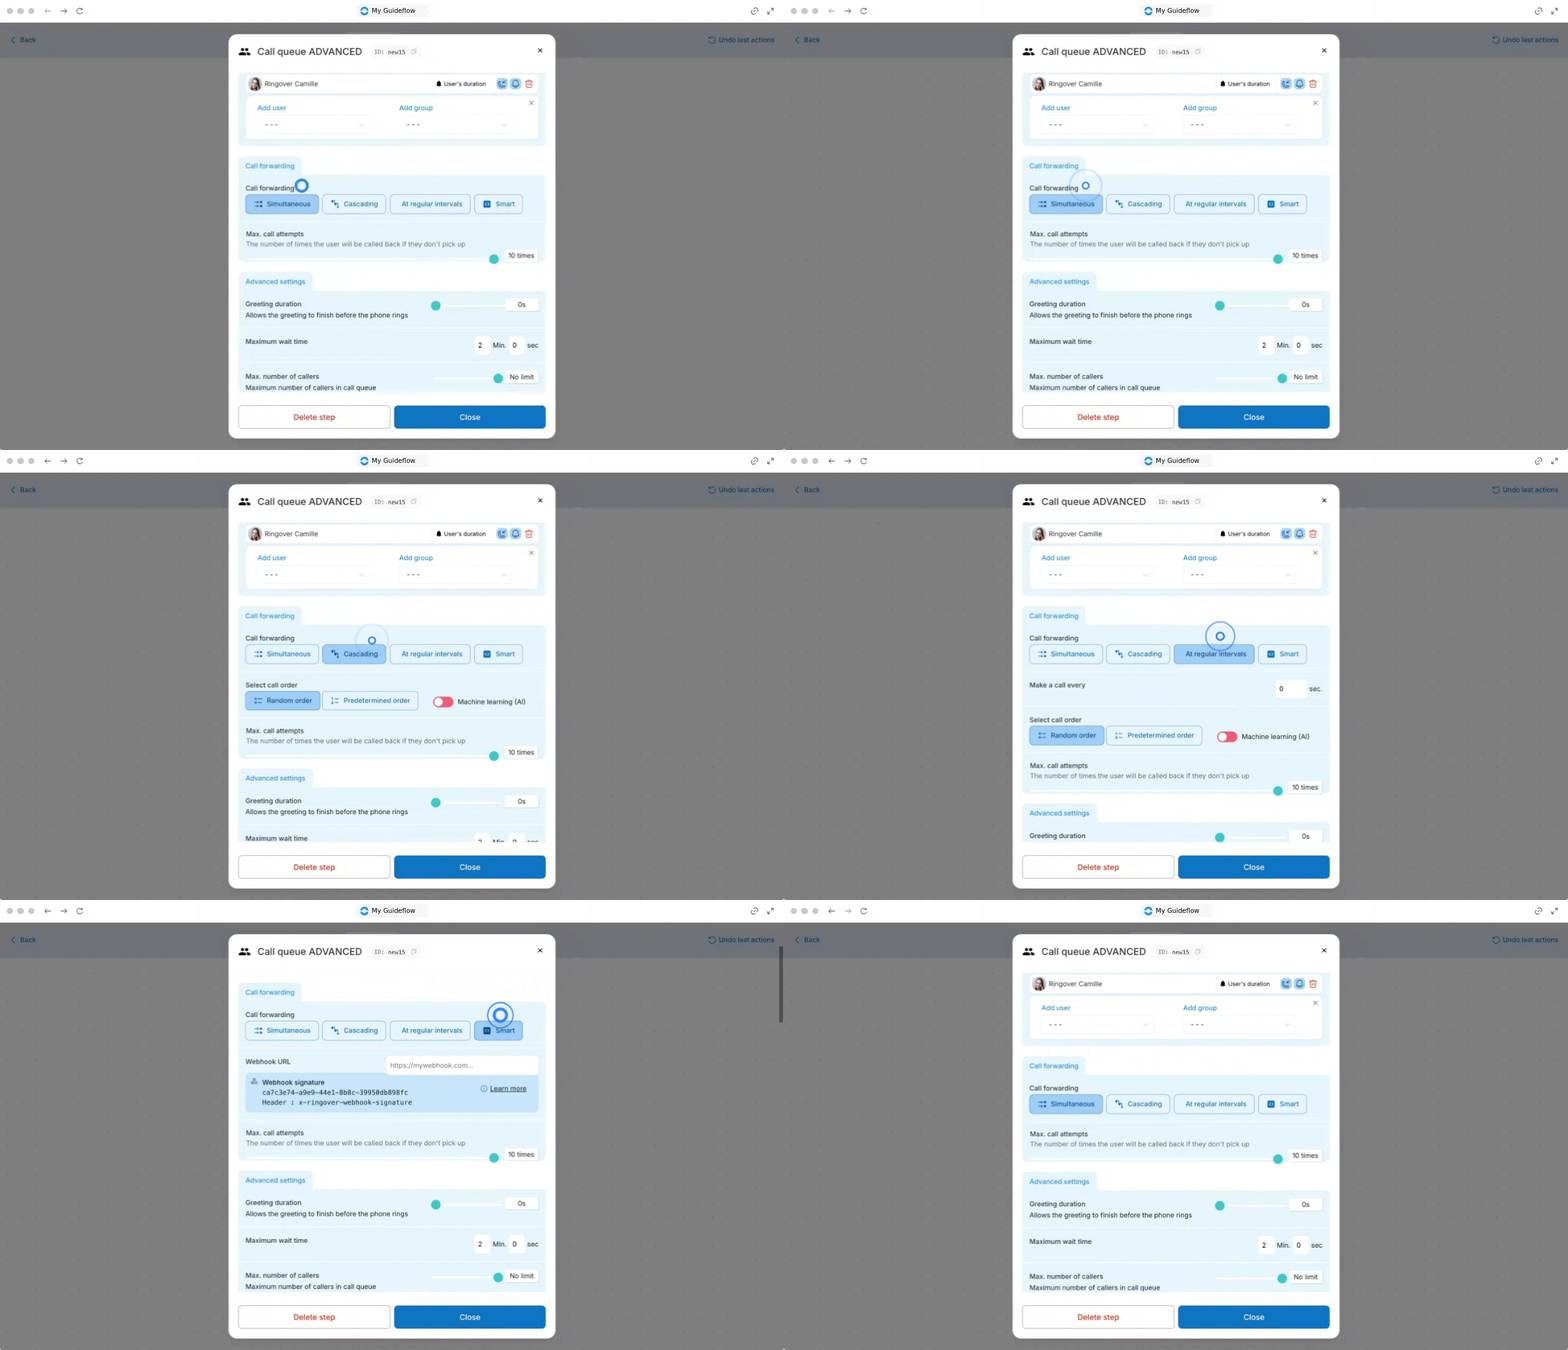
Simultaneous: All users ring at the same time.
Cascading: Users ring one after another according to the configured order. The queue member order is used when this forwarding mode is selected.
At regular intervals: Calls are distributed to users using rotating intervals. The delay between each call attempt is defined in seconds.
Smart: Automatically routes calls using intelligent distribution logic.
Fastest: Routes the call to the first available user who can answer the quickest.
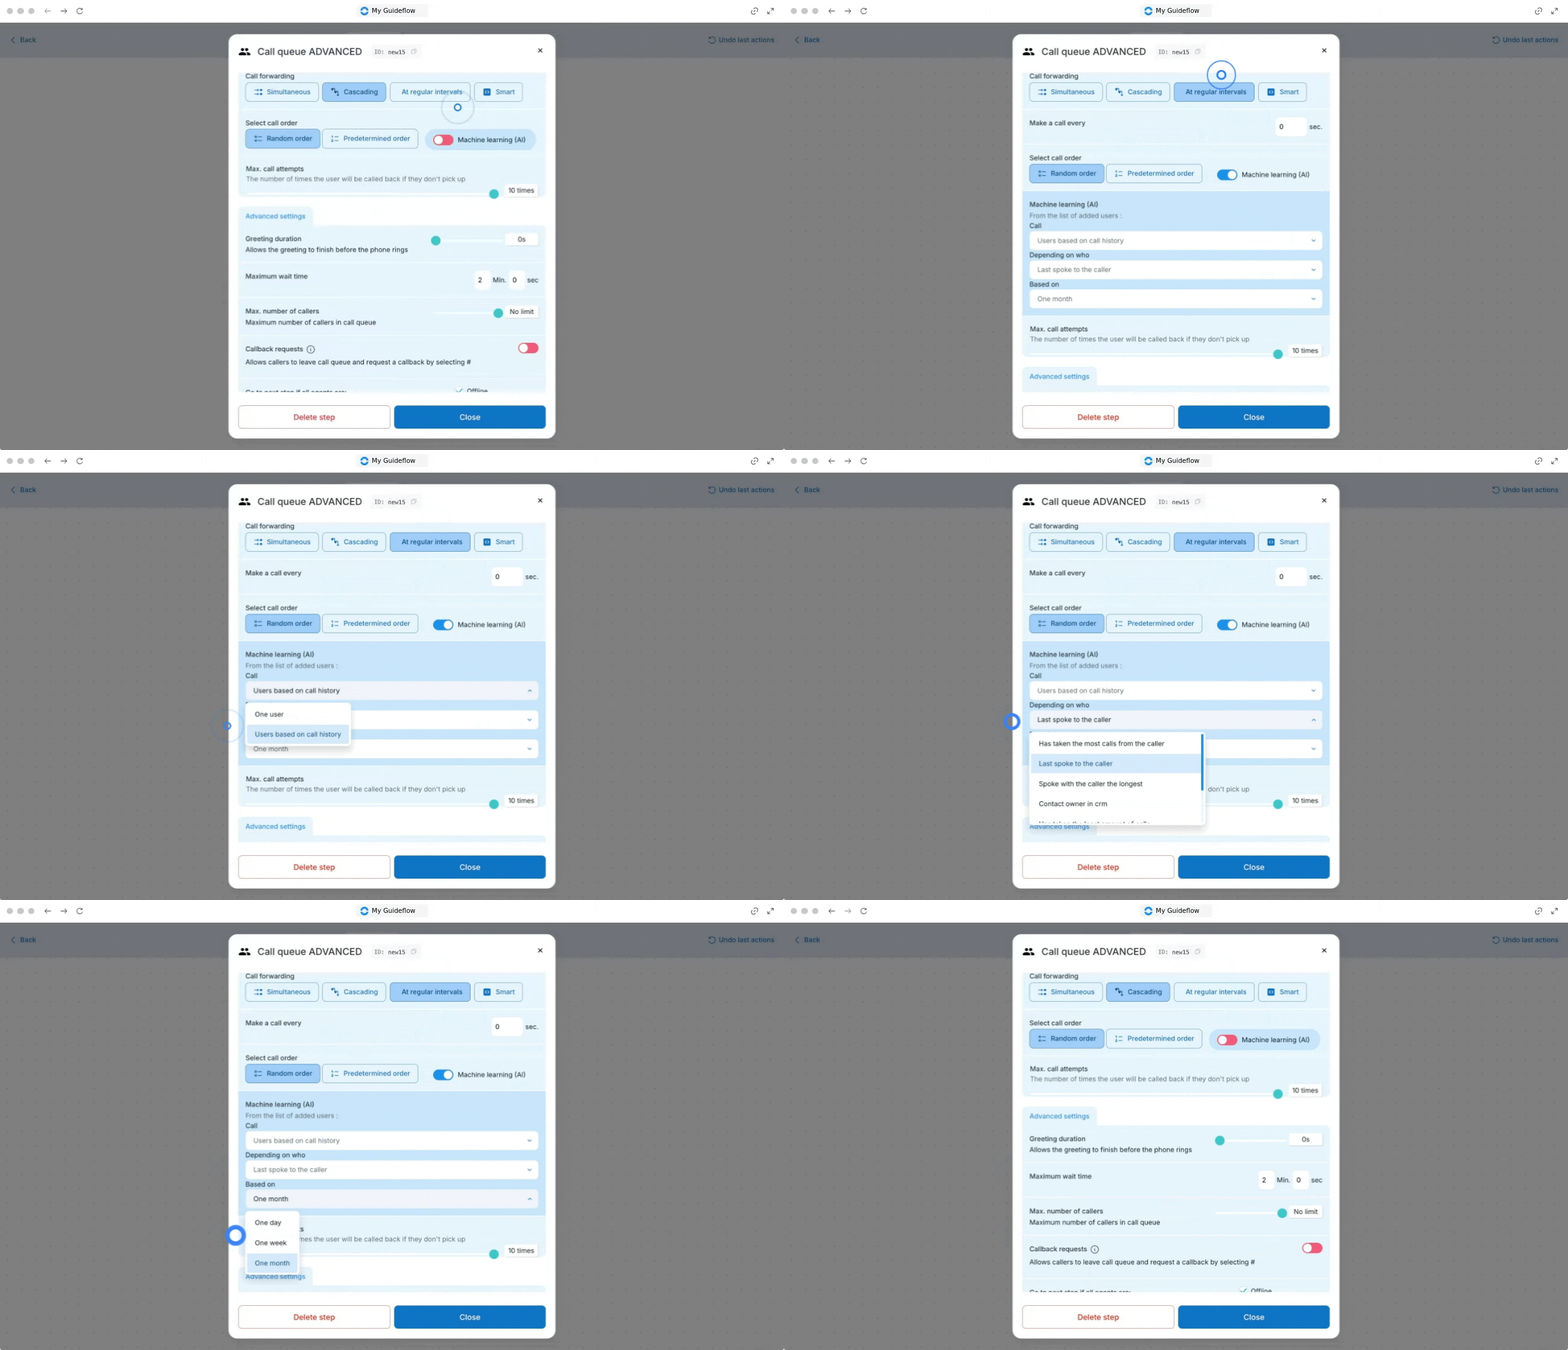
Machine learning (AI)
The Machine learning (AI) option allows Ringover to prioritize call routing based on previous interactions with the caller.
This option is available with:
Cascading
At regular intervals
When enabled, additional routing settings become available to define how calls should be distributed based on call history and interaction data.
Max. Call Attempts
Defines how many times the system retries users if nobody answers. (Example: If set to 3, Ringover will attempt the queue three times before moving to the next step.)

Advanced Settings
The advanced settings section provides additional controls for queue behavior, caller experience, and automatic routing conditions.
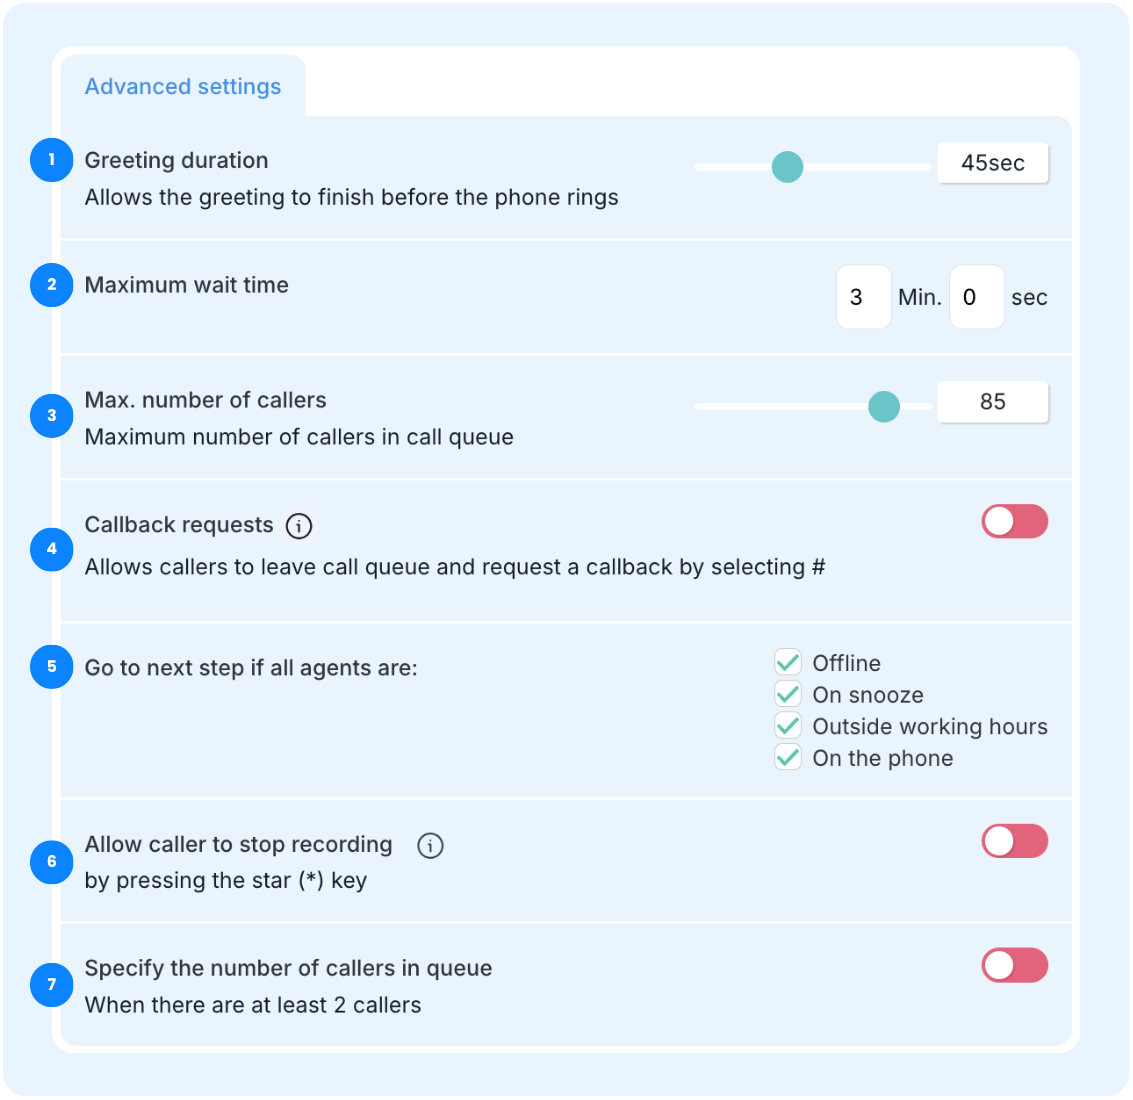
Greeting duration: Defines how long the greeting message plays before users begin ringing.
Maximum wait time: Defines how long callers can stay in the queue before the call exits the queue.
Max. number of callers: Defines the maximum number of callers allowed in queue simultaneously.
Callback requests: Allows callers to leave the queue and request a callback by pressing the # key.
Go to next step if all agents are: Automatically skips the queue and moves callers to the next IVR step if all agents match the selected statuses. This helps avoid unnecessary waiting time when no users are available.
Available statuses:
- Offline: The user is disconnected from Ringover.
- On Snooze: The user has manually activated Snooze mode, temporarily pausing incoming call notifications.
- Outside working hours: The user is outside configured business hours.
- On the phone: The user is already handling another call.
-
Allow caller to stop voicemail recording: Allows callers to end their voicemail message by pressing the star (
*) key. - Specify the number of callers in queue: Announces the caller’s queue position during the waiting period.
2. External phone Numbers
The External Phone Numbers step forwards incoming calls to telephone numbers outside the Ringover workspace. Settings External phone numbers support the same routing modes as Ringover users:
Simultaneous
Cascading
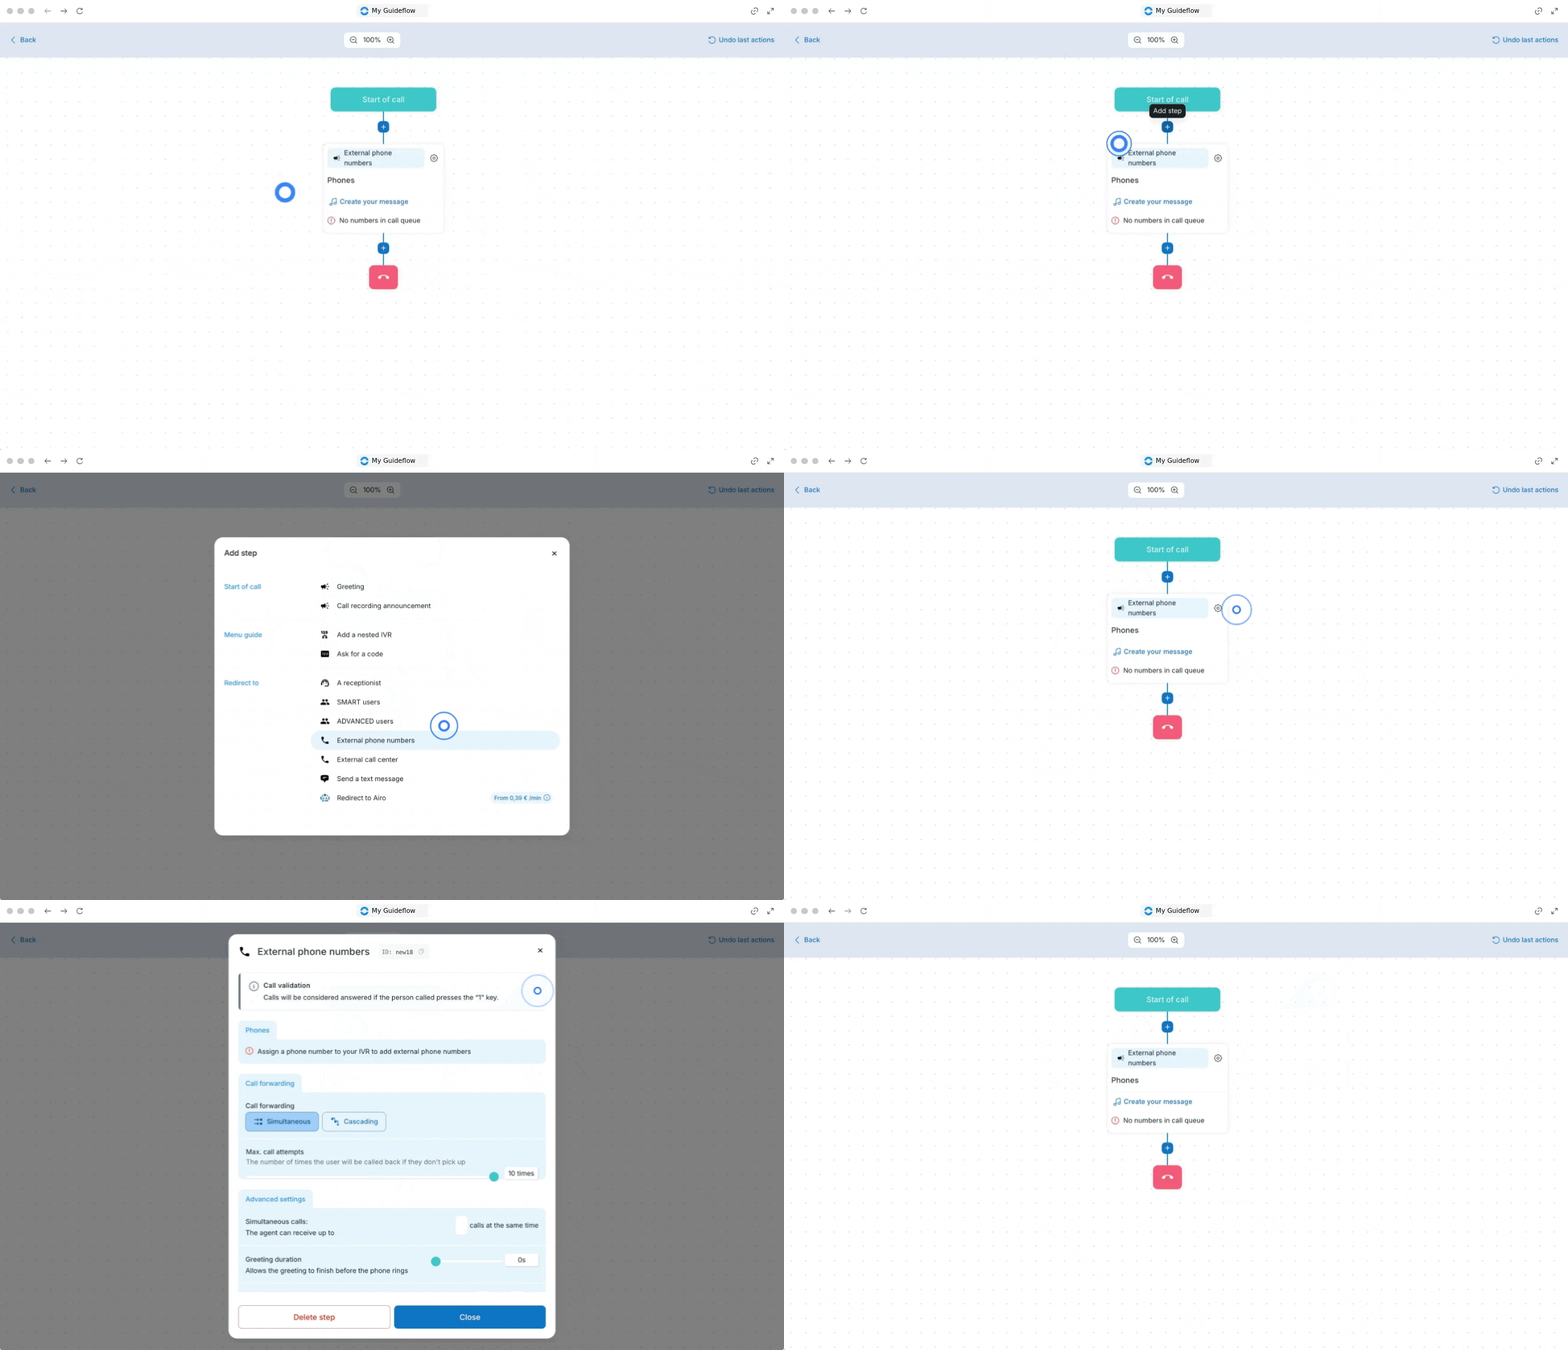
Call Validation
The call validation system ensures that forwarded calls are answered by a person instead of voicemail or automated systems.
Calls are considered answered only if the recipient presses the “1” key.

Add phone:
Administrators can add external phone numbers to receive calls.
If no number is configured, the step will show: “No numbers in call queue.”
3. External Call Center
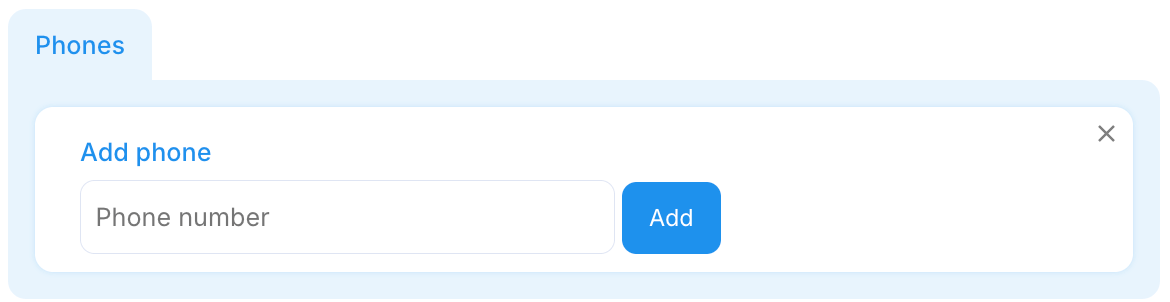
This step is used to transfer calls to an external call center configuration outside the Ringover user environment. The External Call Center step routes calls to an external call center or third-party provider. Calls forwarded through this step are billed at $0.03/min.
Configuration
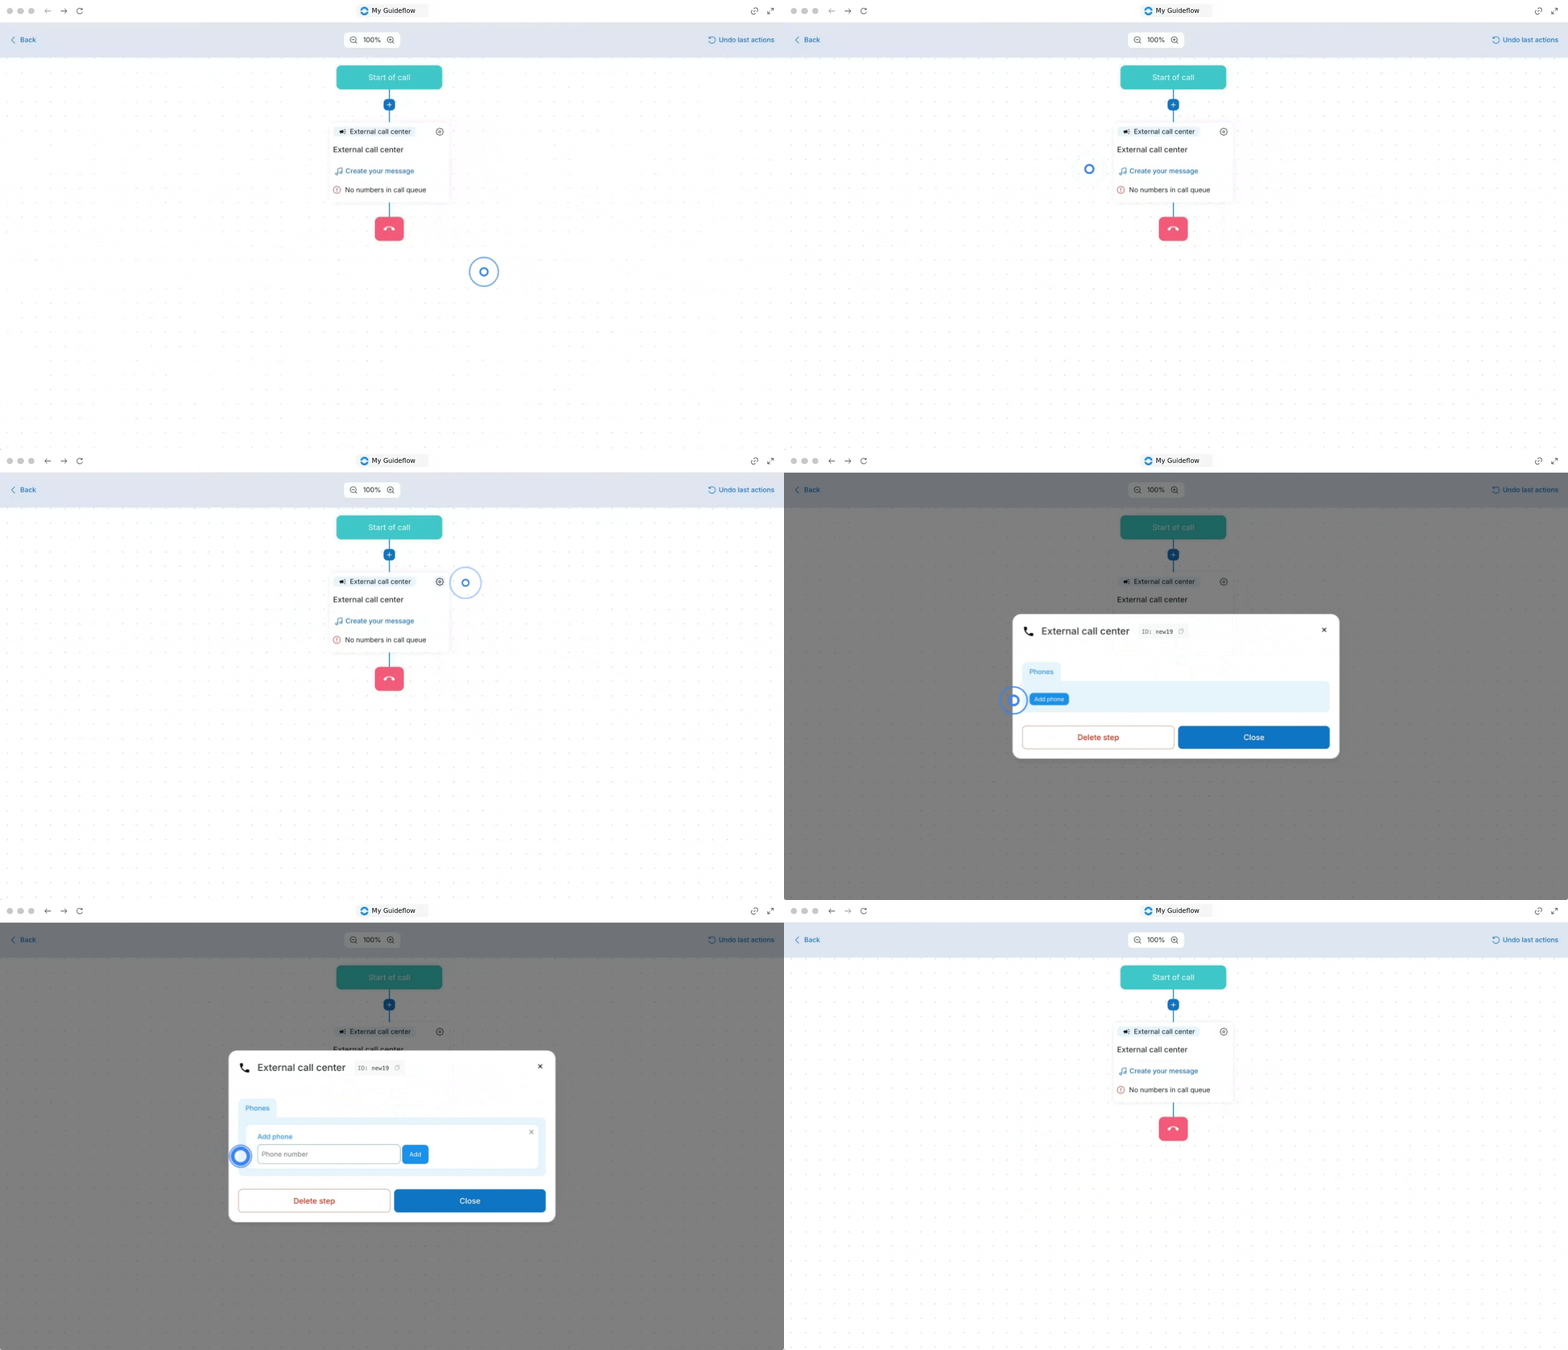
Add phone:
Administrators assign external numbers that will receive routed calls.
If no number is configured, the step displays: “No numbers in call queue.”
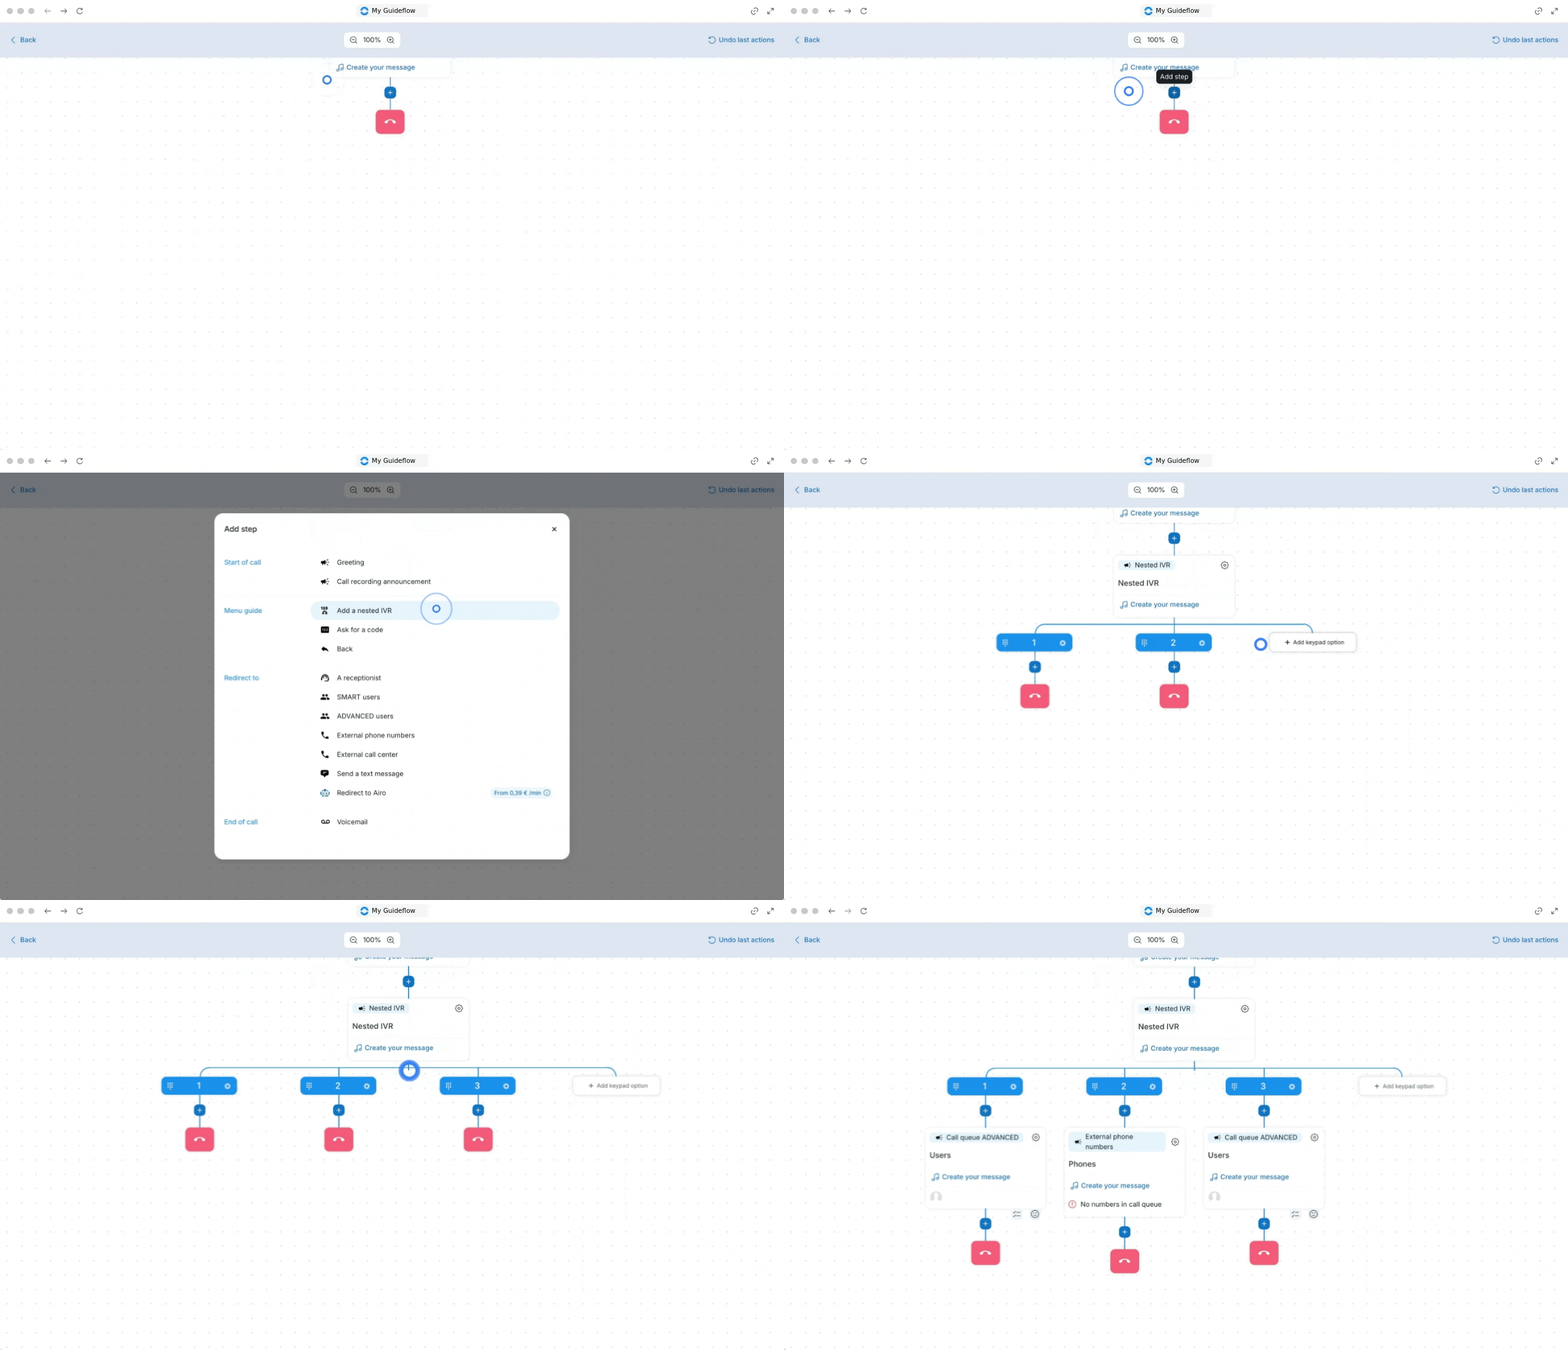
4. Nested IVR
A Nested IVR allows callers to navigate through multiple voice menu levels by pressing keypad options such as
1,2, or3.When a caller presses a configured digit, the call is redirected to another IVR menu or routing step.
This allows administrators to create structured call flows with multiple menu layers and routing paths.
5. Send a text message
The Send a Text Message step automatically sends an SMS message during the IVR flow.
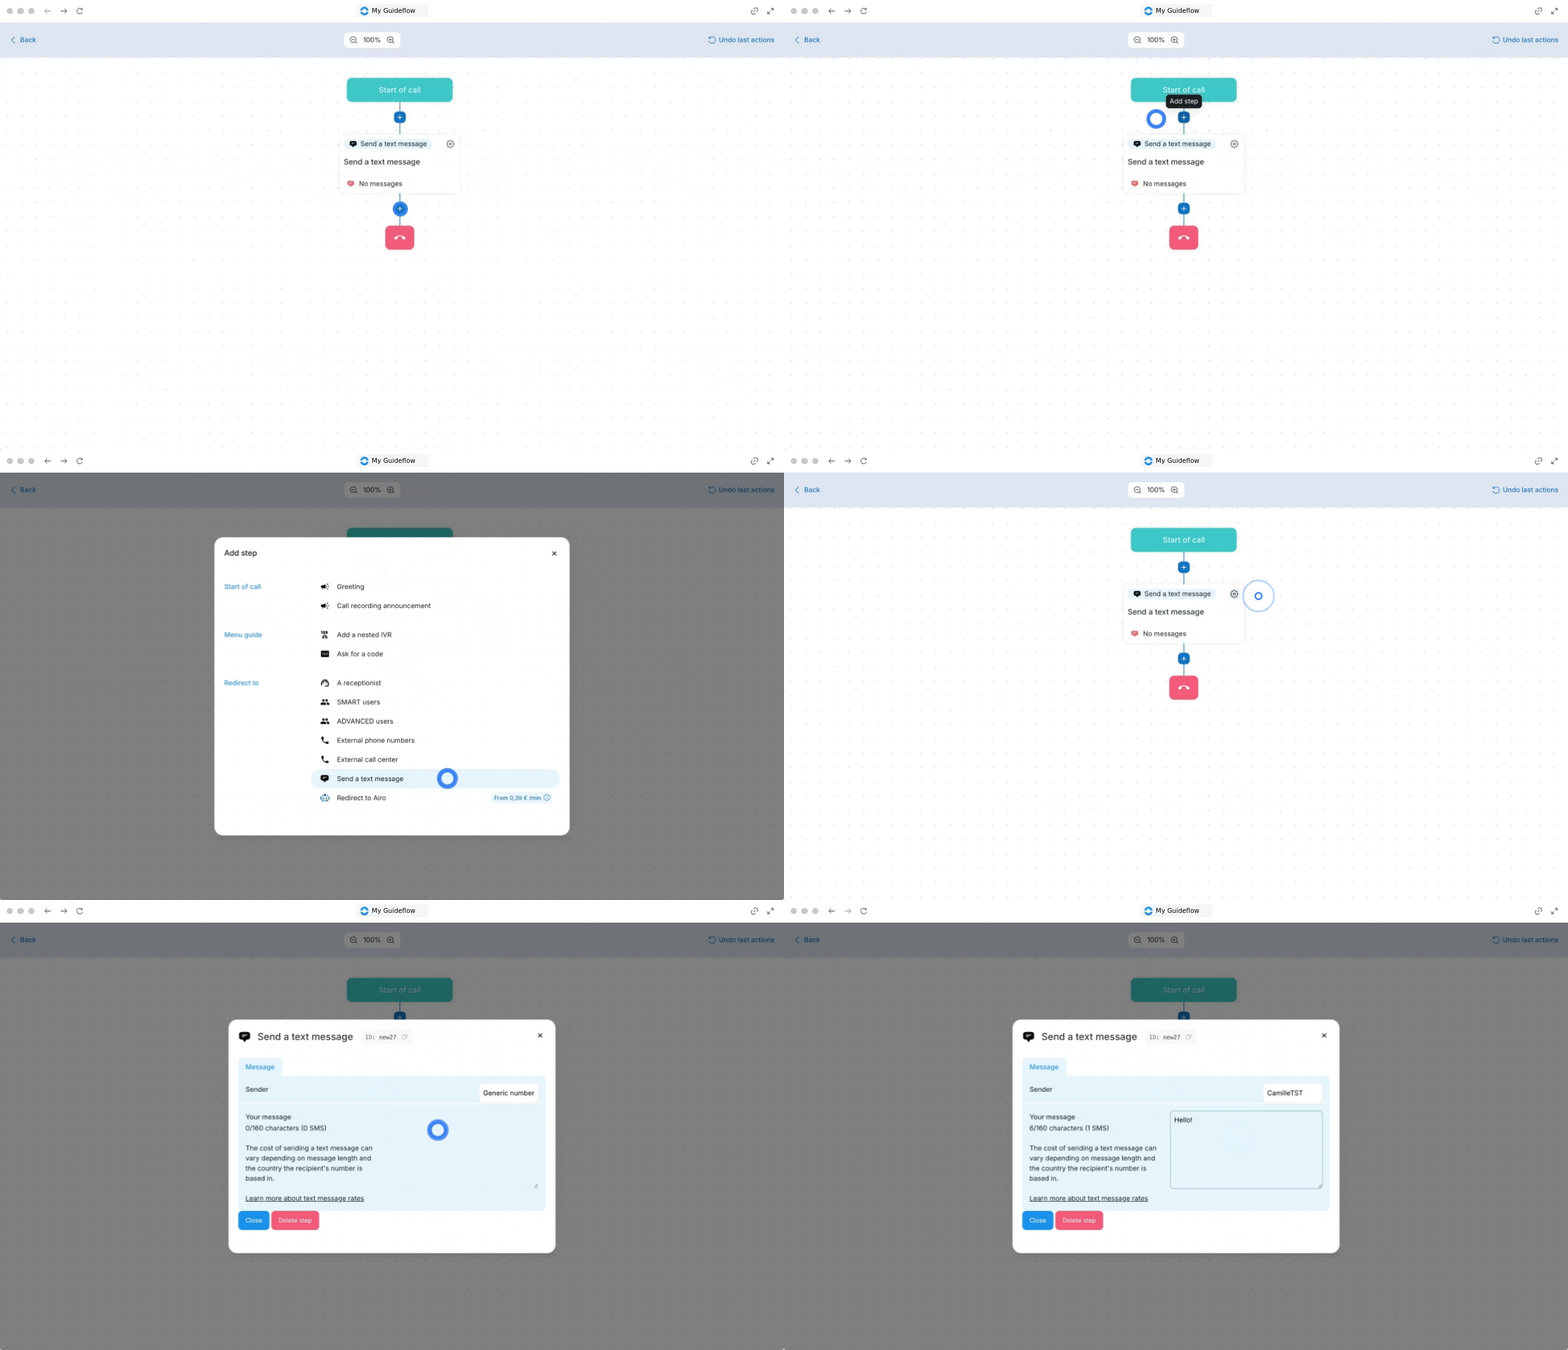
Message Settings
Sender: Defines which number sends the SMS (Generic number, Dedicated business number).
Your message: Defines the SMS content.
• Standard SMS messages are limited to 160 characters per SMS segment.
• Longer messages may generate multiple SMS charges.
• SMS costs are billed separately according to your pricing plan.
For more information about SMS pricing, character limits, and usage control, refer to the following article: 🔗 How to manage your SMS characters.
6. Airo AI Agent
The Airo AI Agent step routes callers to an AI-powered voice agent configured inside the AIRO Dashboard.
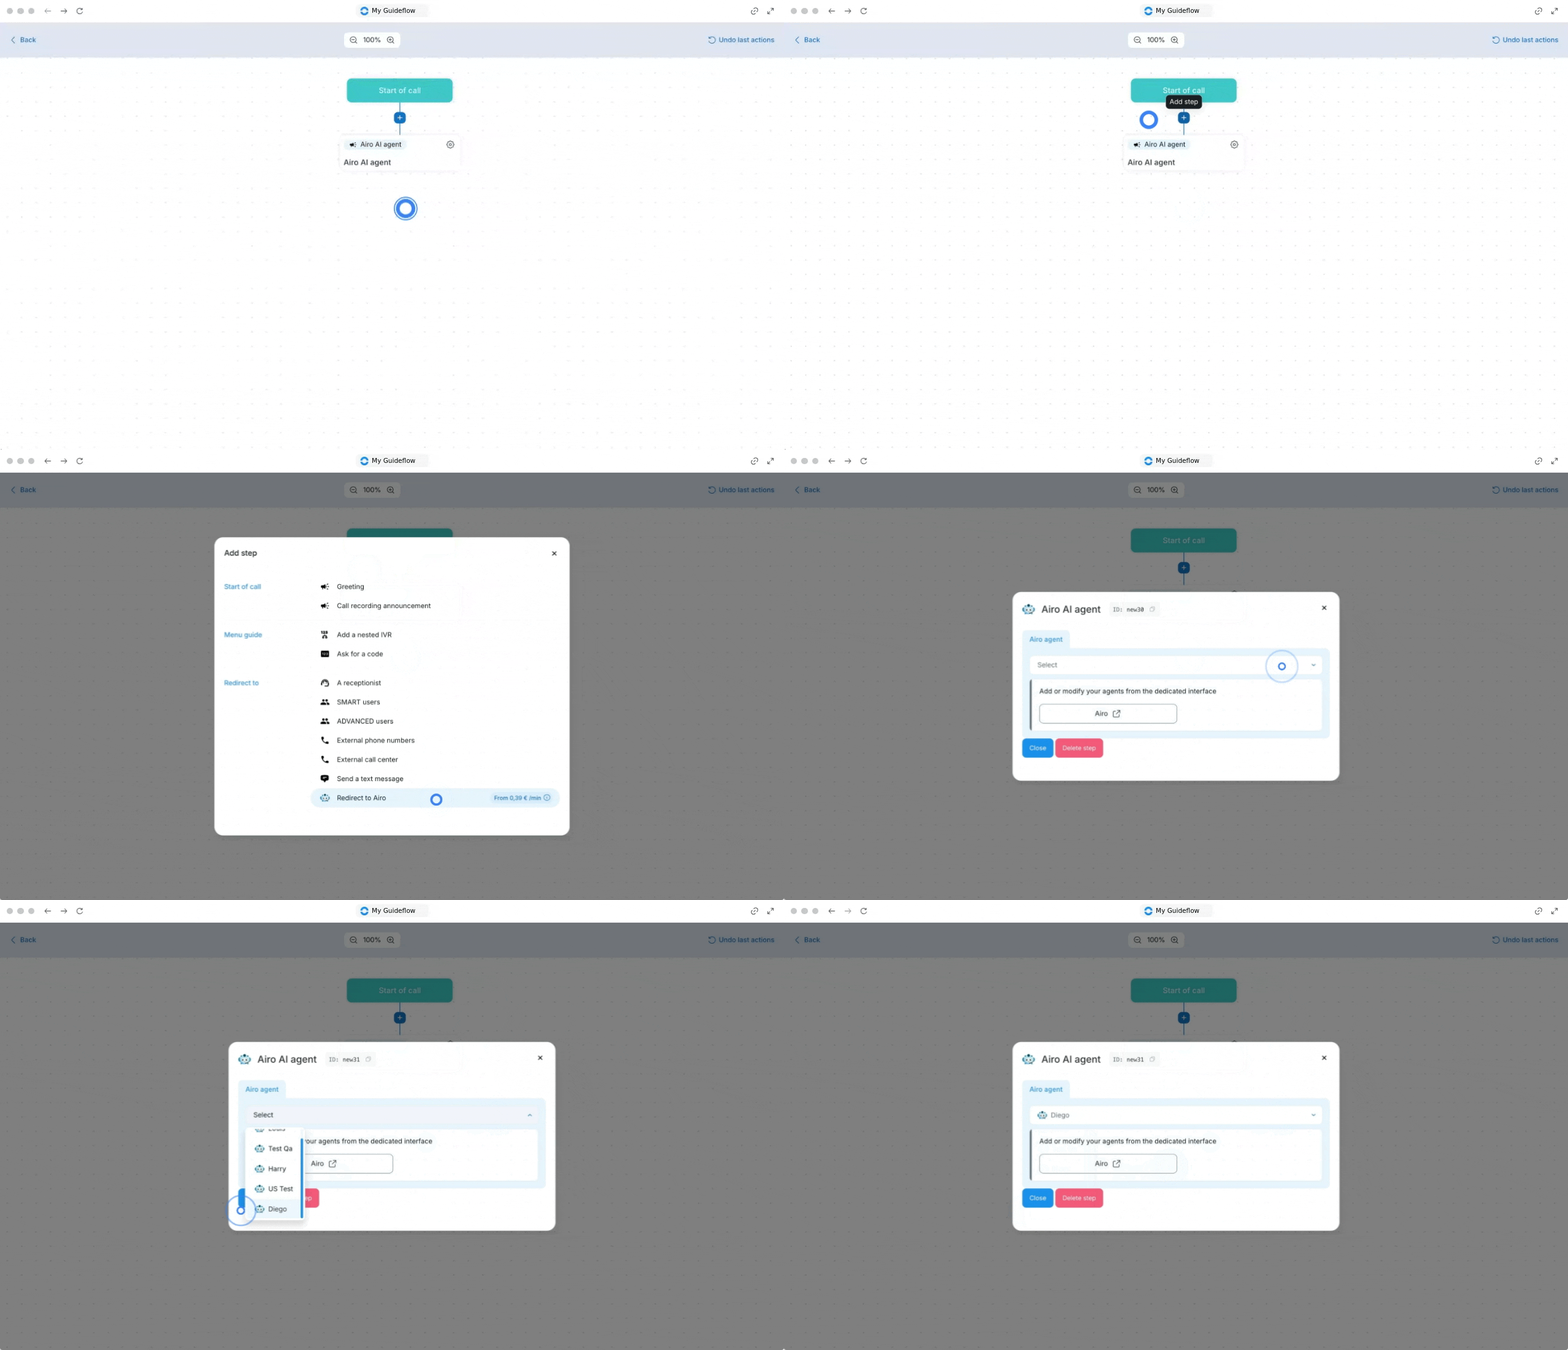
AIRO Agent Settings
Select your bot: Choose which AI agent should handle incoming calls.
-
AIRO Portal Shortcut: The “AIRO” button opens the dedicated AI management interface where administrators can:
Create an AI agent.
Edit an existing AI agent.
Add new resources.
See our related articles for additional configuration details:
- 🔗 How to set priority routing rules for your IVR
- 🔗 How to add a survey at the end of a call
- 🔗 How to create a call script
🎉 You now know how to configure and manage IVR steps and routing settings in Ringover!