Odoo is an open-source enterprise resource planning (ERP) system that integrates a wide range of applications to facilitate the management of various business functions such as sales, CRM, accounting, inventory, eCommerce, and more. It is known for its modularity, customization, and ease of use, adapting to the specific needs of different types and sizes of businesses.
The Ringover integration for Odoo empowers you to manage your calls and communications directly within Odoo's key modules (CRM, Contacts, Helpdesk, Project, HR), ensuring smoother interactions, improved productivity, and centralized data management.
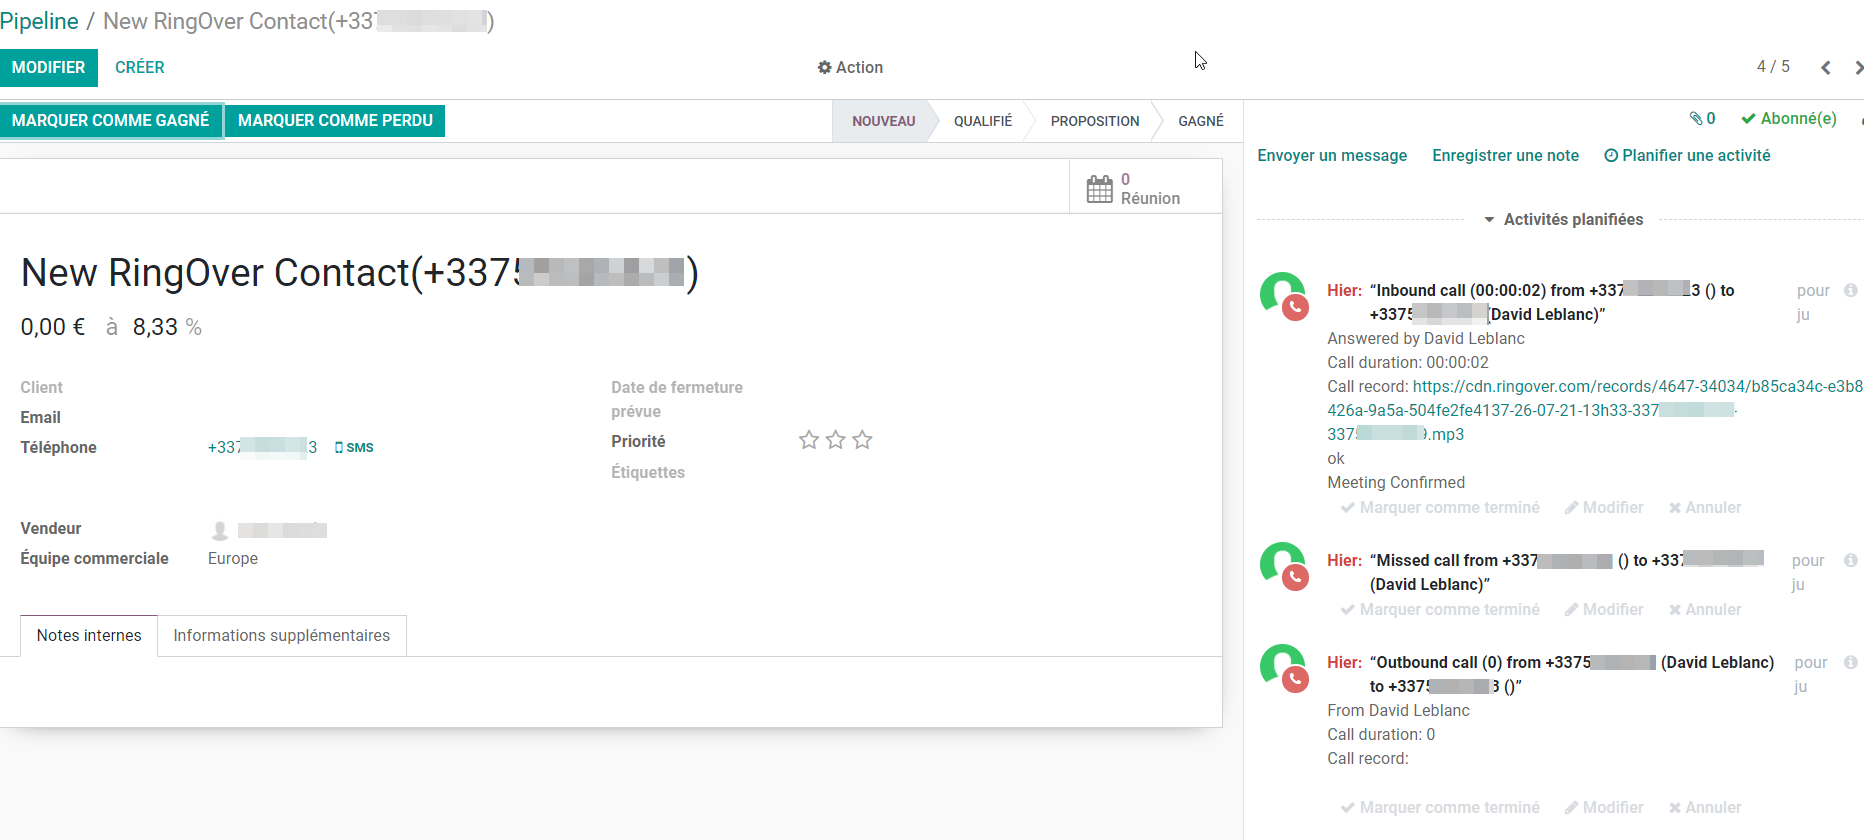
- Make and receive calls in Odoo via the Ringover dialer app or the Chrome dialer extension
- Log your Ringover communication activities in Notes or Tasks
- Log inbound and outbound calls
- Log SMS
- Log Whatsapp conversations
- Get the call recording and transcription link
- Sync your notes and tags
- Sync your contacts
- Get the AI call summary and next steps (when Empower is enabled)
- Display your Odoo CRM fields into the dialer
- Automatically create tickets for calls and SMS (Odoo Helpdesk)
- Automatically update stages with Ringover tags (Odoo Project)
Now, let's proceed with the tool integration 📳
Prerequisite:
- You must have a Ringover Business or Advanced account to benefit from this integration 💳
- The integration must be performed by a Ringover account administrator 👨💼
- The integration must be performed by an Odoo administrator 👨💼
Step 1: Generate an API key in Odoo
Go to your Odoo application to get started and retrieve your API key:
- Click on "Settings":
- Then click on "Activate the developer mode" (search for "developer" in the search bar for faster access).
- Click on "My Profil" in your menu.
- Go to the "Account Security" tab and click on "New API Key".
- Name it "Ringover" and click on "Generate Key".
- Copy this key and paste it into the API field in the Odoo activation section of your Ringover dashboard
Step 2: Configuration in Ringover
💻 Go to your Dashboard> Store> Integrations and click on "Odoo".
How to find your database name in Odoo
To complete the integration, you need the exact name of your database in Odoo. Follow these steps to find it:
- Click on your profile picture or avatar in your Odoo account
- Select "My databases"
- Copy the exact name of the database you want to activate
- Do not copy numbers or extra text, only the name as it appears in the "Databases" column
💡 Important:
- The database name is not the URL or the company name. It is the exact identifier that appears in the "My databases" list
- Enter your Odoo url and login info
Please make sure you do not enter "https://" in the Odoo url field. It must start with your Odoo subdomain name (eg. xyz.odoo.com)
- The integration will be activated by default for all agents with identical email addresses on Ringover and Odoo
- You can add or deactivate users by clicking on “Manage users”:
- You can customize the integration so that it suits yours needs:
💡 For more information on the configuration, check out our dedicated section "How to configure your tool?"
Step 3: Installation of the integrated dialer
You can integrate the Ringover dialer into your Odoo interface in two possible ways. How to install the Ringover Dialer Chrome Extension in Odoo?
Both are compatible with Odoo Cloud, Odoo on Premise and Odoo SH from version 14 up to the latest version 18.
Option 1. Install the Ringover VoIP Phone Extension for Odoo (Chrome browser)
Note: the extension provides the same integrated dialing experience and same features as the app, and is free of charge.
Option 2. Install the Ringover App from Odoo's marketplace
Note: due to custom code being included, the use of the app may incur some charges from Odoo. Please liaise with your Odoo representative for more information.
There you have it, the integration is complete. You can now manage your communication with the dialer directly in Odoo and retrieve all your communication activities in one place! 🎉