Step 1: Creating an application
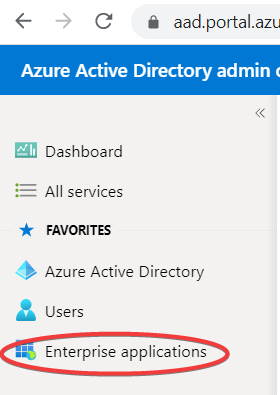
- 💻 Sign into Azure Active Directory admin center and then click on "Business applications” in the menu on the left-hand side:
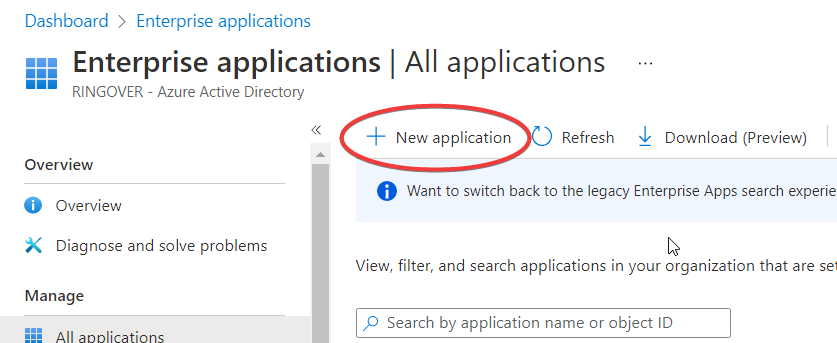
- Next, click on "New application":
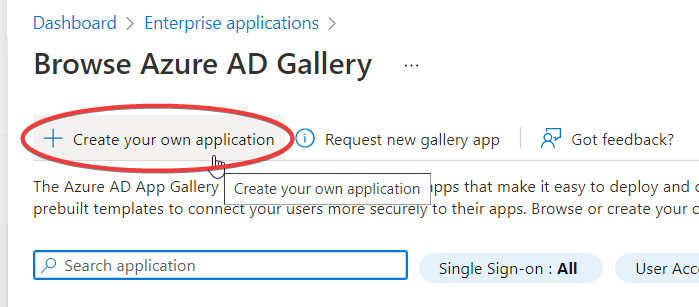
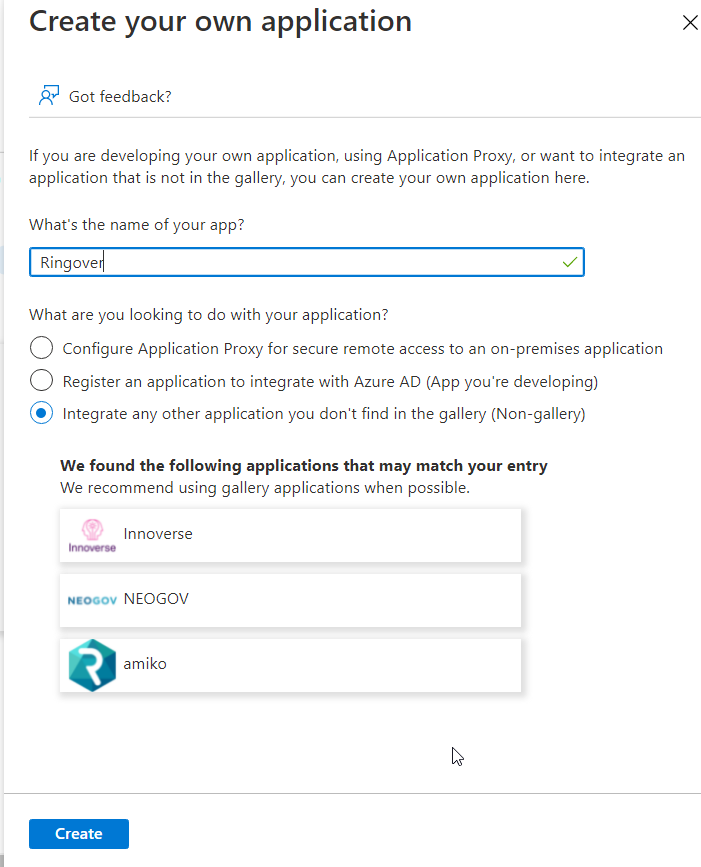
- Then, click "Create your own application":
- Name it "Ringover”, select "Integrate any other application" and then click on "Create":
Step 2: Configuring the SSO
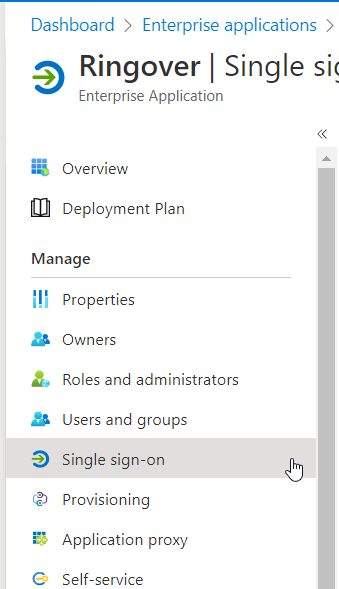
- Click on "Single-use authentication"
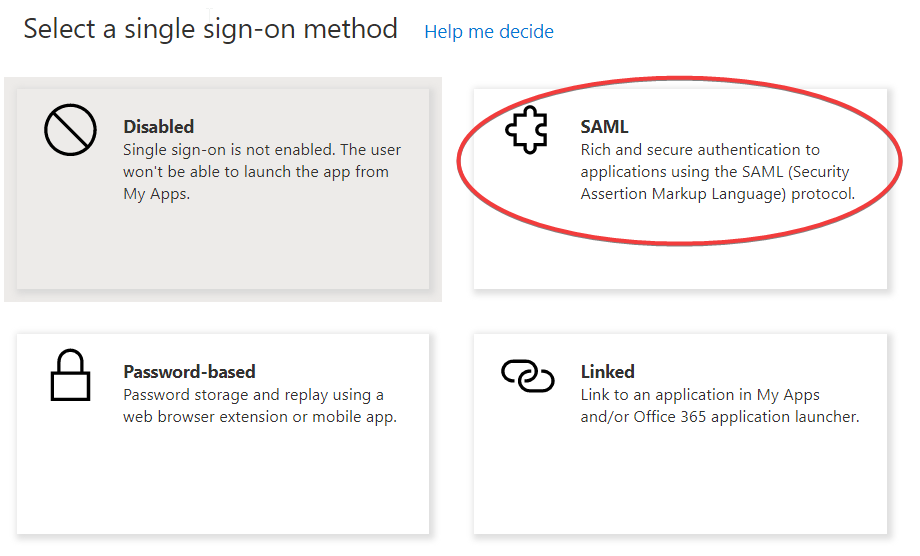
- Then, click "SAML":
- Next, click on "Upload the metadata file":
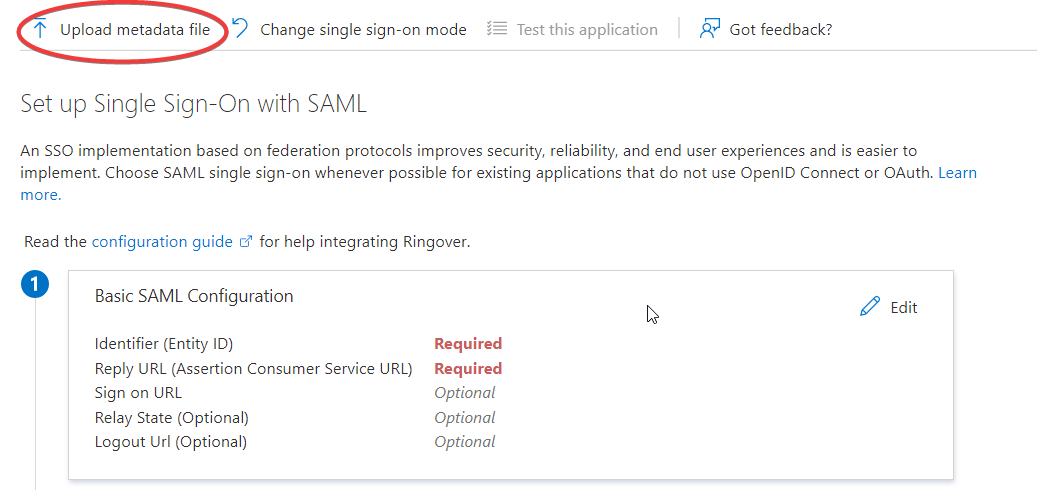
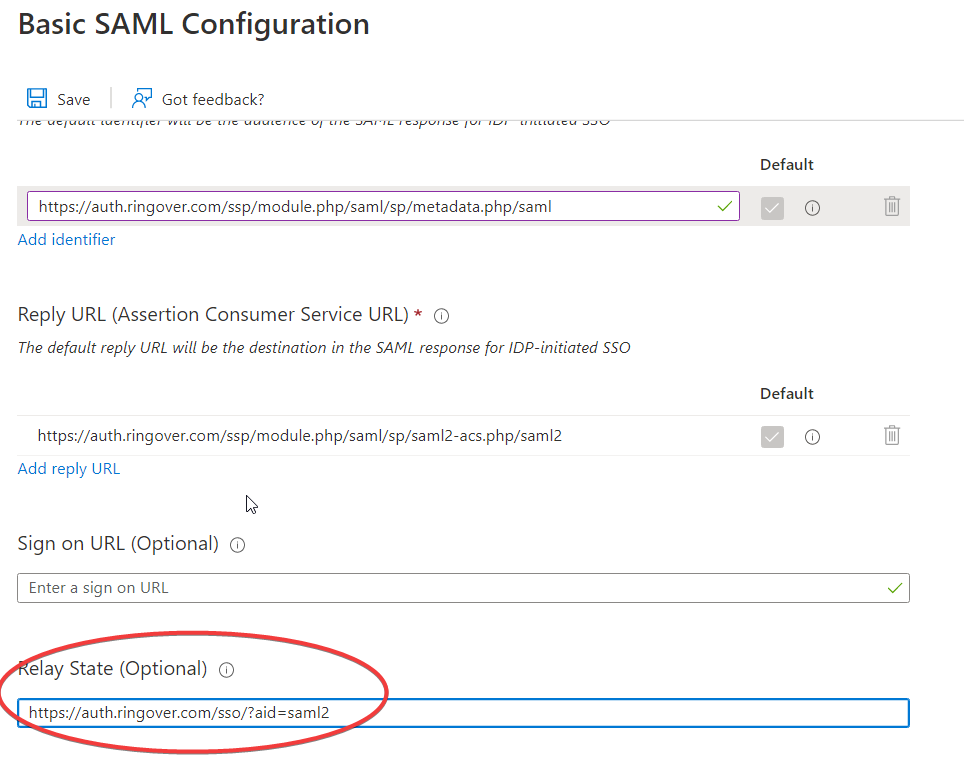
- Once the file has been imported, the fields will be pre-completed. You still need to add this URL https://auth.ringover.com/sso/?aid=saml2 into "Transfer status":
- Then, click on "Save” at the top of the page.
- Download the metadata federation XML file and e-mail it to us at support@ringover.com.

- Once our engineers have integrated it, the secure connection between your Azure environment and Ringover will be established.
Step 3: Adding users
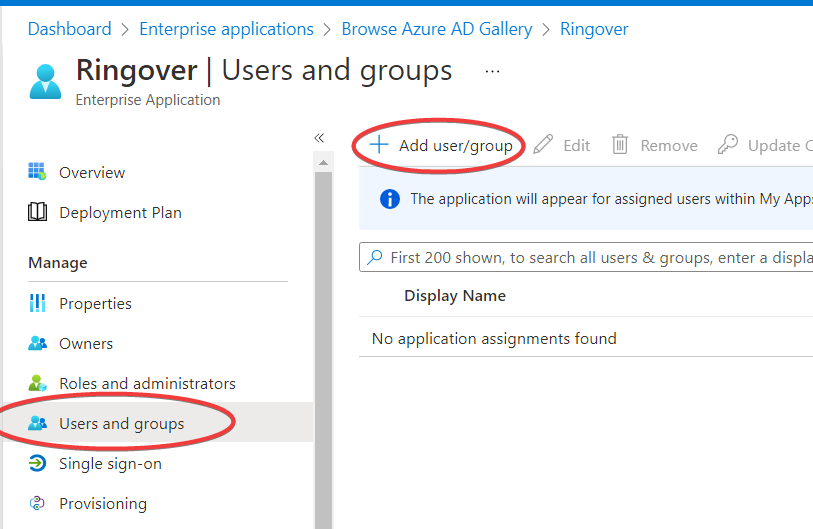
- Click on "Users and groups”, then "Add a user/group":
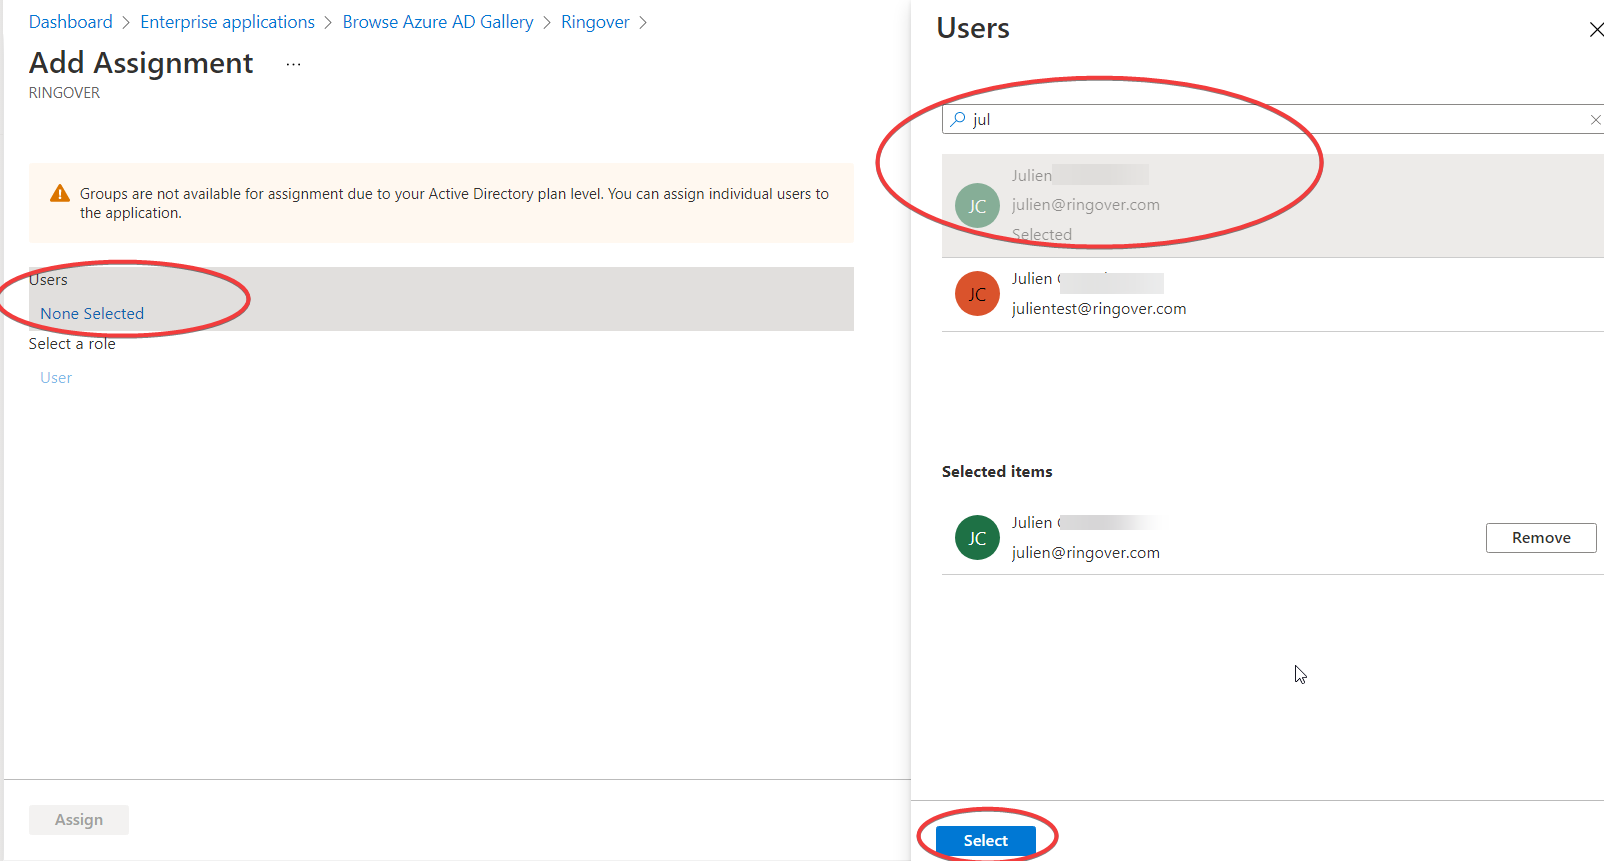
- Select the users that you want to add:
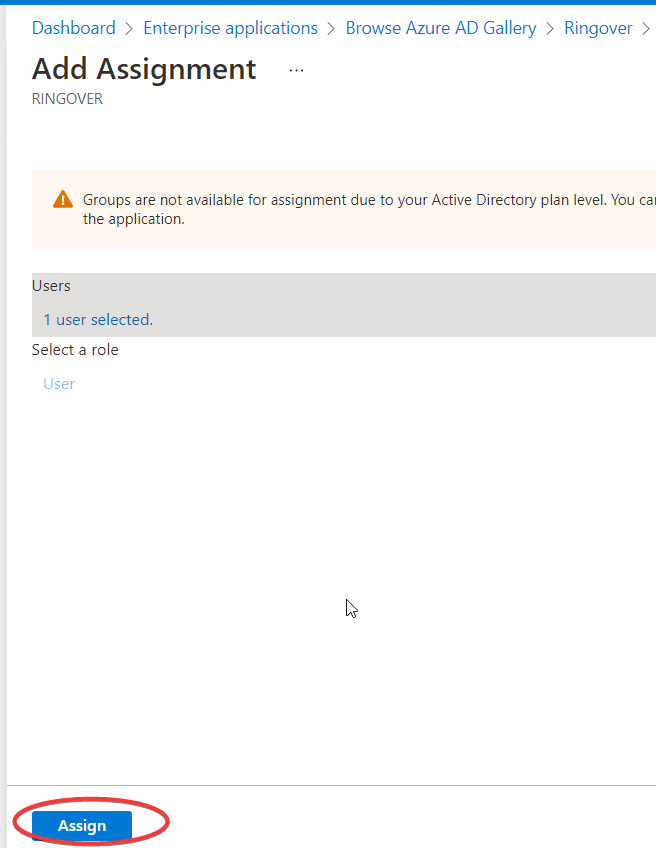
- Then, click "Assign":
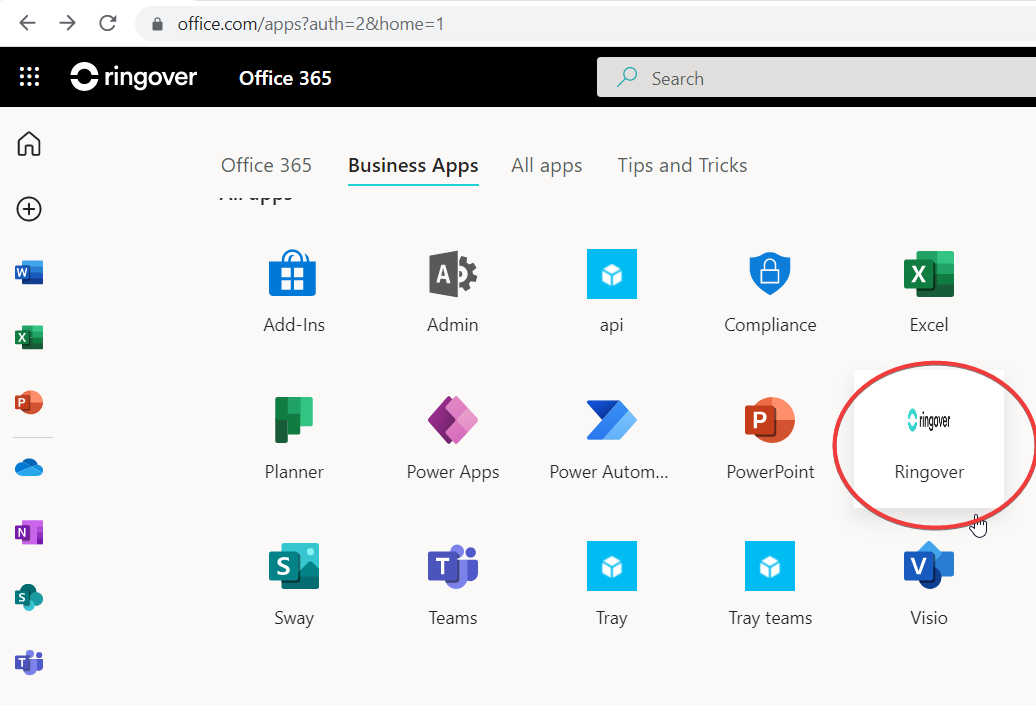
Your users will now be able to open the Ringover application in just one click from their Azure portal, without having to enter their Ringover login details! 🎉