Salesforce is a company specialized in customer relationship management (CRM) software for businesses. Their cloud platform offers solutions for sales, customer service, marketing, and analytics. The platform is used across various industries to optimize business processes and strengthen customer relationships.
The integration of Ringover into Salesforce CRM allows you to:
- Sync your Salesforce contacts with Ringover
- Make/receive calls directly from the Salesforce interface
- Have a history of all calls and SMS (WhatsApp included) in your client profiles
- Listen to recorded conversations (you need to activate this option in your Ringover account beforehand)
- Listen to voicemails left by your clients
- Sync your call notes/comments
- Sync your call tags
- Access Empower transcription summaries
- Map custom fields in your Ringover Dialer
Prerequisites
- You need to have a Ringover Business or Advanced account to benefit from this integration 💳
- The integration must be performed by an administrative or technical account in Ringover 👨💼
- The integration needs to be installed by a Salesforce administrator account.
Note that Ringover integration with Salesforce is compatible with:
- Service Cloud
- Sales Cloud
- Experience Cloud
Note that Ringover integration with Salesforce is not compatible with:
- Salesforce Developer Edition
Step 1: Linking your Ringover and Salesforce accounts
To link your Salesforce account to your Ringover account connect to Dashboard>Store>Integration
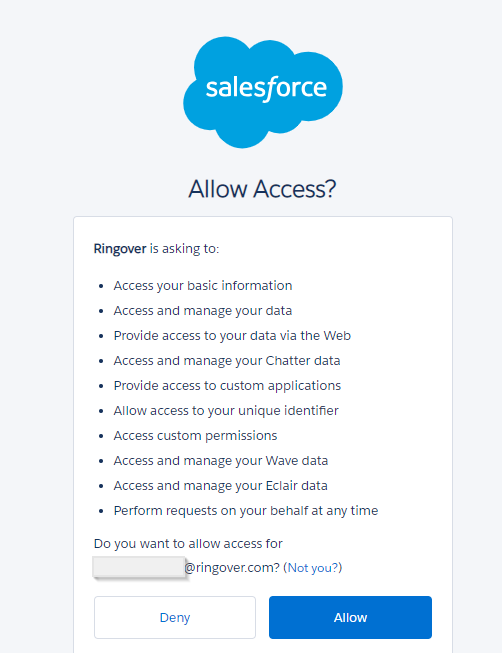
Click on "Salesforce",
Then click on "Allow"
Step 2: Set up your Salesforce integration
Configure the settings of the integration to fit your needs, in the same place, click on "Salesfoce":
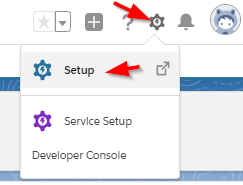
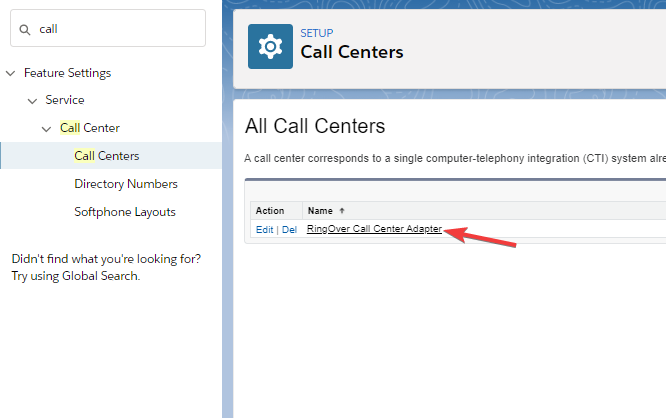
Step 3: Configuring the “call center” in Salesforce
Open the Setup menu in Salesforce
Then open the sub-menu “Call center”
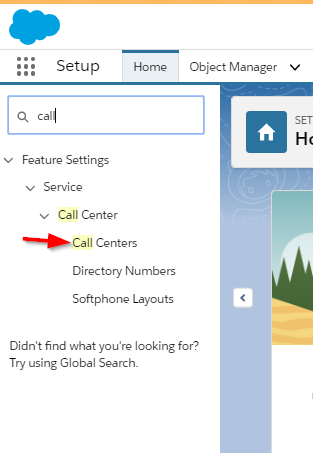
Click on “Ringover Call Center CTI Adapter”
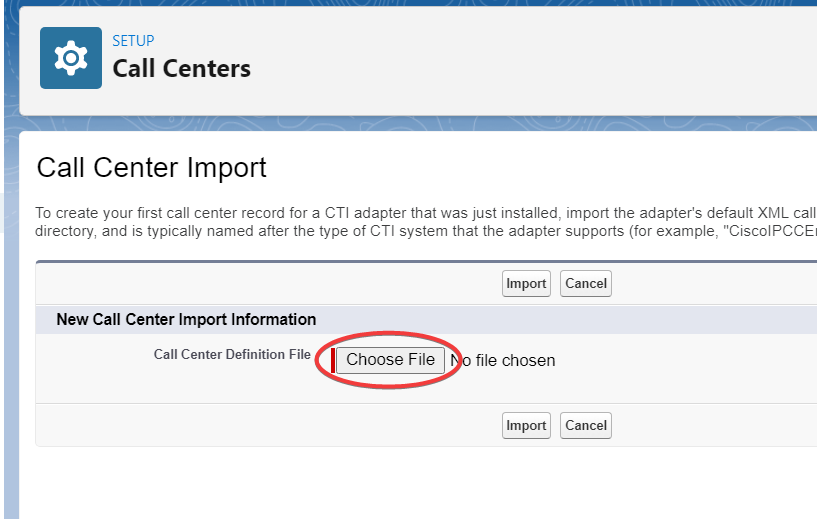
Click on Import :

- Click on "Choose File":
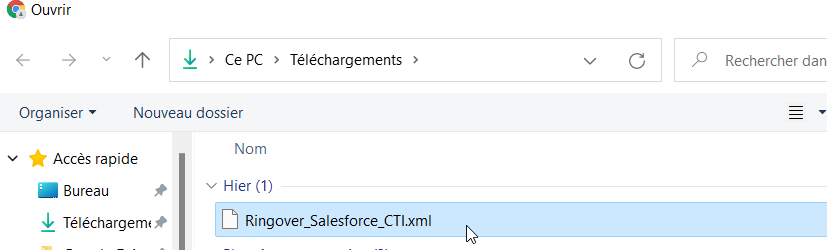
Select the previously downloaded XML file:
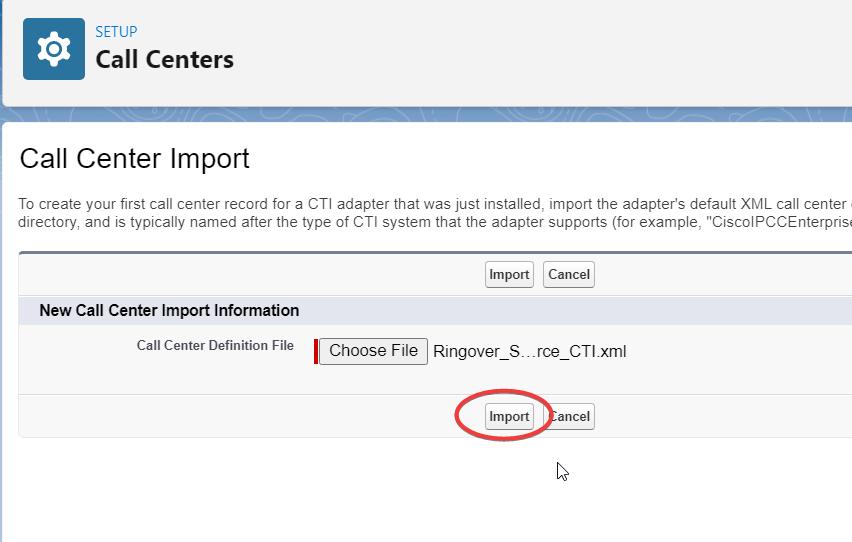
Then click on Import:
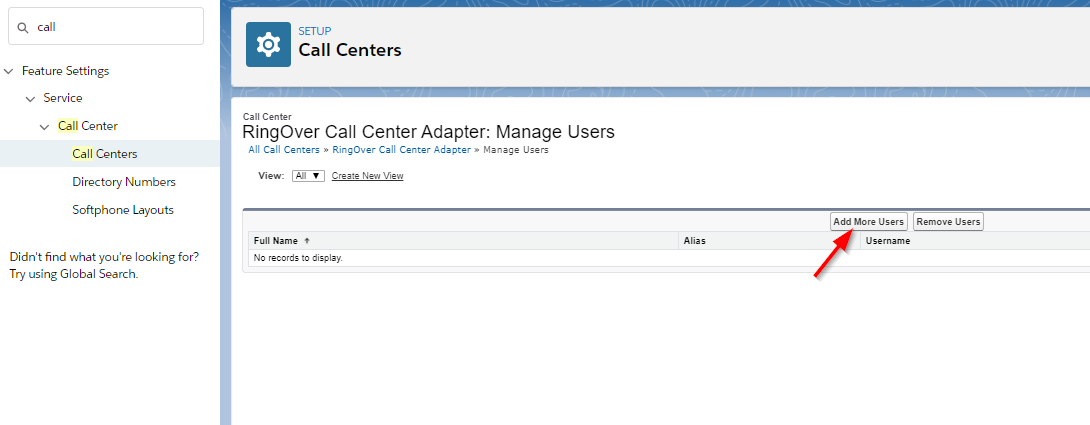
Click next on “Manage call center users”
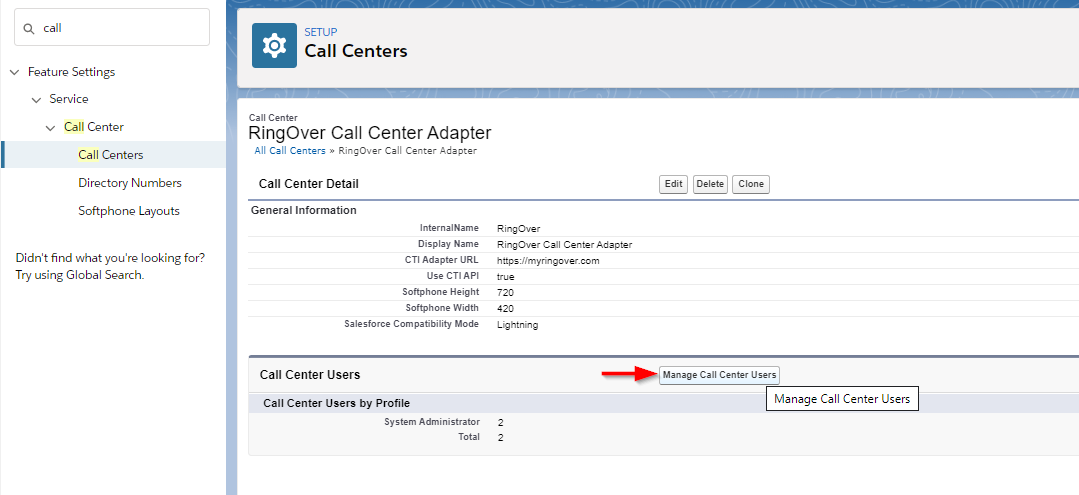
Then click on “Add more users”
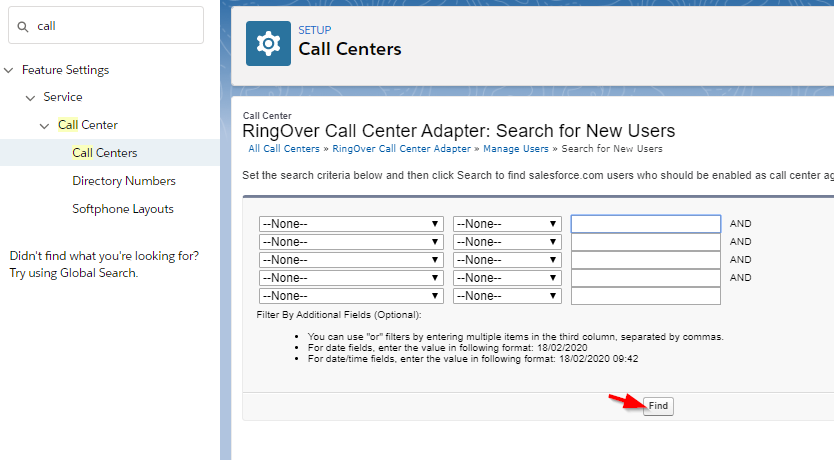
Click on “Find”
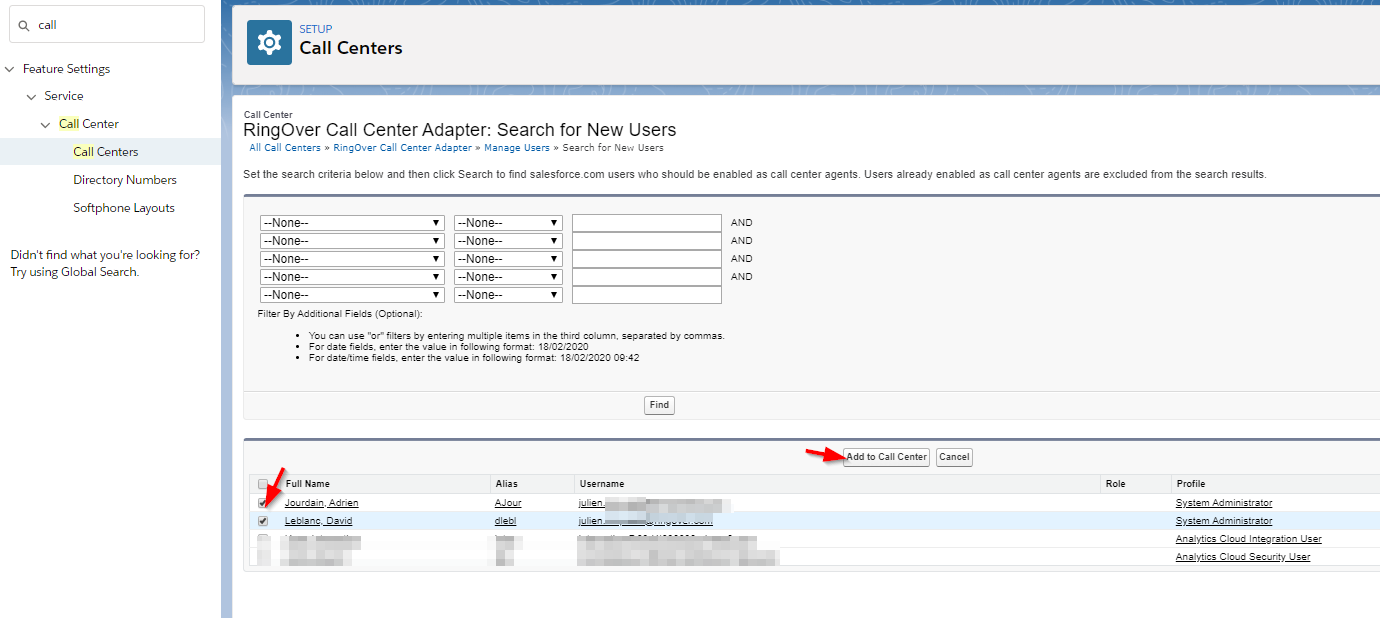
Select the users and click on "Add to Call center"
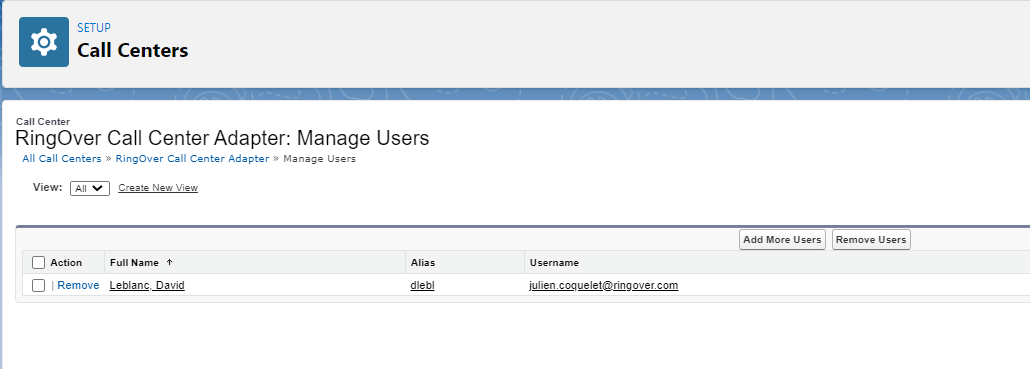
The users added here can now use the RingOver application
Step 4: Adding the Ringover app to the toolbar
Still in the configuration menu, go to “Applications management”
Select the application to which you wish to add Ringover; here in our example we’ve chosen “Sales” (be sure to choose a “Lightning” application) and click “Modify”
Click on “Utility Items (Desktop Only)”
Then “Add Utility Item”
Select “Open CTI Software”
Change the name by “Ringover” and click “Save”
That’s it, the integration is complete! Ringover will now appear in your toolbar 🎉
Please note that some sections are no longer up to date and will soon receive an upgrade.