Sellsy Onboarding:
Topics covered:
- Prerequisites
- About.
- Getting started with the onboarding process.
Prerequisites: A CRM account should be created.
About:
This documentation includes the detailed onboarding process for Sellsy.
Getting started with the onboarding process:
The onboarding process differs for manager/sales agent, and Super admin/ admins
For the manager / sales agent:
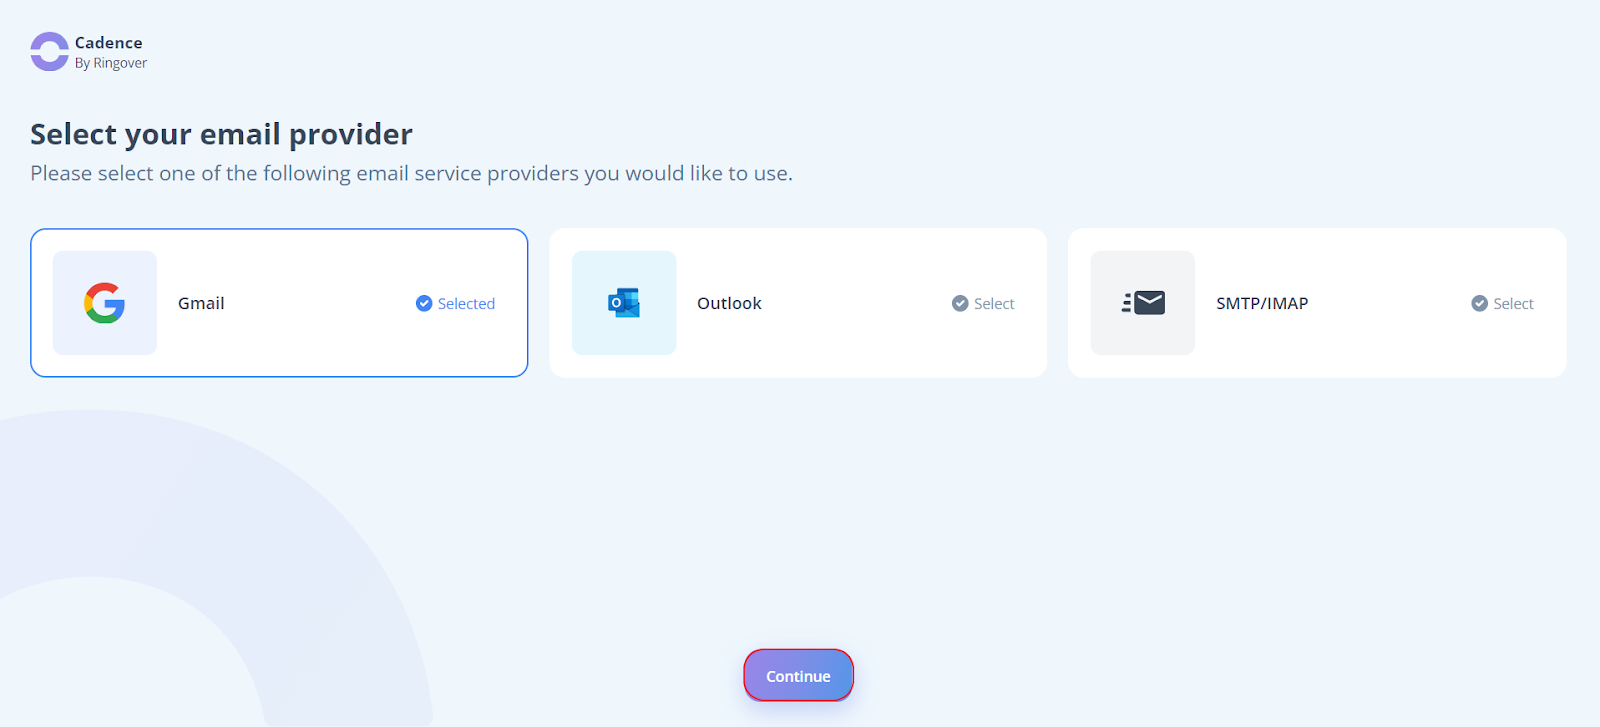
Step 1. Log in to your Cadence account and select your email provider. Click Continue.
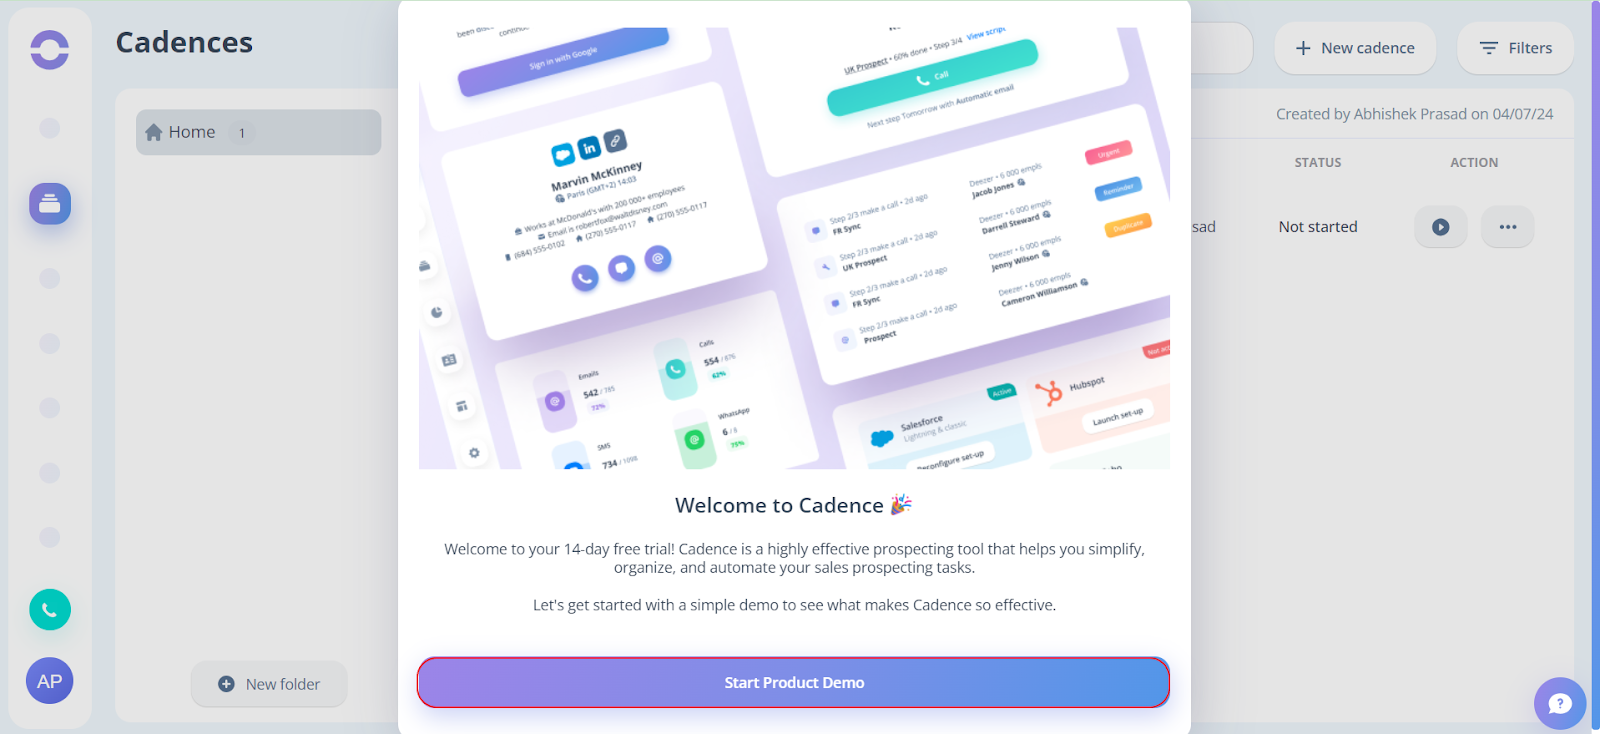
Step 2. After that, you will be directed to the product tour page. Click on Start Product Demo.
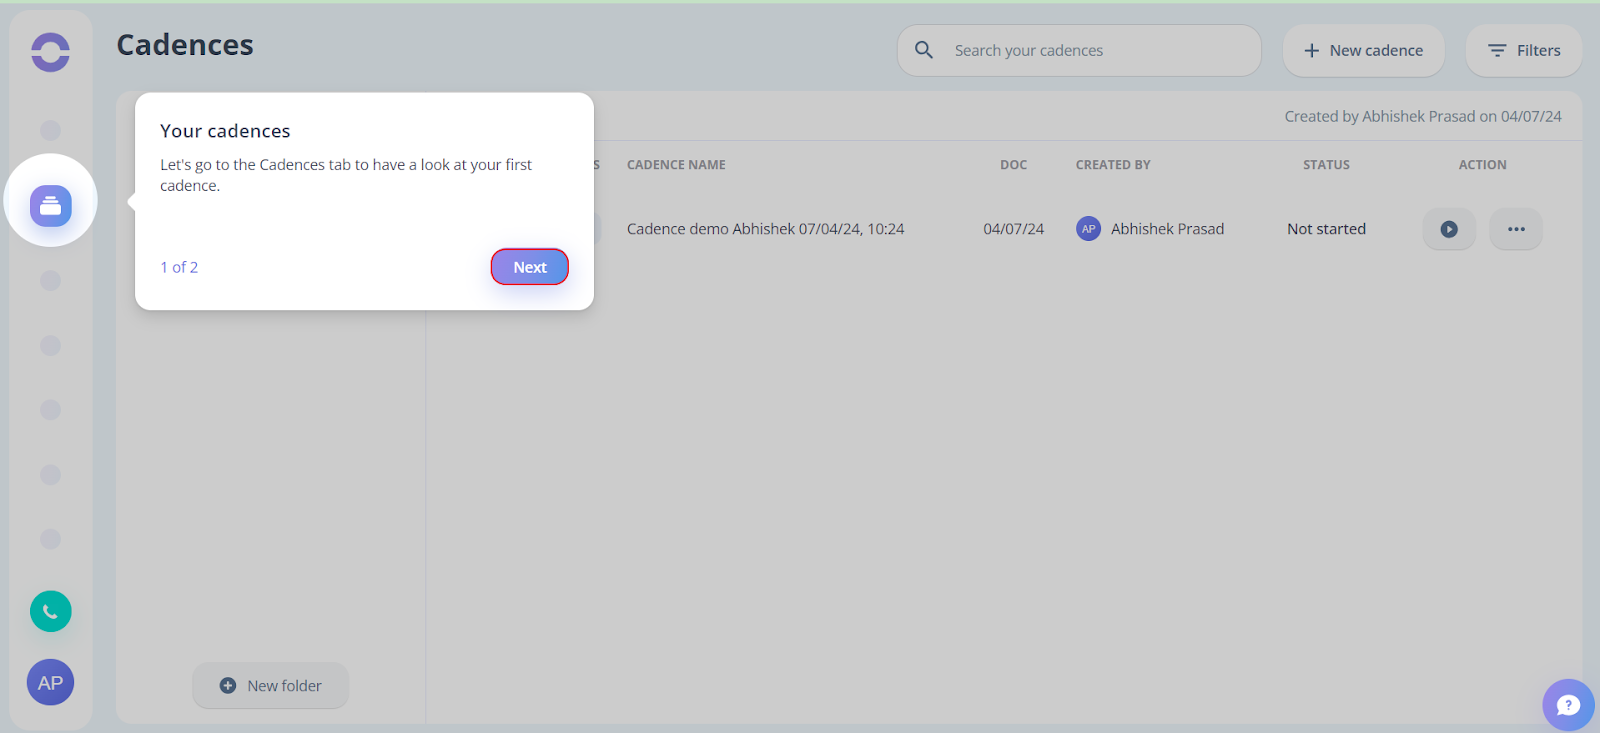
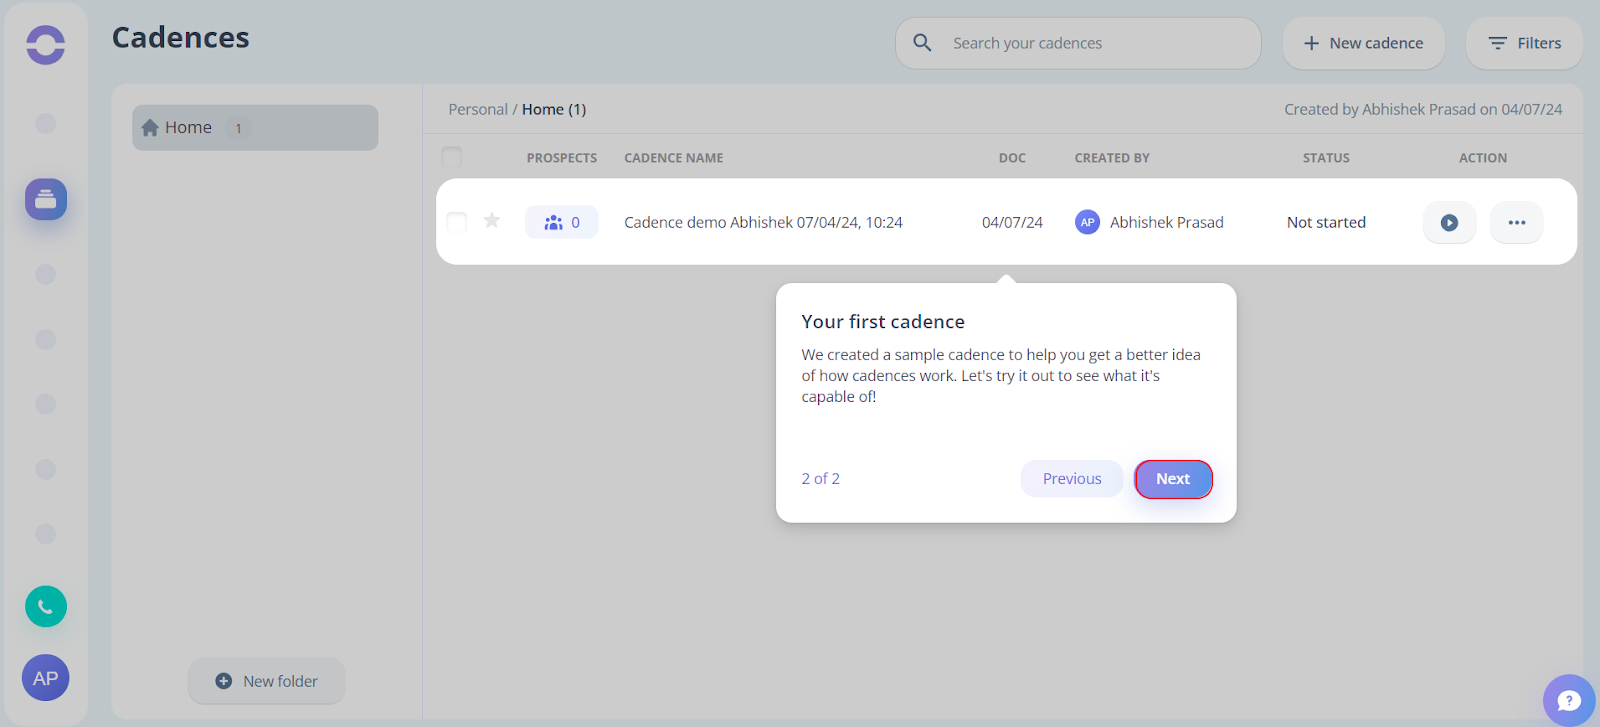
Step 3. To have a look at your first cadence, click on Next.
Step 4. Now a sample cadence will appear on your screen. To get a better idea of how cadences work, click on Next.
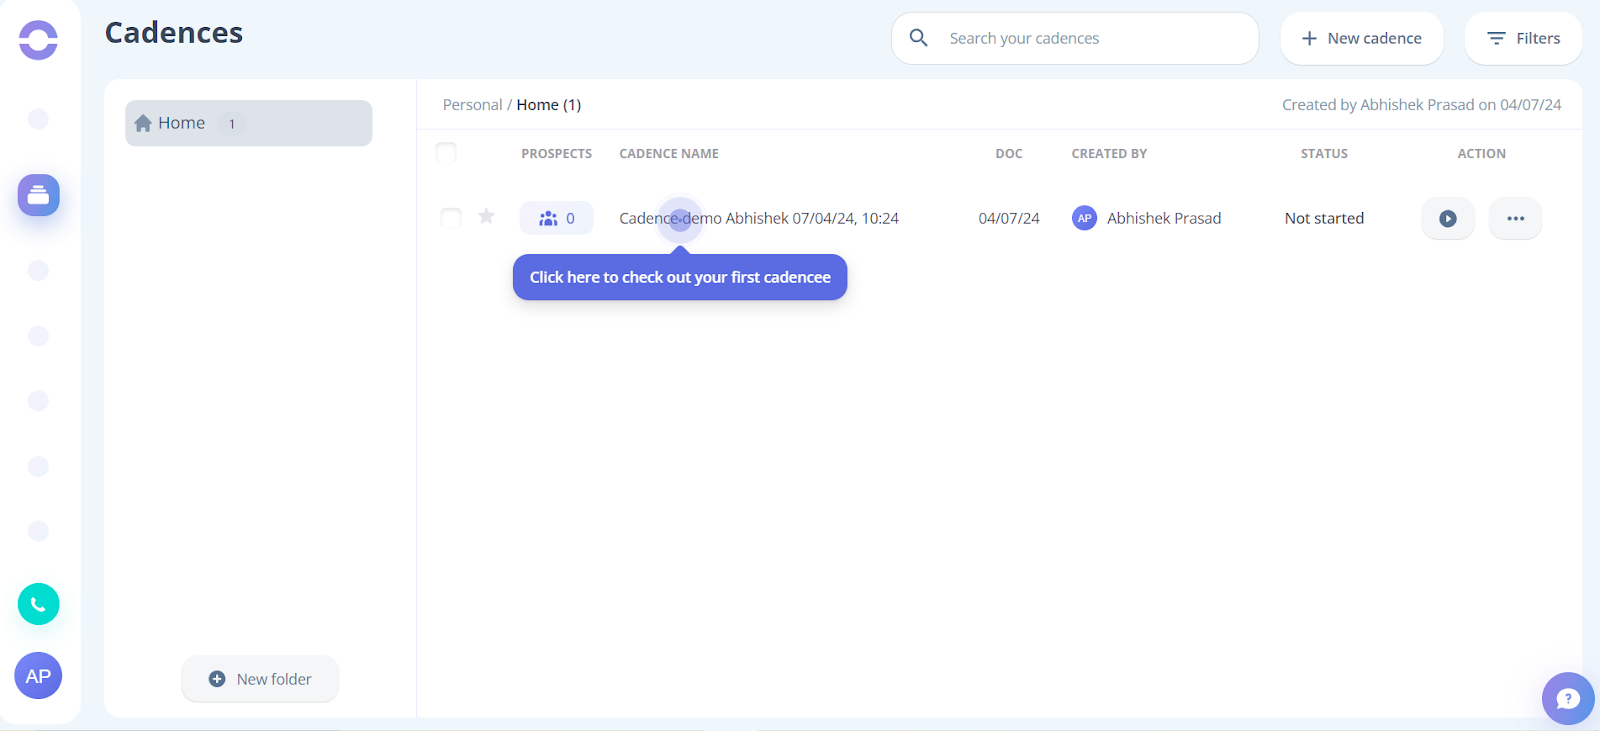
Step 5. Now click on the cadence to check out your first cadence.
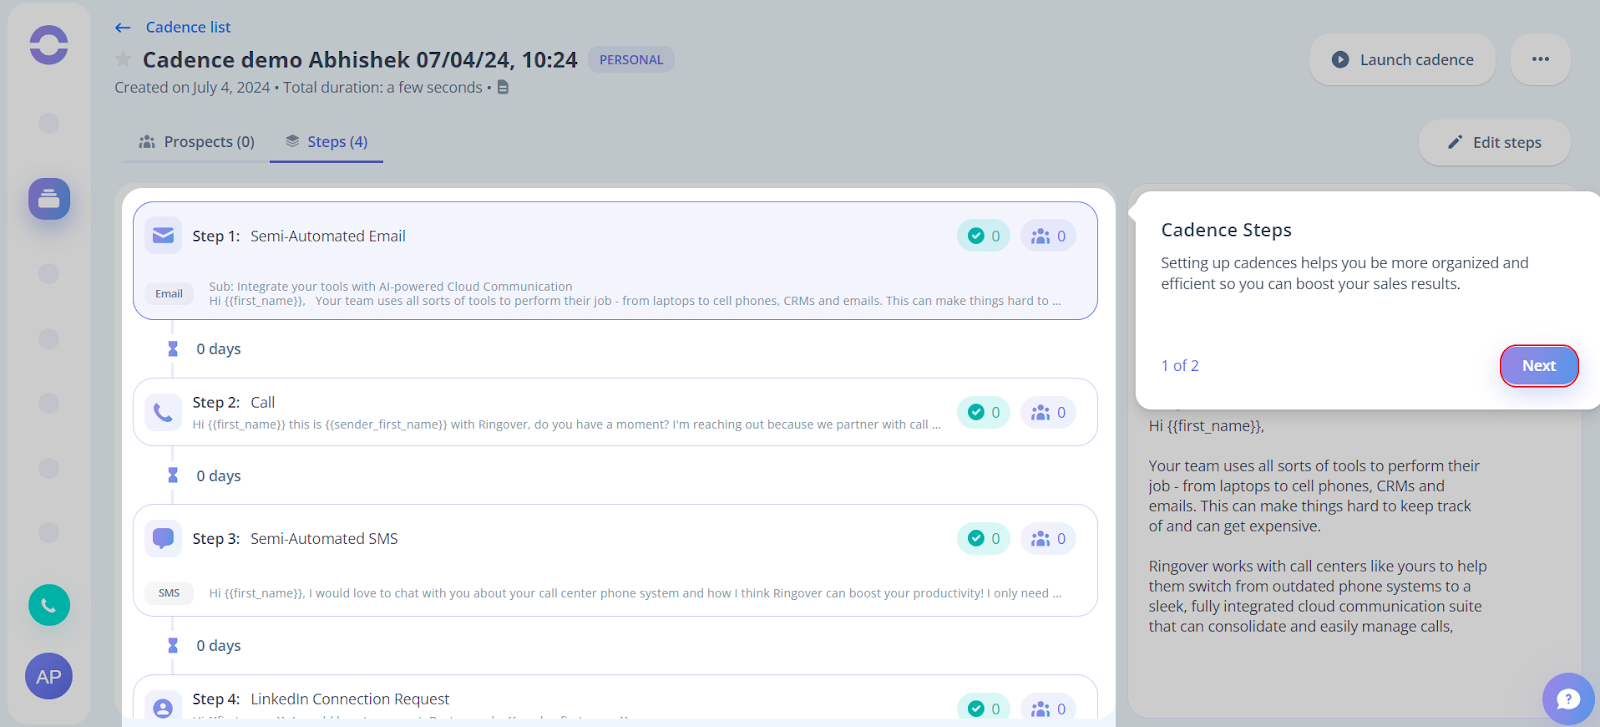
Step 6. After that to set up your cadence steps, click Next on the right-hand side of your screen.
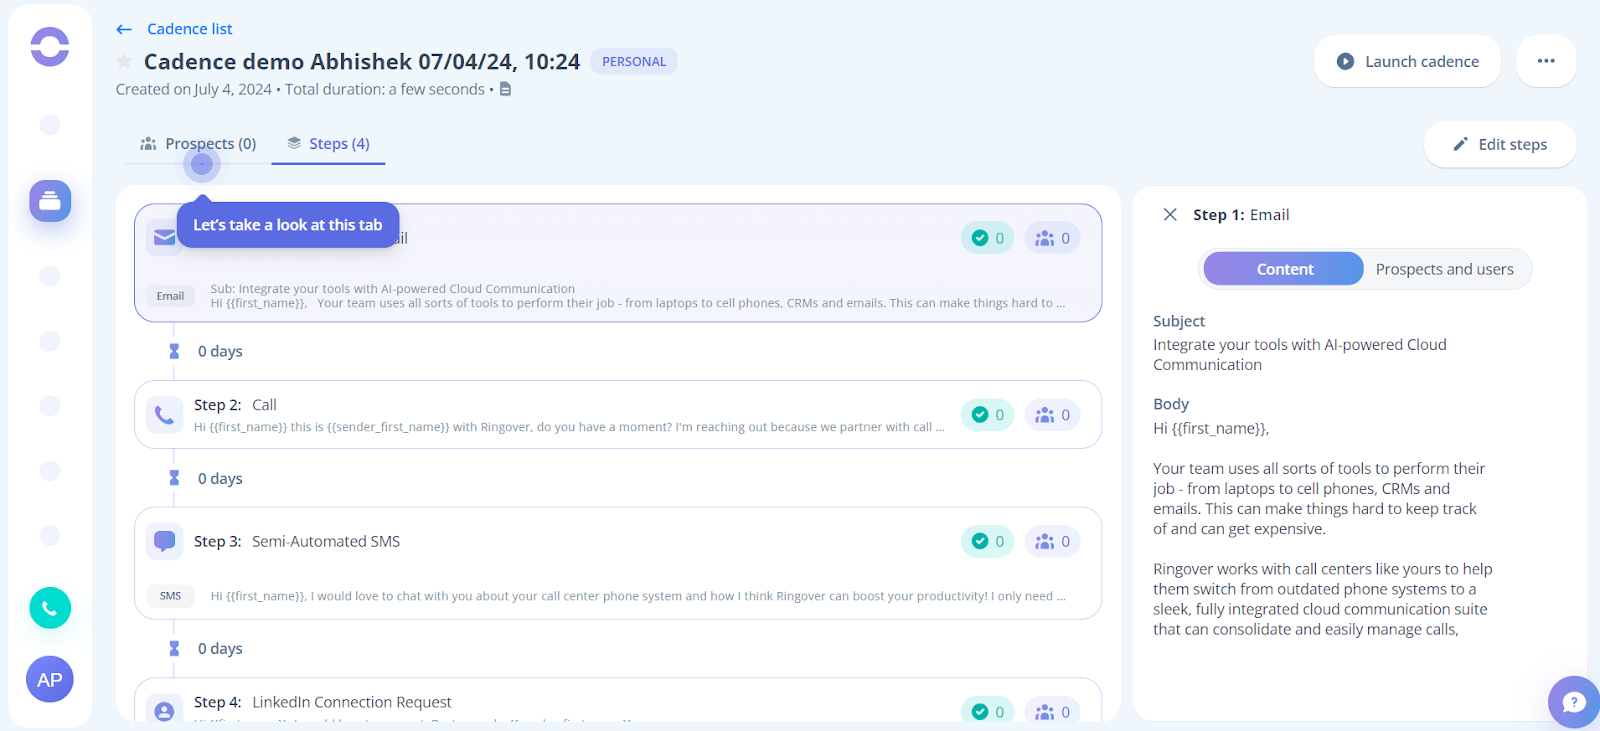
Step 7. By clicking on each step of your cadence, you can review its content. To move forward, click Next.

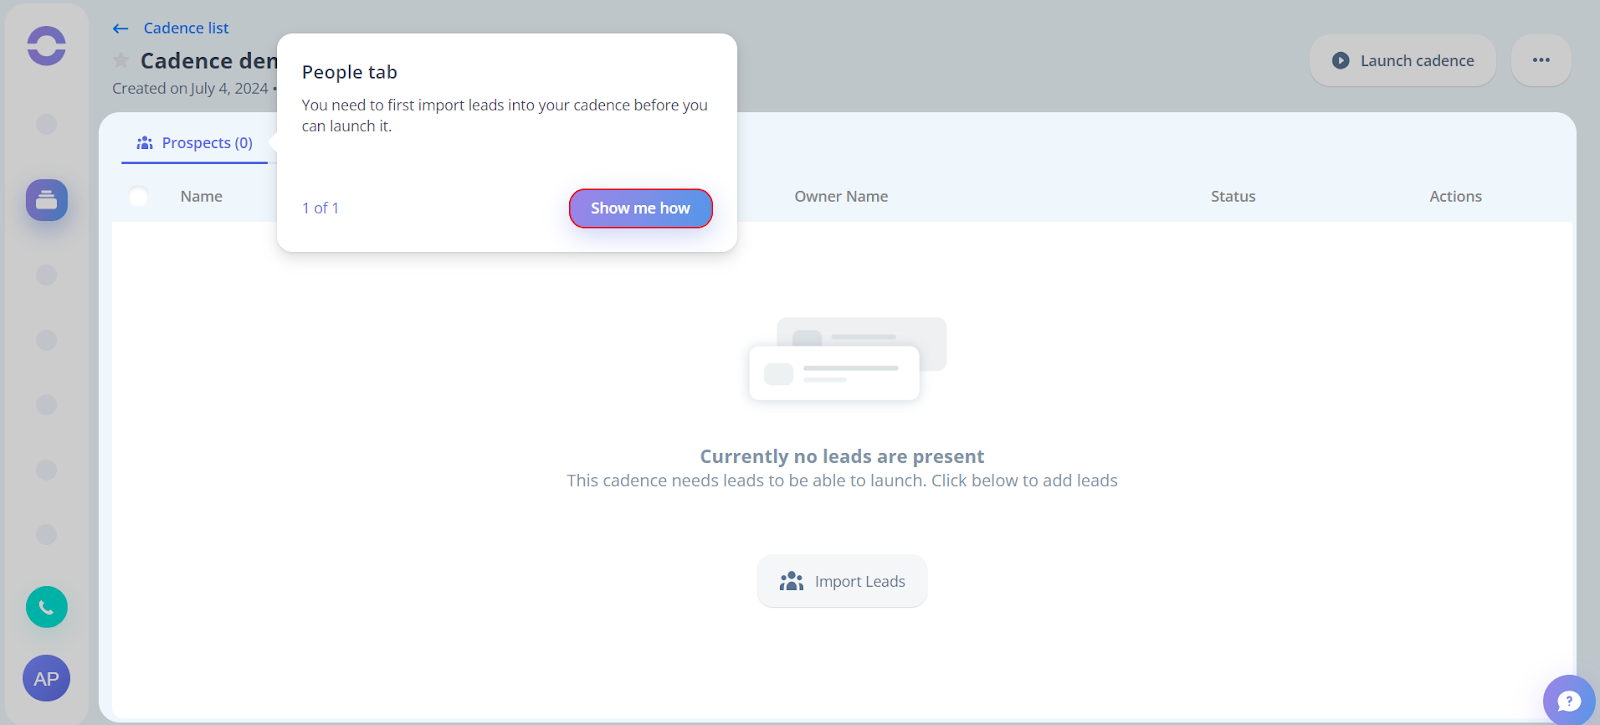
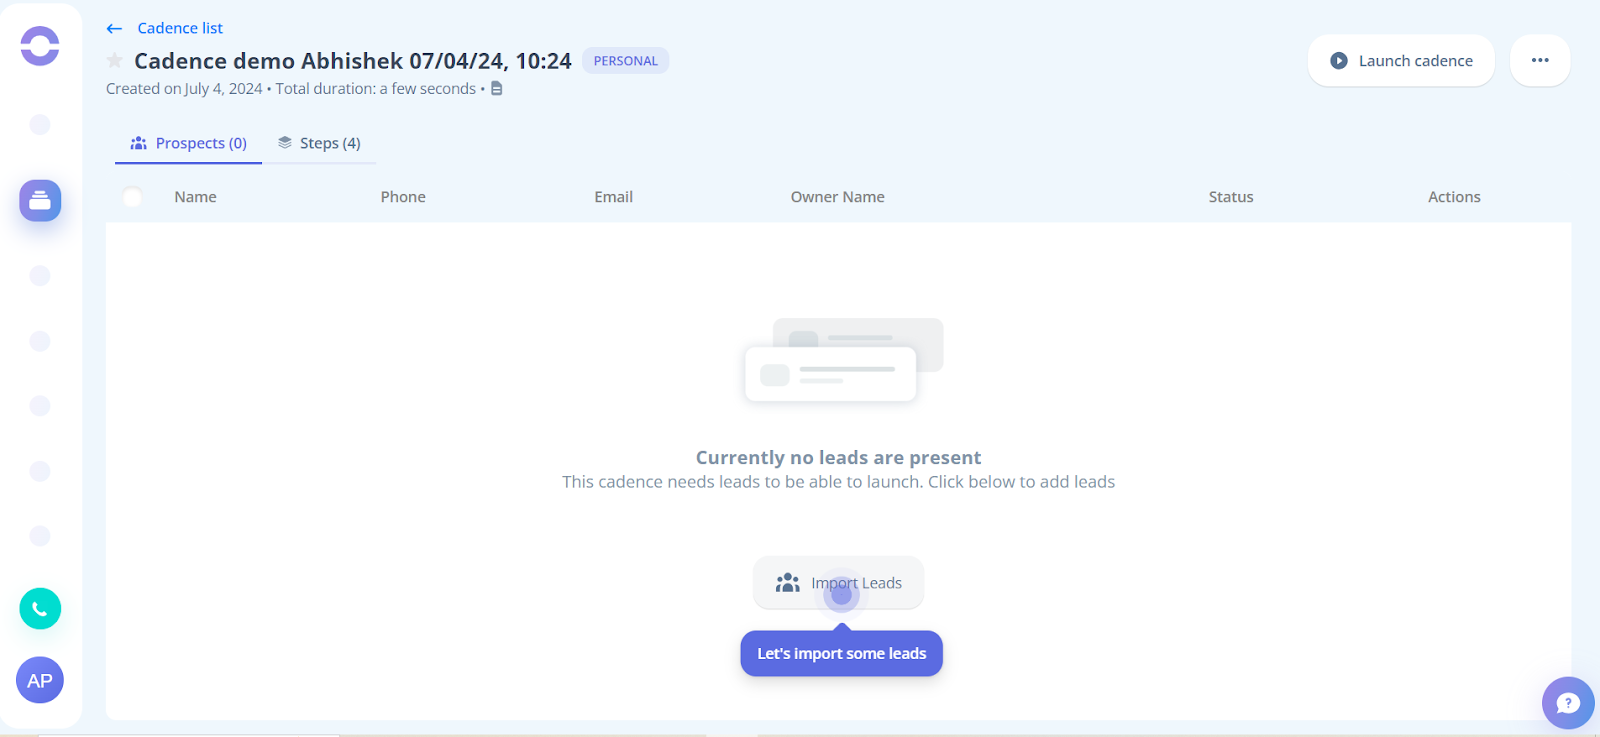
Step 8. To import prospects, click on the Prospect tab.
Step 9. Before launching your cadence, you must import leads into it.
Click on Show me how.
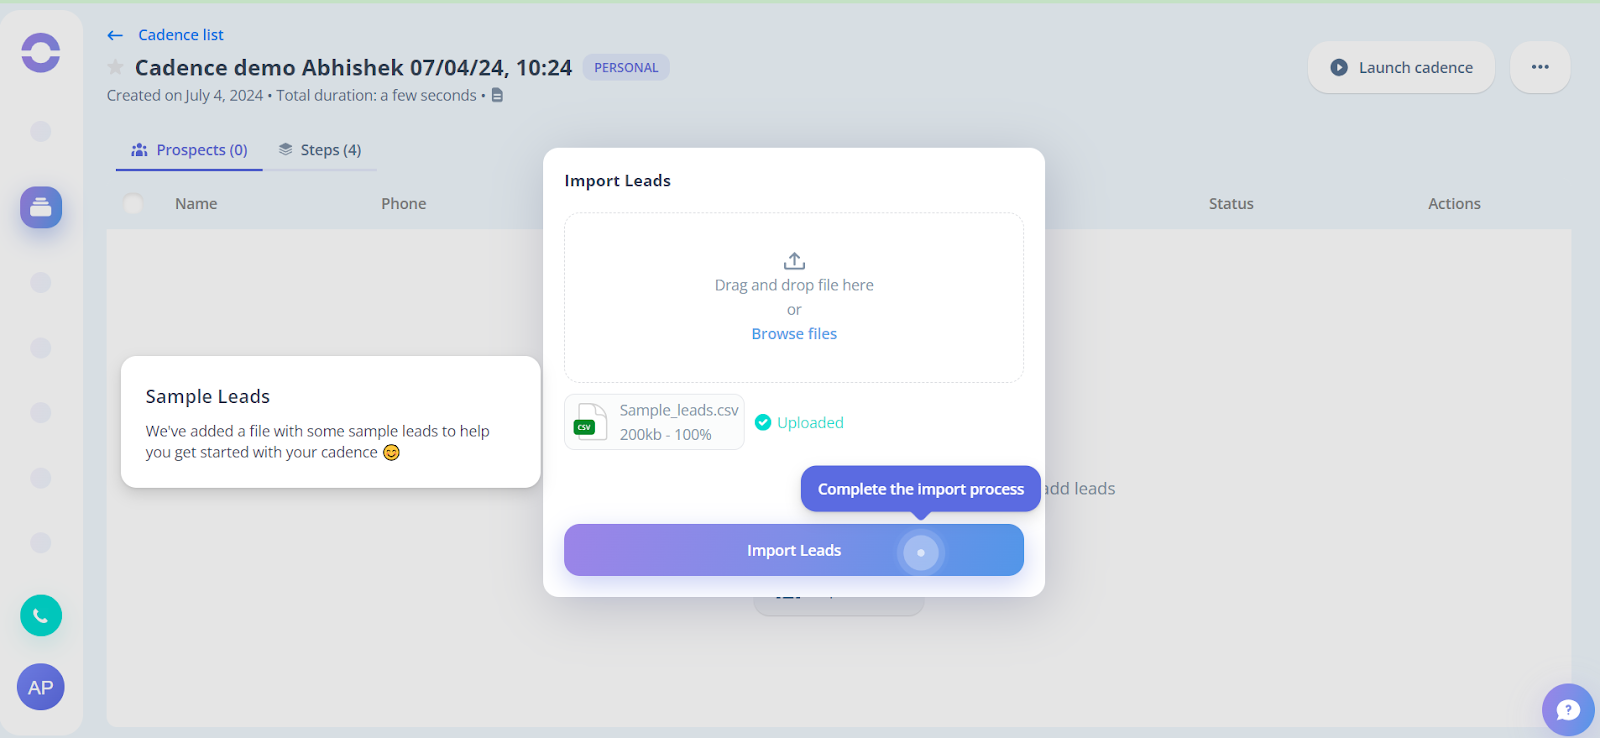
Step 10. To import leads in Cadence, click on the “Import leads” button.
Step 11. After that, the sample file will be automatically imported. Click the Import Leads button.
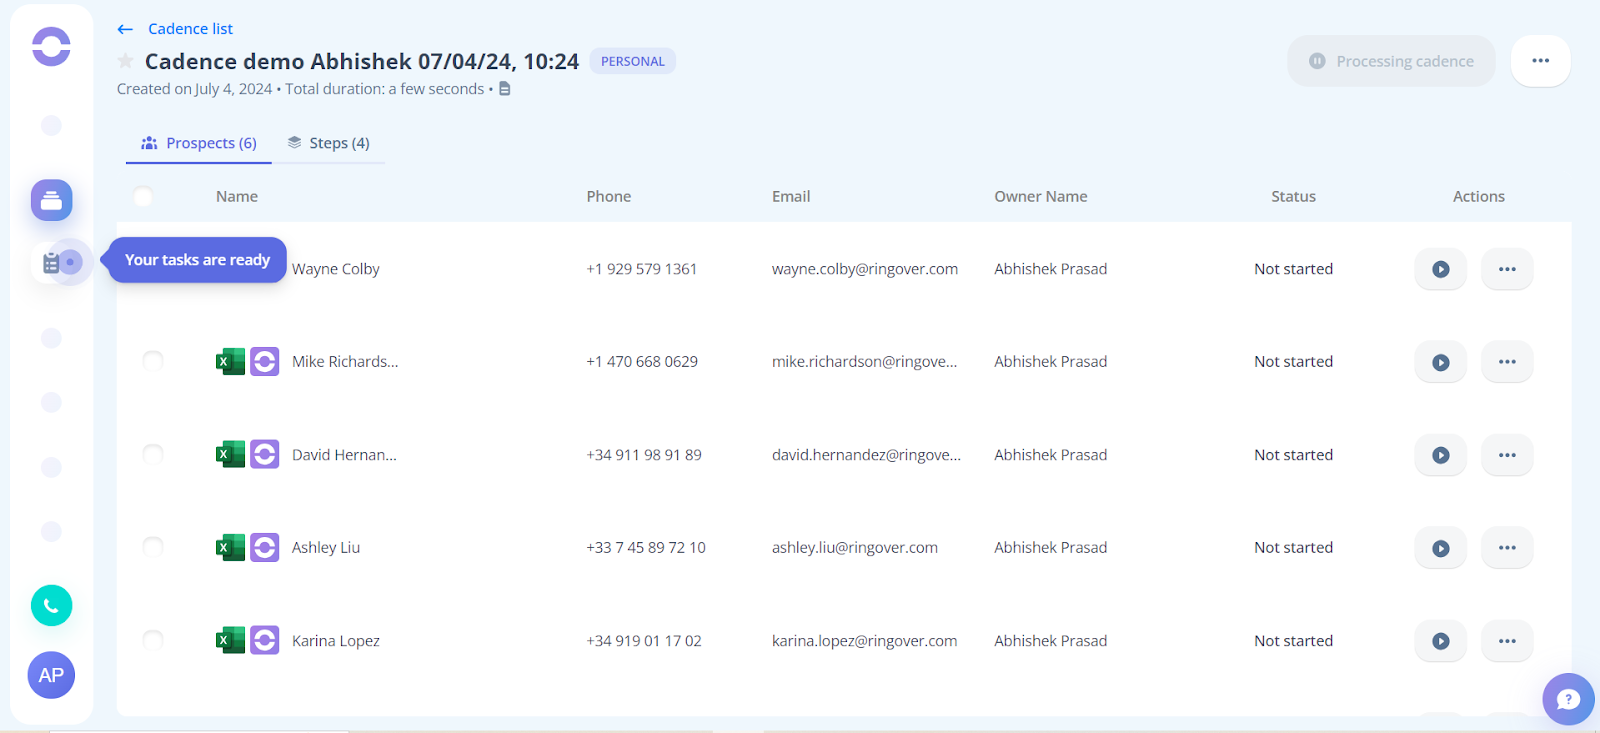
Step 12. After the leads are imported you need to click on the Launch Cadence button.

Step 13. Next, to perform the tasks, click on the task page.
Step 14. The Tasks page lists all the tasks related to your prospects. Click Next to perform the tasks.
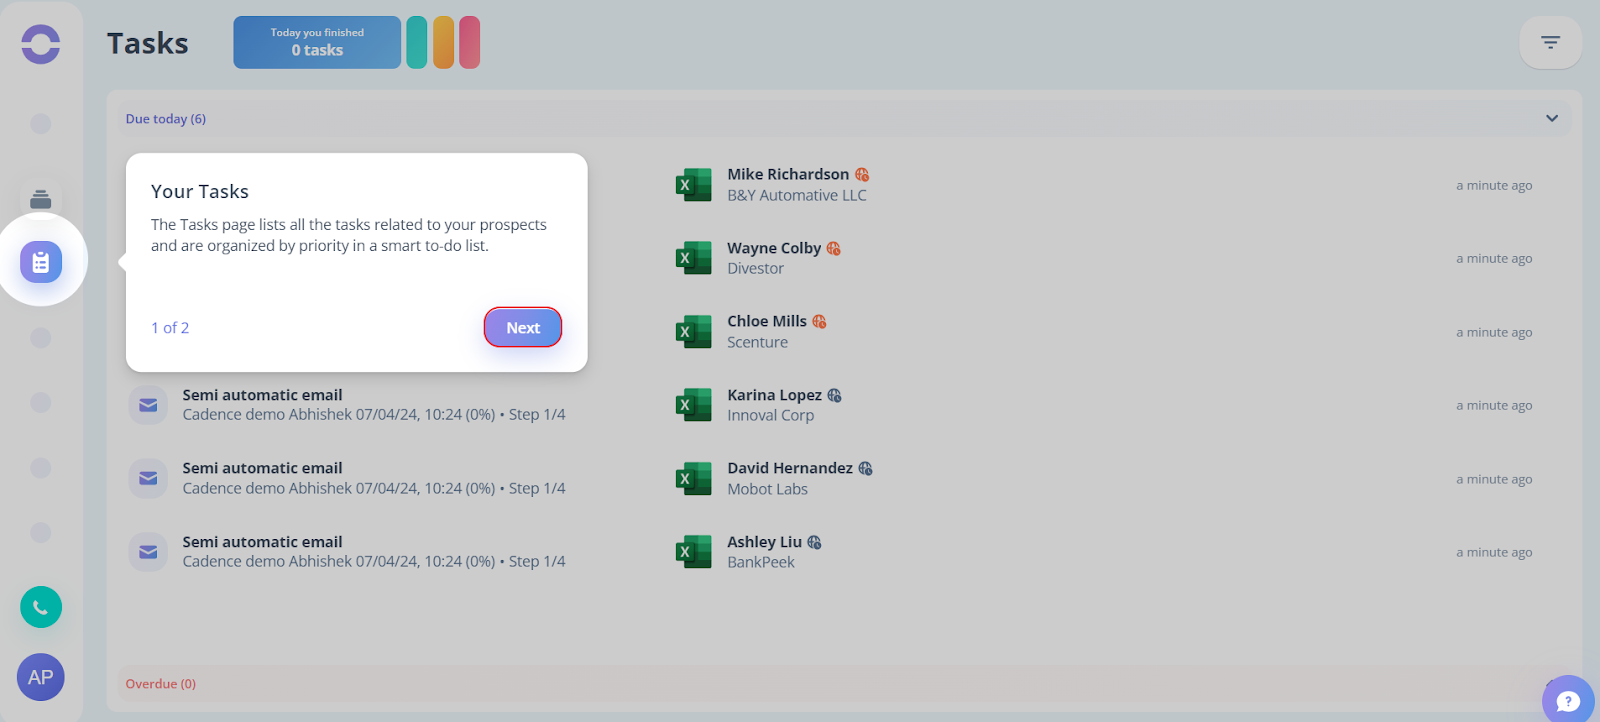
Step 15. Now you need to complete 4 tasks for one of the leads in the cadence.
Click Start.
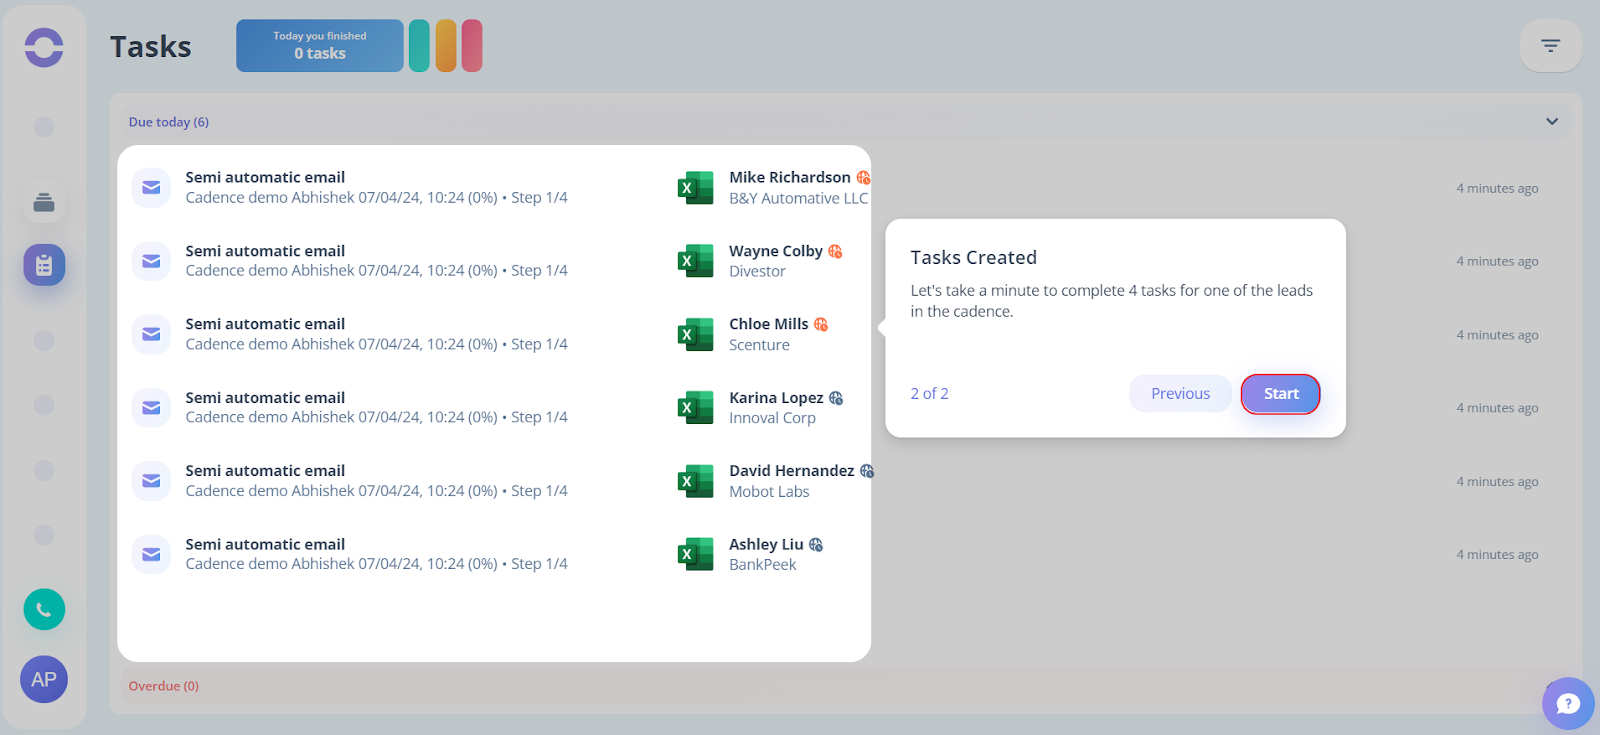
Step 16. Now let's have a look at the first task. Click on the first task prompting on your screen.

Step 17. After clicking on the task the Task page will open and click on the “Semiautomatic email” button.
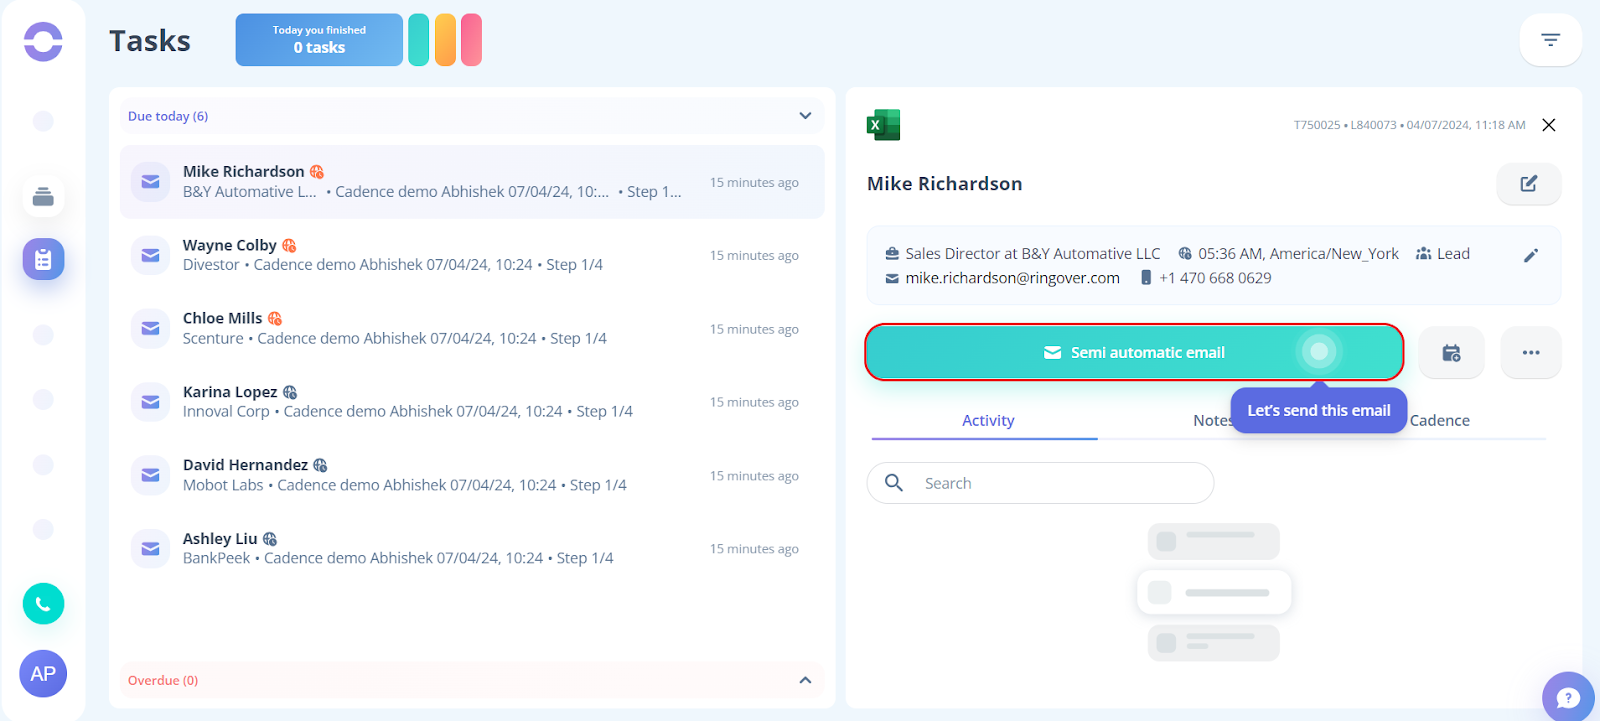
Step 18. After that, the Send mail modal will appear on your screen, Click on the Send email button.

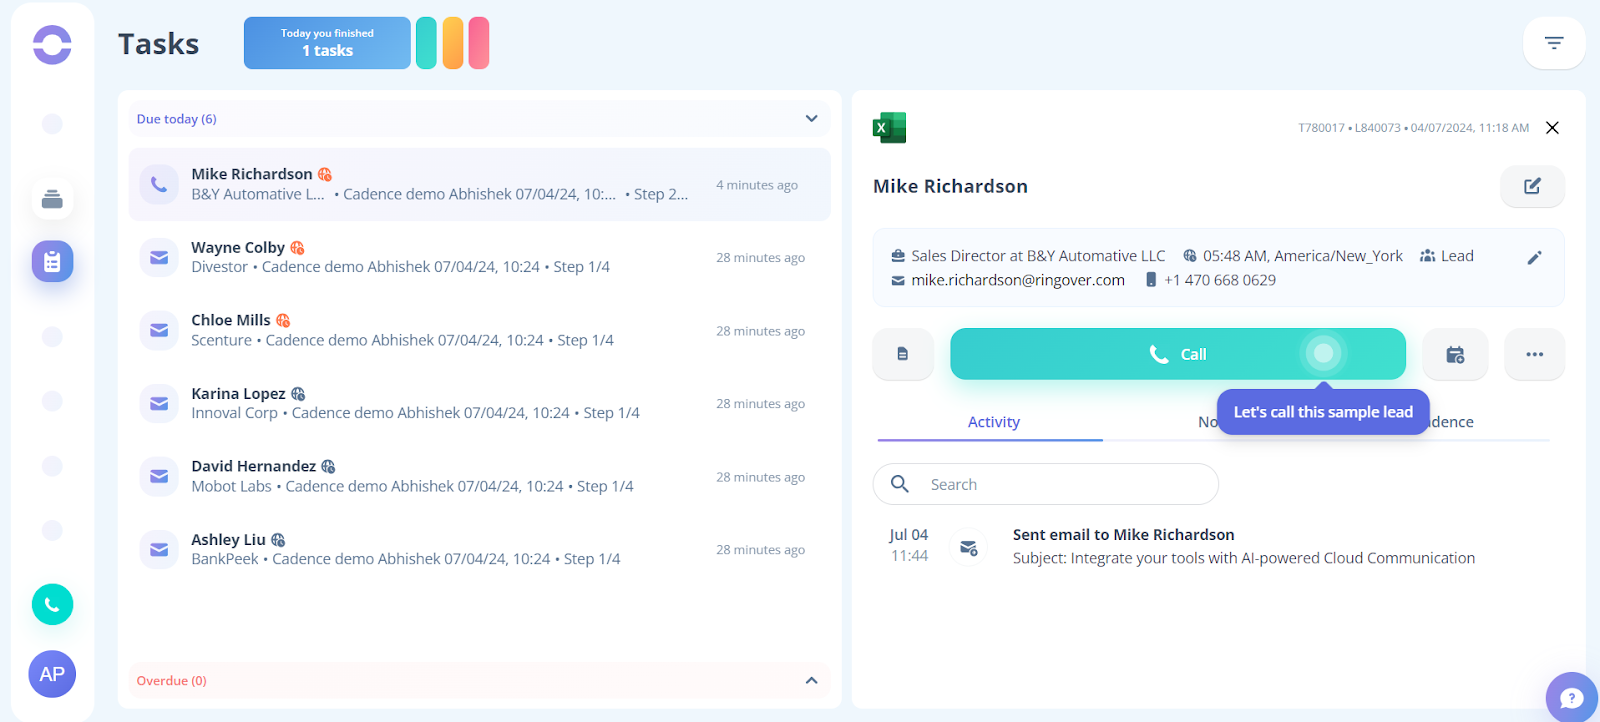
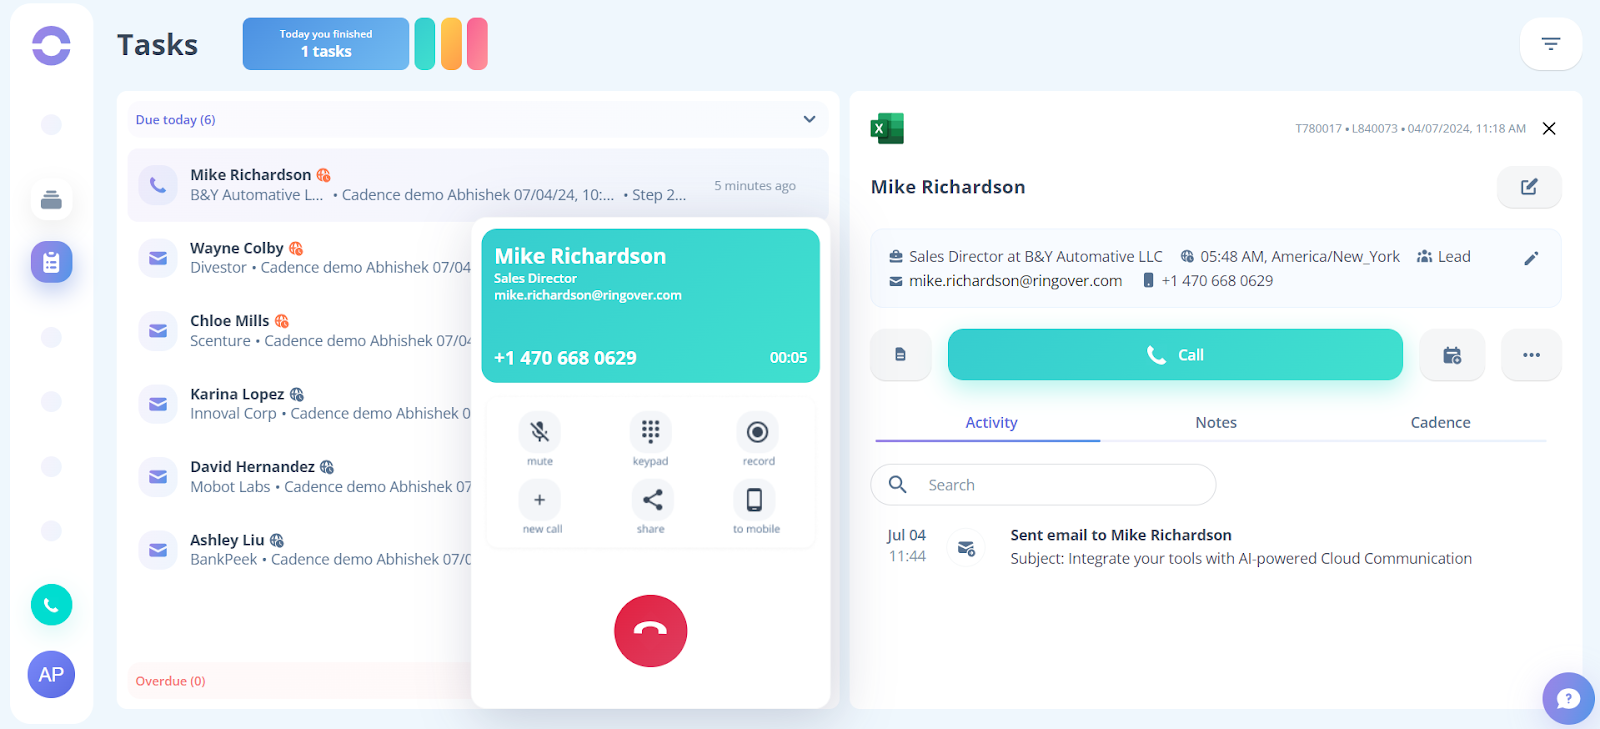
Step 19. To perform the next task click on the task prompt on your screen.

Step 20. The next task is a call task. Click the Call button to perform the task. You will be able to see the call task being performed for the sample lead on your screen.
Step 21. To perform the next task, click on the Semi-Automatic SMS button.
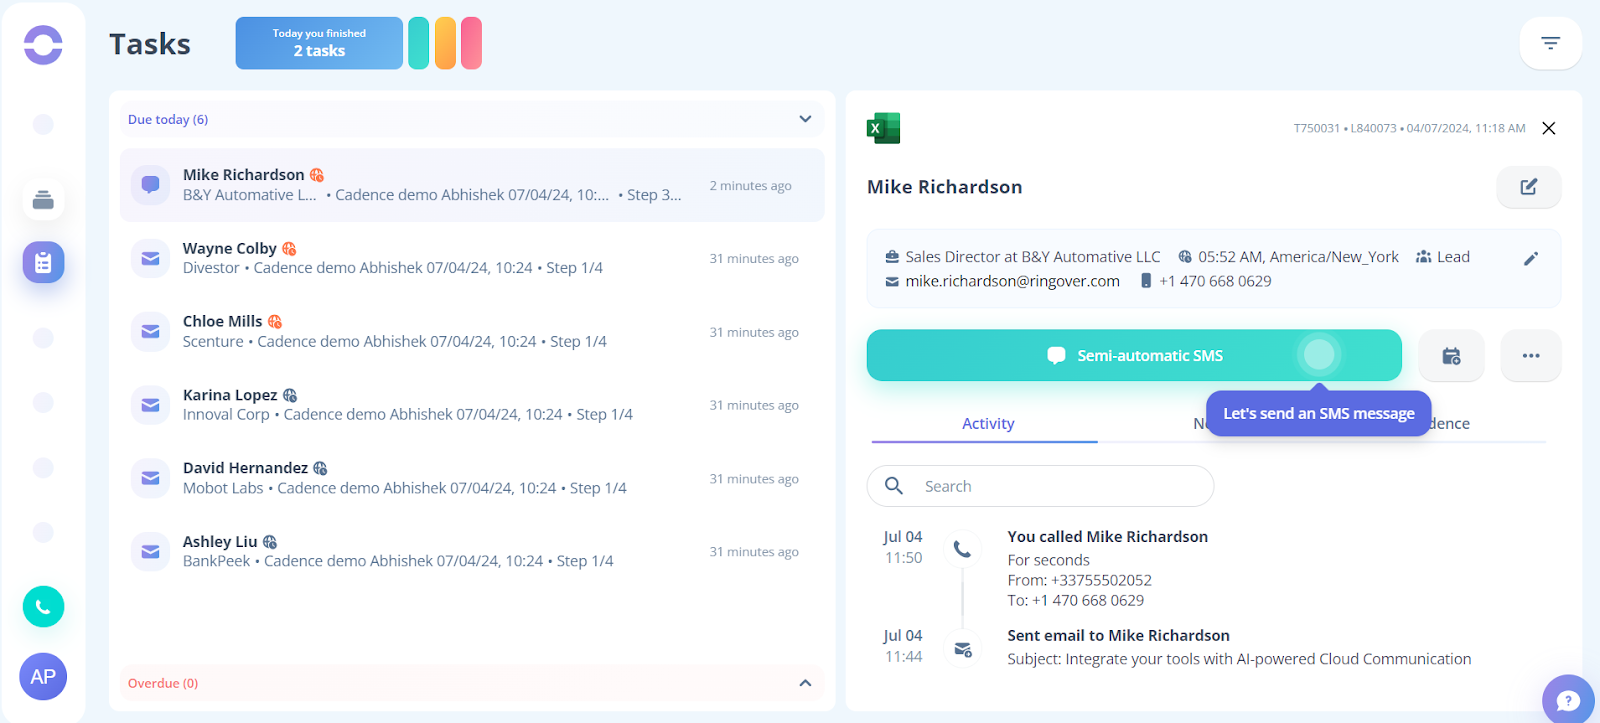
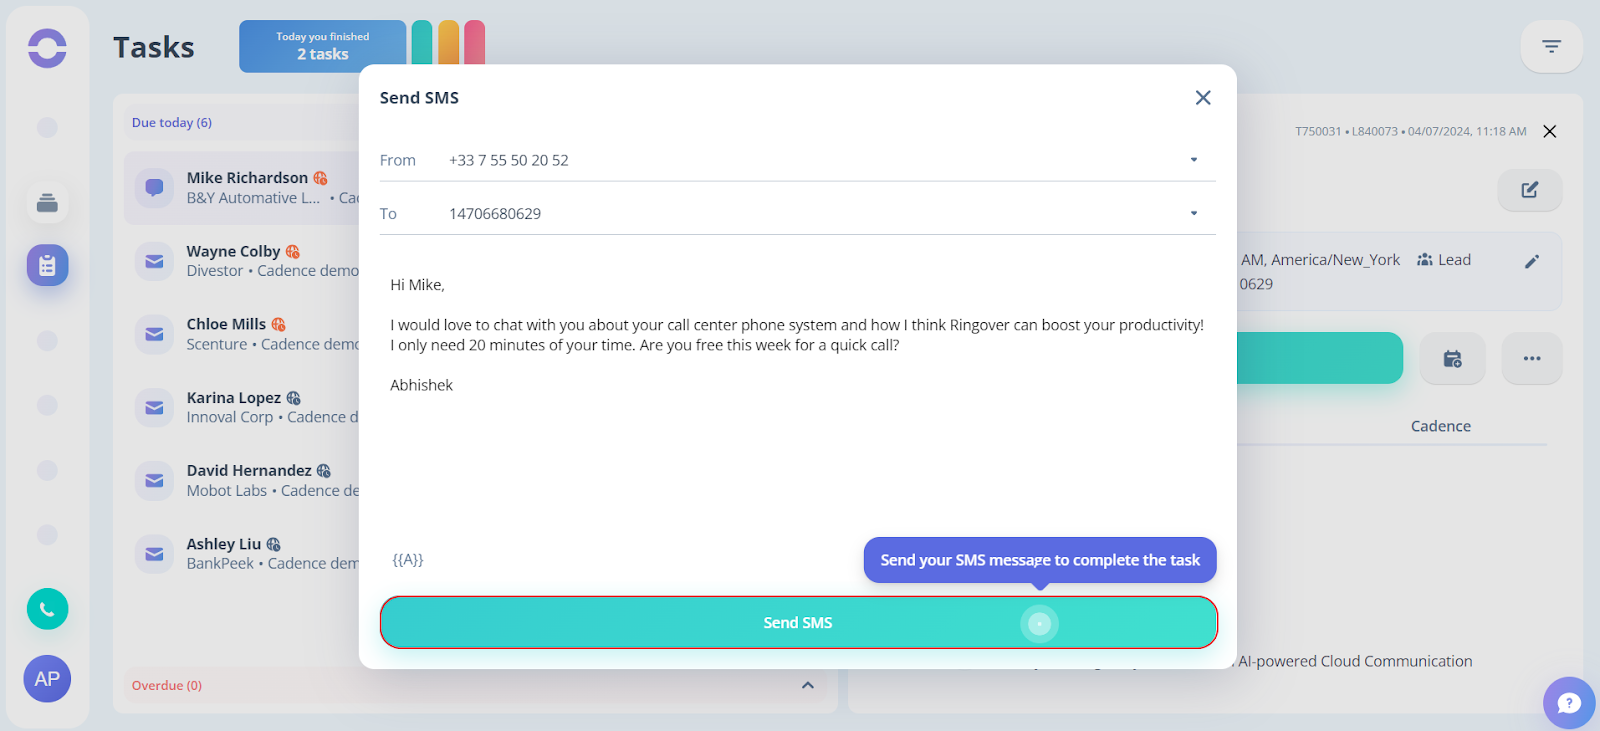
Step 22. A task modal will open. Click on the Send SMS button.
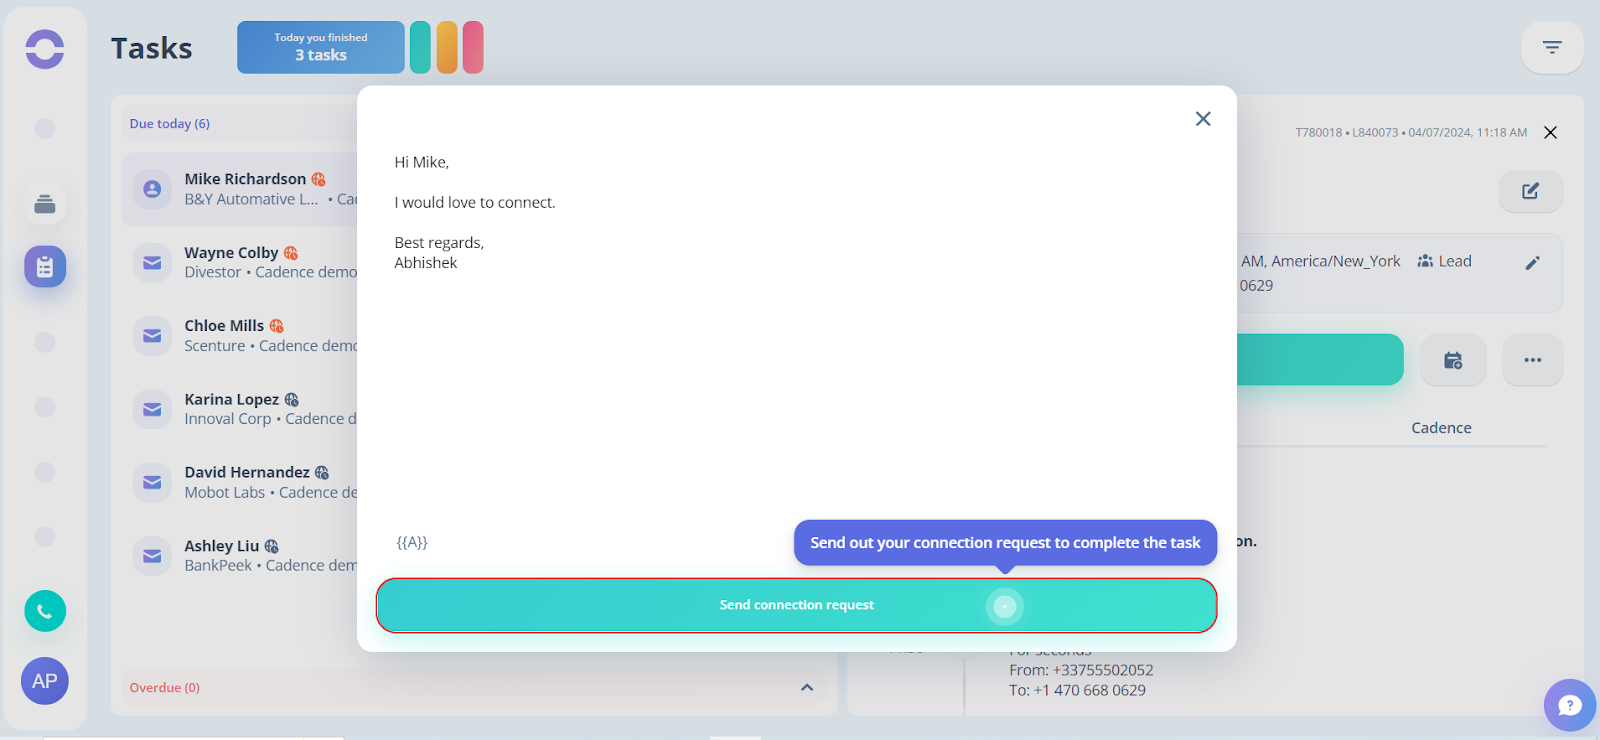
Step 23. To perform the next task, click on the LinkedIn connection button.
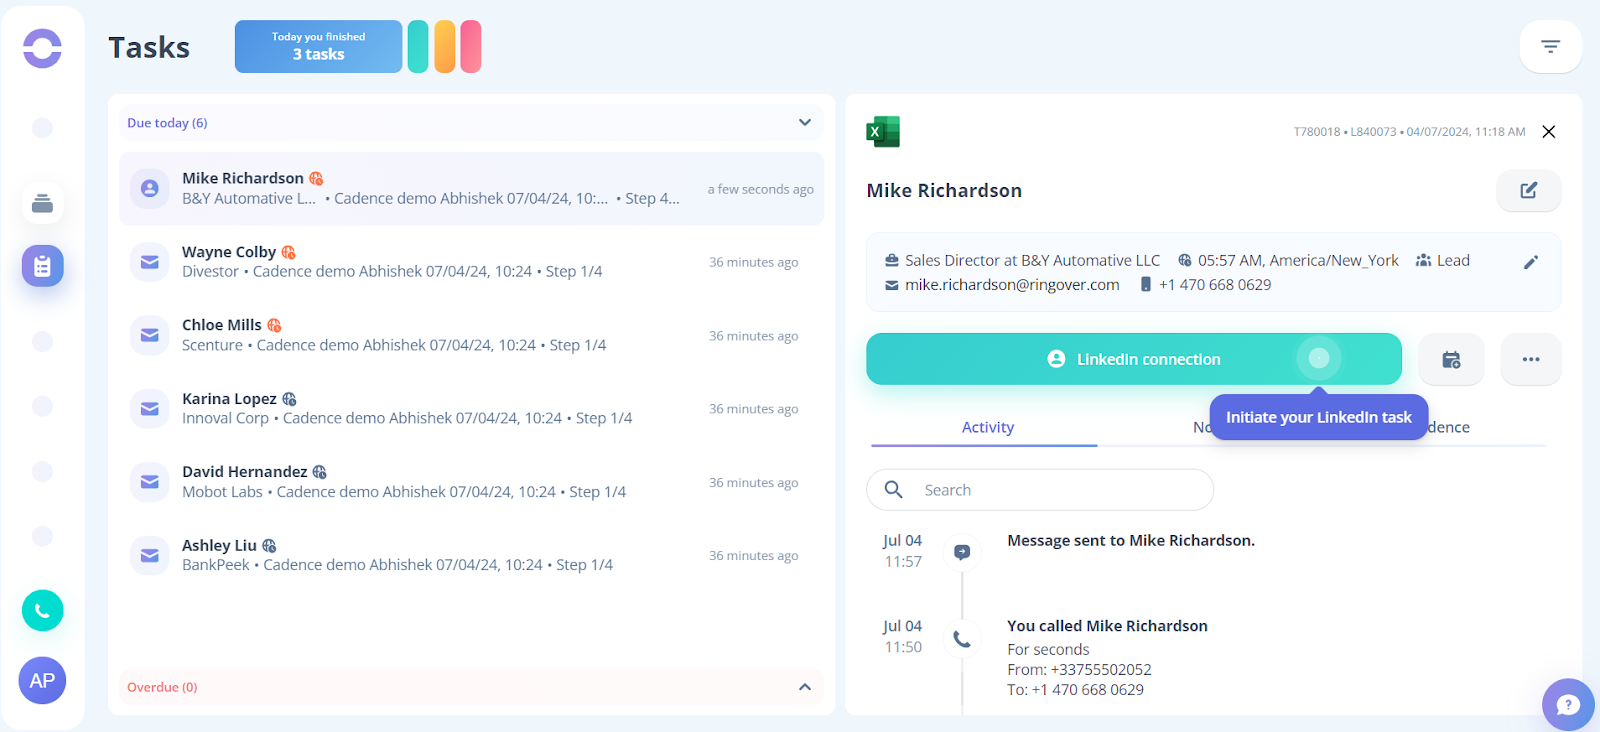
Step 24. On the task modal, click on Send connection request.
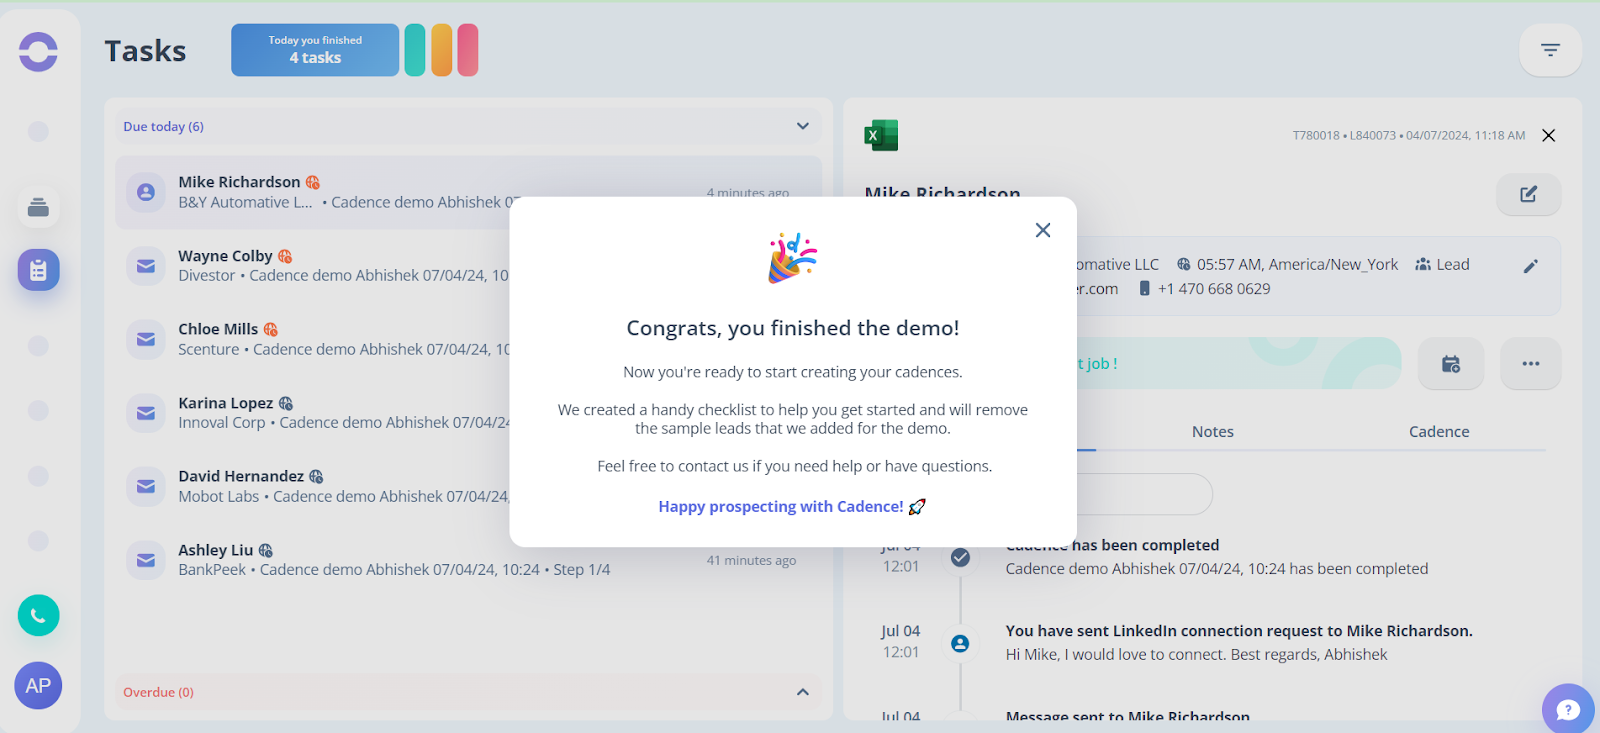
On completing all the tasks, you will get to see the success modal on your screen.
For Super admins and admins:
The onboarding procedure is identical for super admins and sales agents; all steps up to step number 24 must be completed. However, there are a few more steps that you must take after that, which are detailed here.
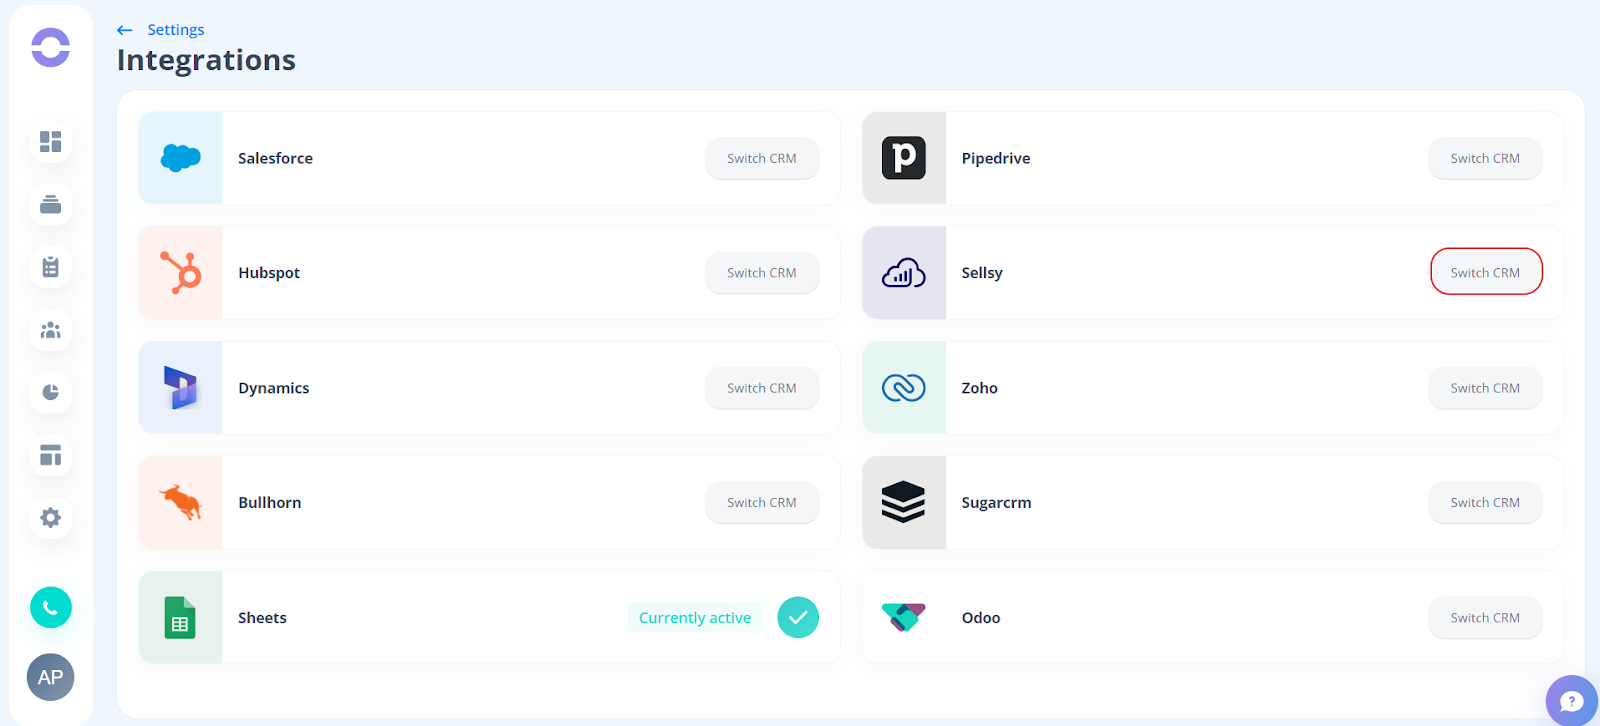
Step 24: Go to the CRMs.

Step 25: Click on the Switch CRM button beside the Sellsy icon.
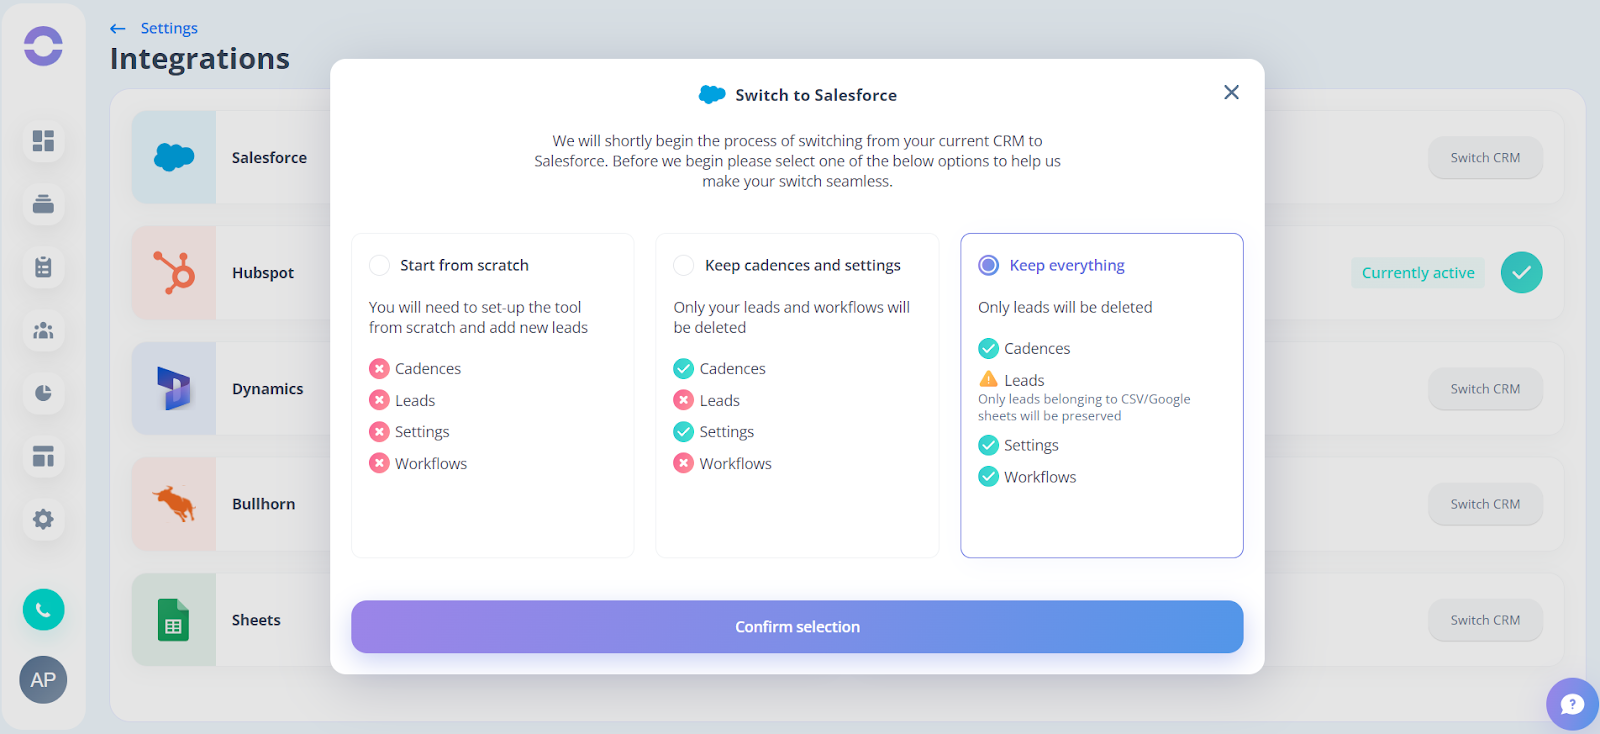
Step 26: After you click on the button, there will be a pop-up giving three different alternatives regarding the choices that users will have while switching their CRM.
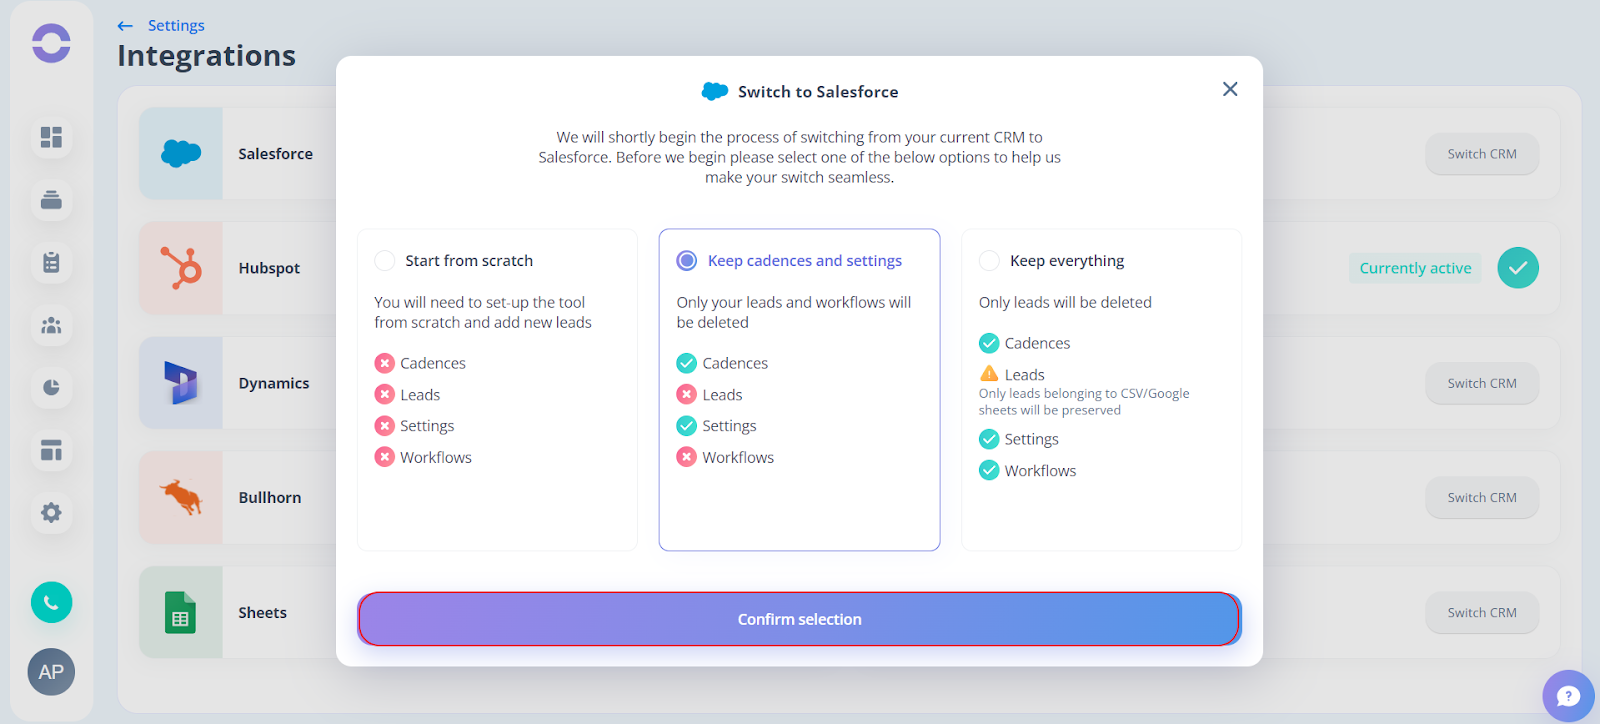
- Start from scratch
Any workflows, leads, settings, and cadence will be erased if this particular option is chosen if they are available. Users of the Group will need to log in again and connect to their CRM.
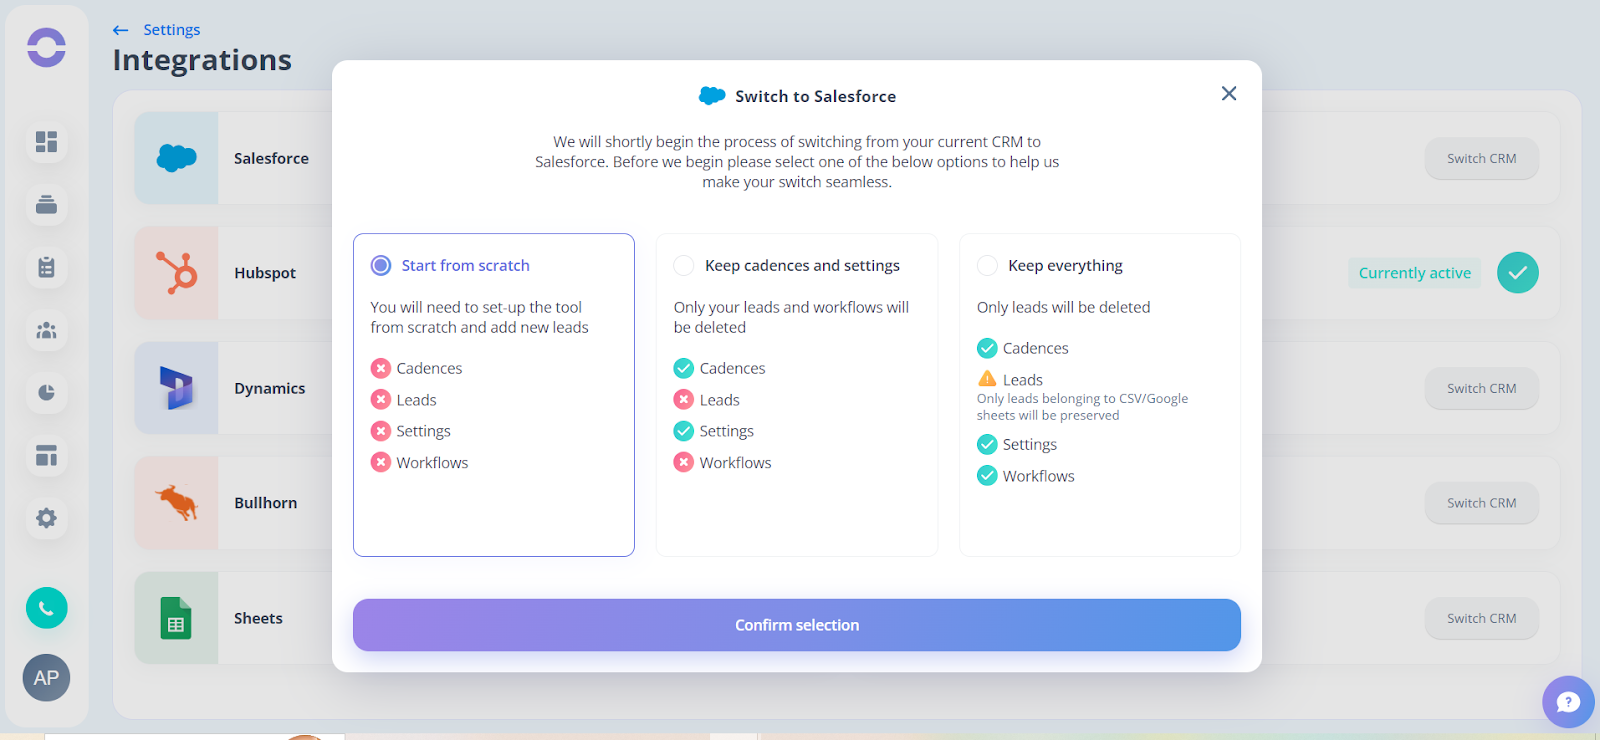
- Keep Cadences and Settings
All of the leads and workflows will be erased if this option is chosen, but the cadences and settings will still be available.

- Keep everything
By selecting this option, Customers can keep all their Cadences, settings and workflows. But in the case of leads, there are a few cases:
- When a CRM is changed, leads that were associated with it cannot be kept. They will be irreversibly erased and lost forever, with no chance of recovery.
Step 27: Click on the Confirm selection button after choosing the alternative.
Step 28: A pop-up related to the CRM switch will then appear on the screen. After reading each of the crucial points described below, click the Please proceed with switch button. Thus, the CRM will be changed.

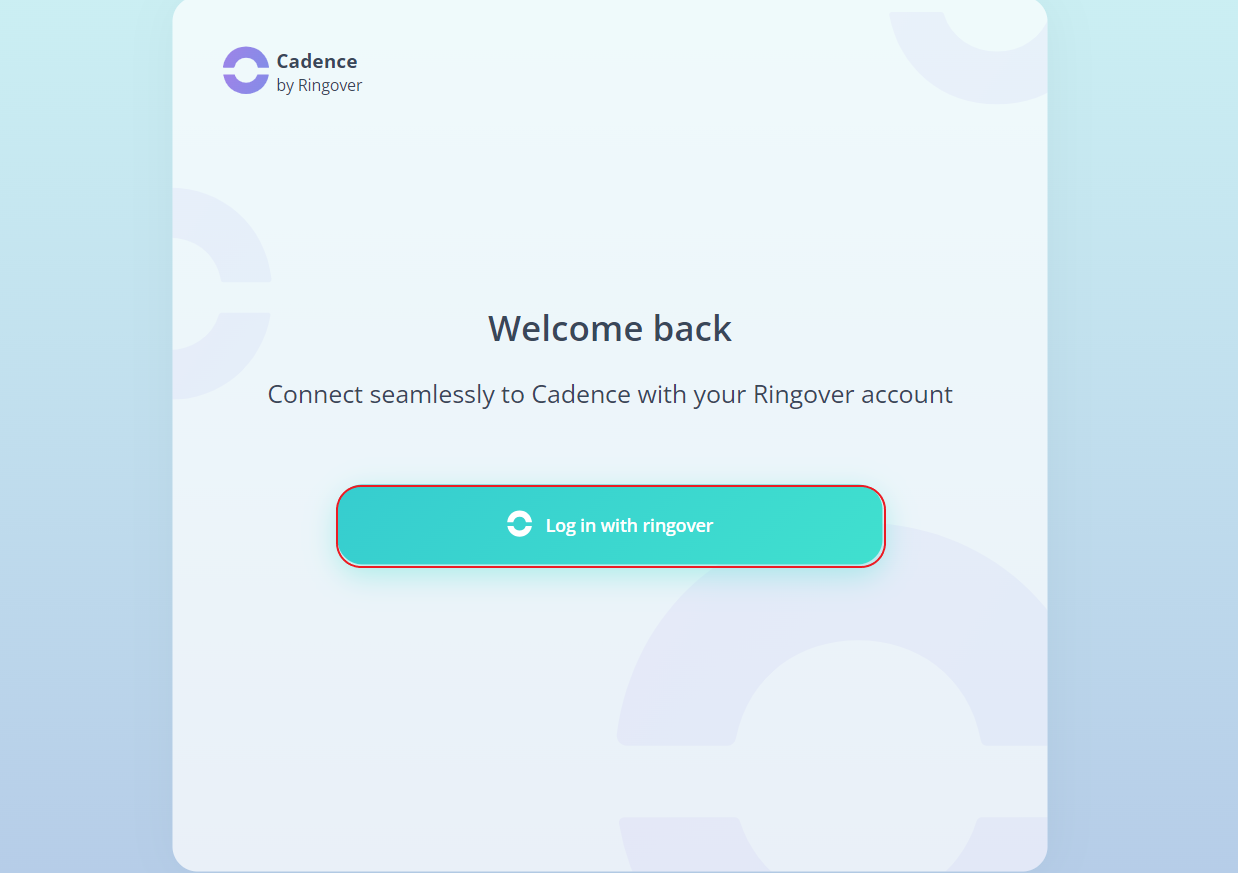
Step 29: Click on the Logout button.

Step 30: Click on the Log in with ringover button
Step 31: Click on the Connect to Sellsy button.
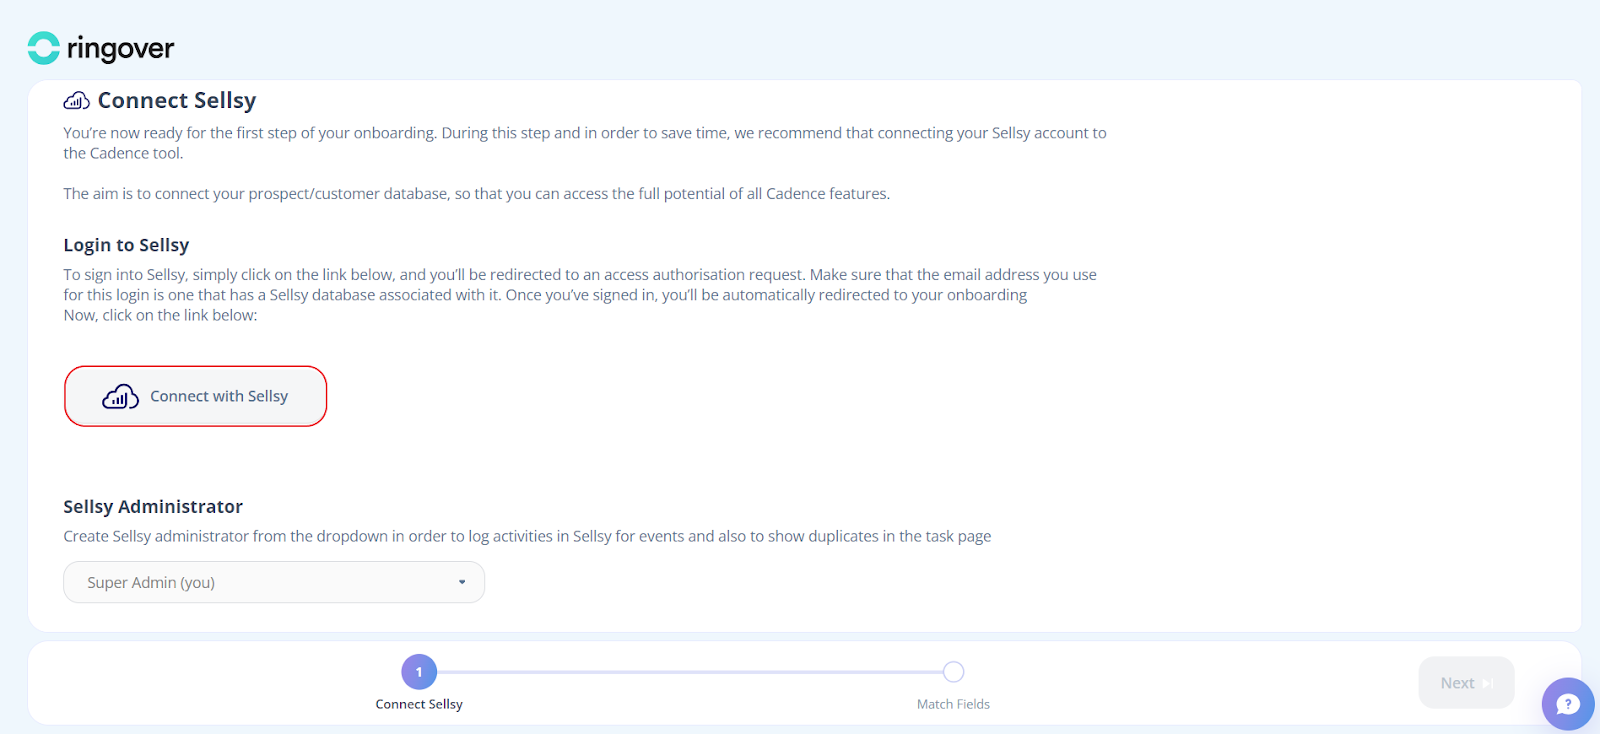
Step 32: Then log in to your Sellsy account.
Step 33: After that select the administrator from the dropdown.
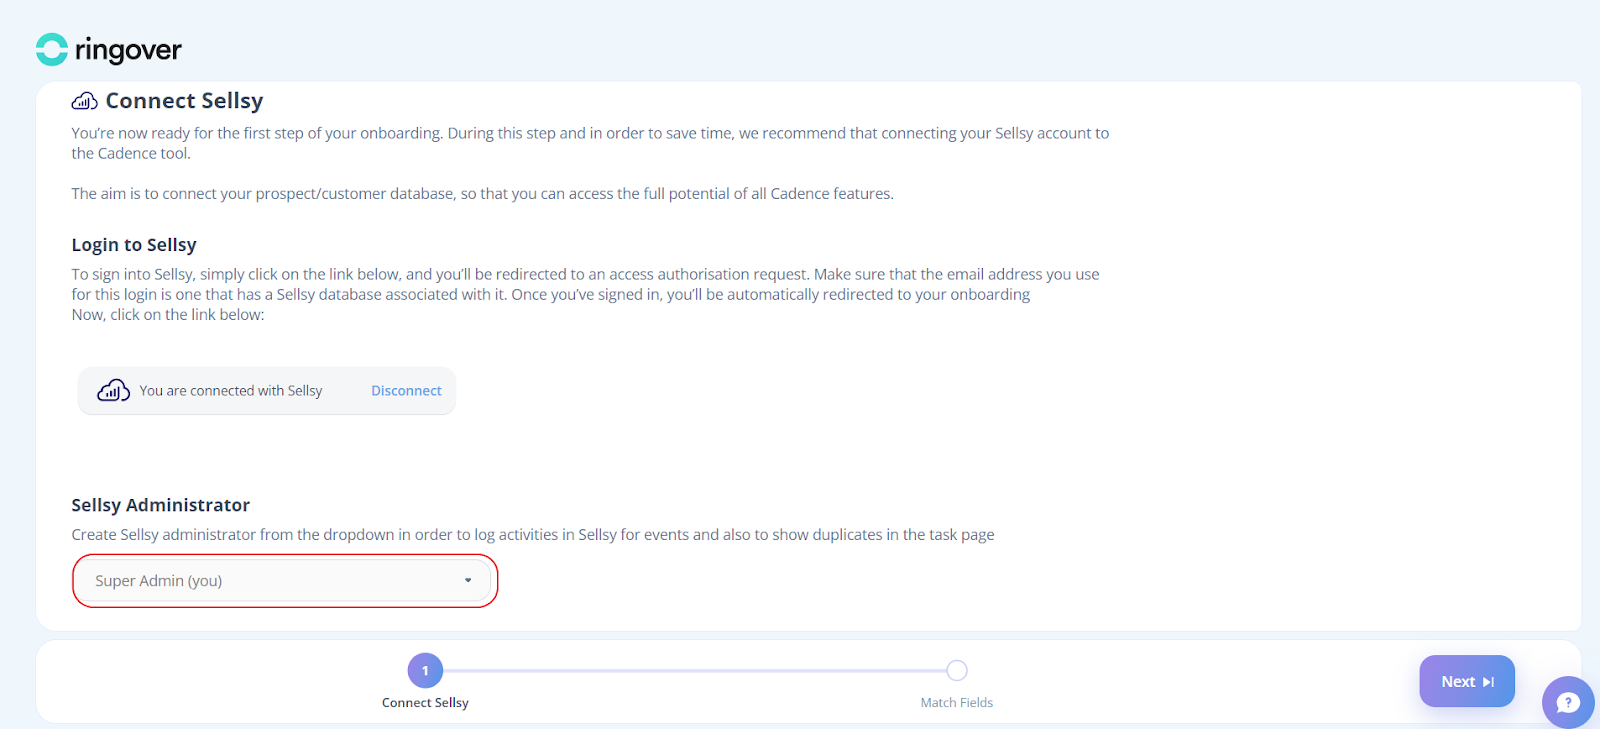
Step 34: Click on the Next button.
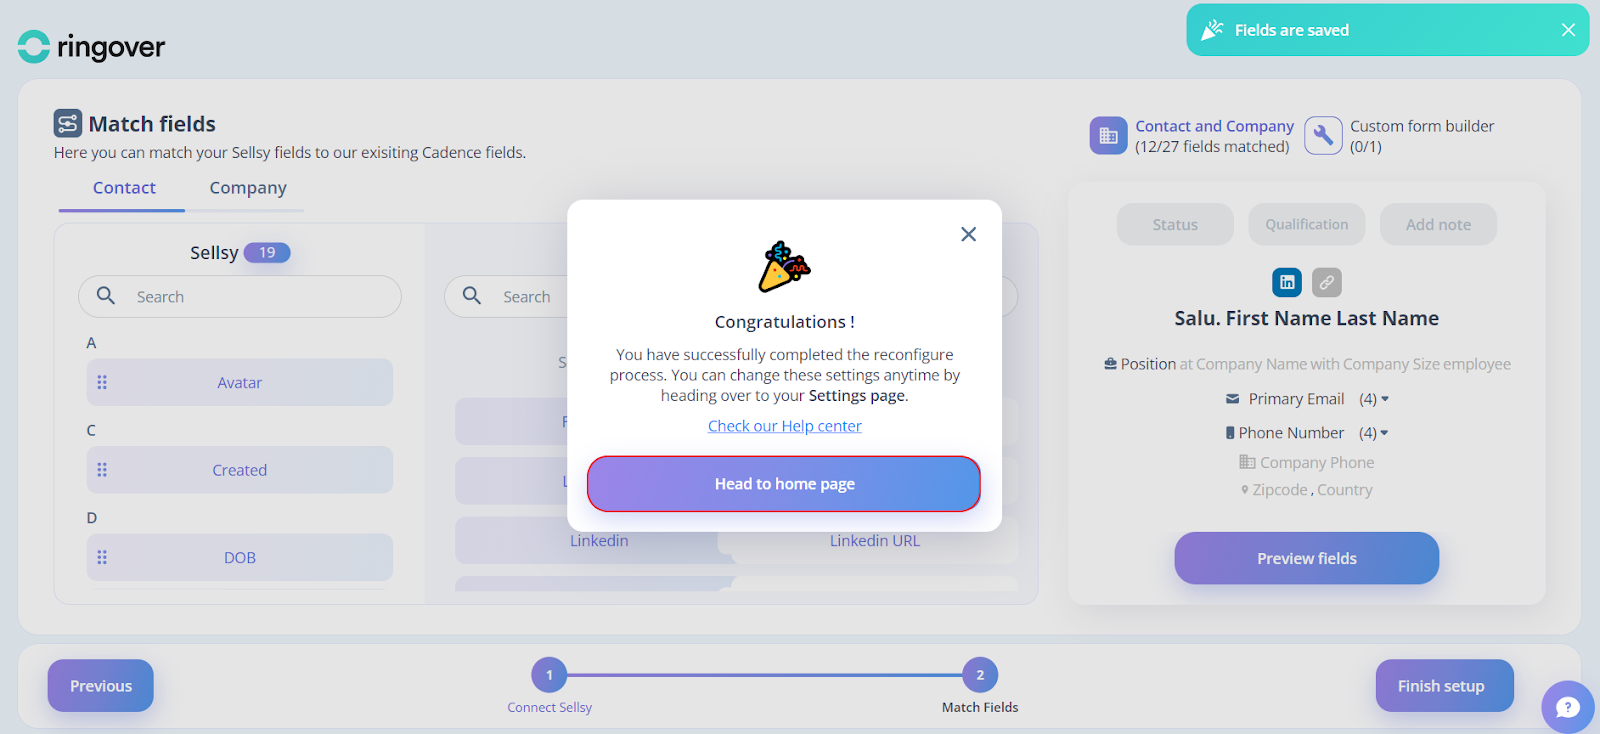
Step 35: You will be taken to the Field Mapping section on the following page, where you will need to match your Sellsy fields with the existing Cadence fields. The necessary fields are going to be mapped automatically; click on Finish Setup.

Step 36: Thus, the onboarding process will be completed. Click on the Head to Home page button to get started.