
The Voicemail Campaigns feature allows you to send automated voice messages to a large list of contacts at once. In this guide, you’ll learn how to successfully create, configure, and launch your voicemail campaigns.
Prerequisites
- Make sure you are the administrator of the Ringover account or a "Campaigns" supervisor to be able to access this feature.
- This service is only available for the following destination countries: France, the French Overseas Territories, the United Kingdom, and Spain.
- You must have a Ringover Business account to benefit from this integration.
Create and launch a voicemail campaign
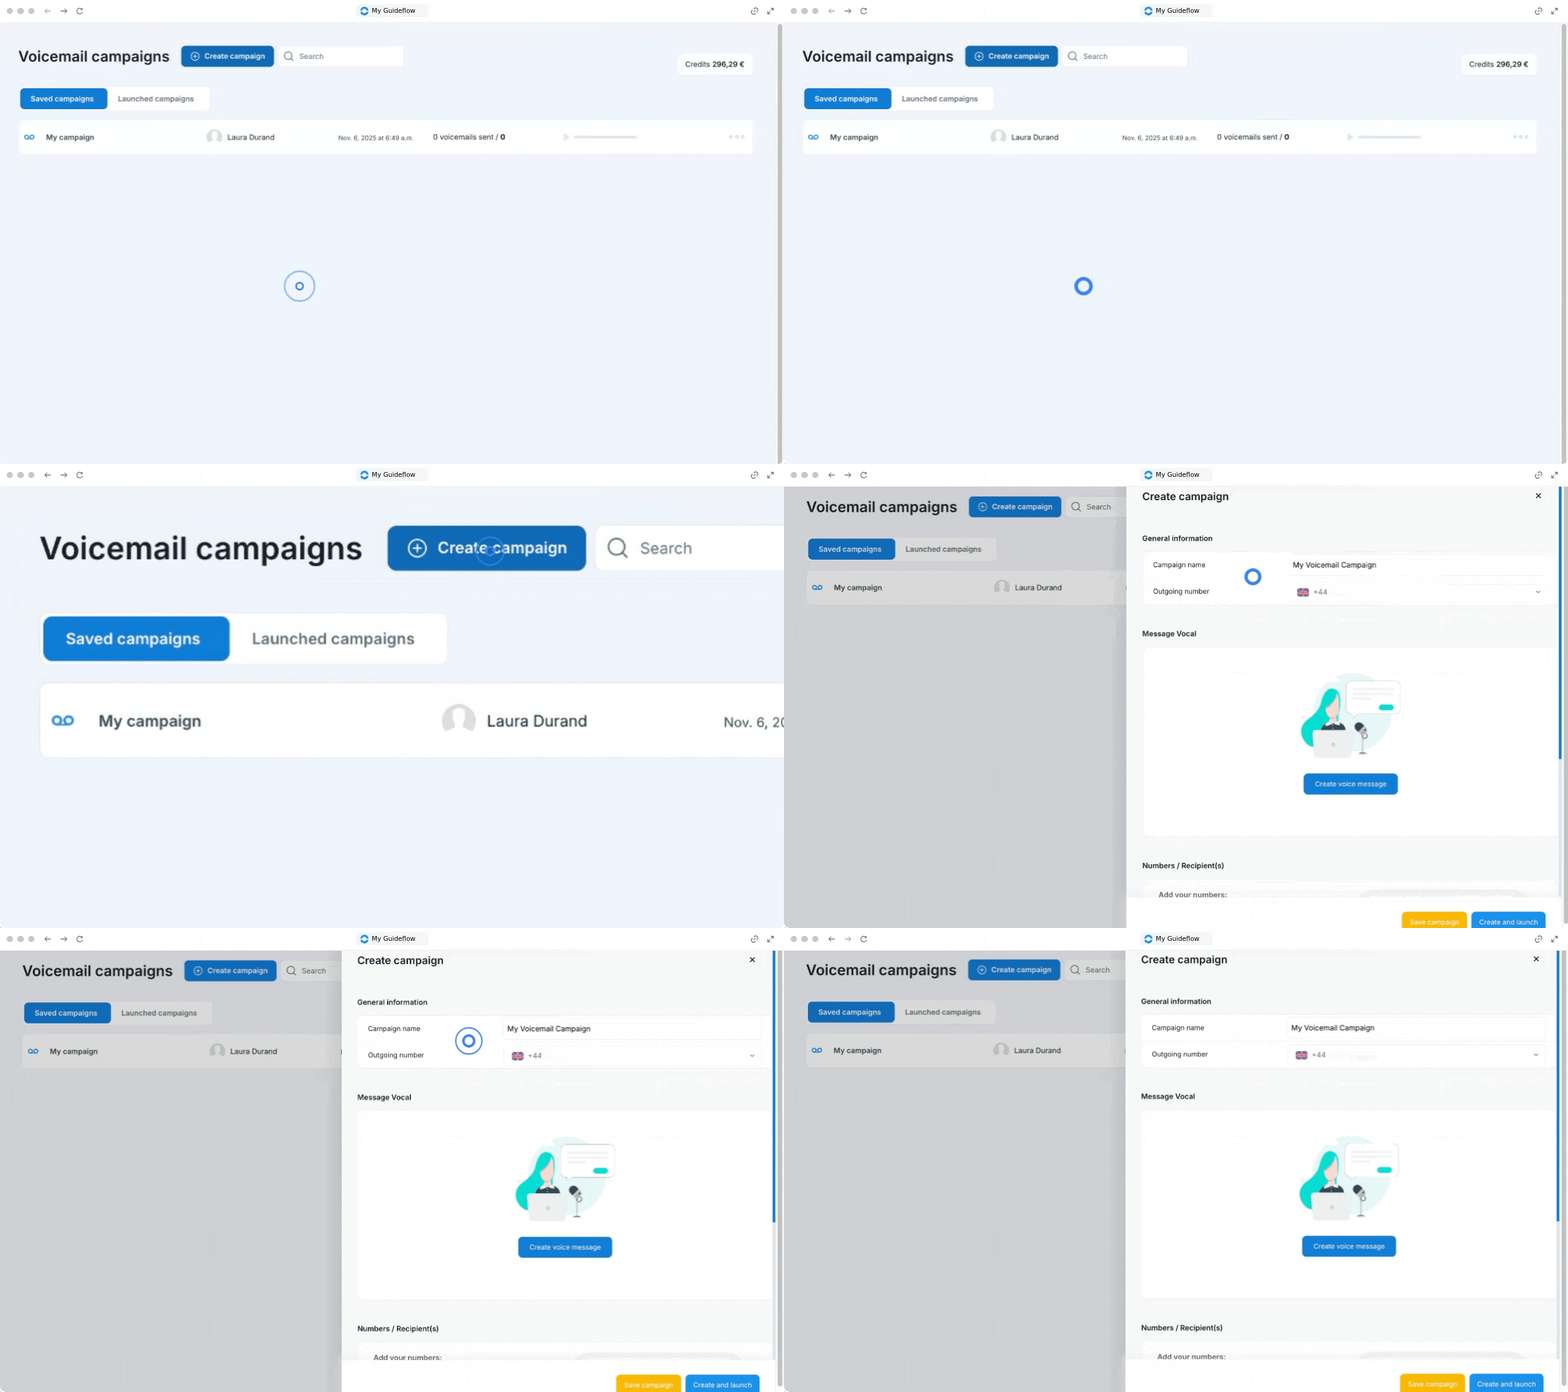
1. Create a new campaign
Begin by setting up the basic details for your outgoing campaign.
- Go to voicemail campaigns.
- Click on create campaign.
- Give your campaign a name.
- Select a phone number.
2. Configure your voice message and contacts
Set up the audio message your recipients will hear and choose who will receive it.
- Click to create a voice message.
- Select whether to use AI assistance or record your own voice.
- Choose whether or not to add background music.
- Enter the name of your audio file.
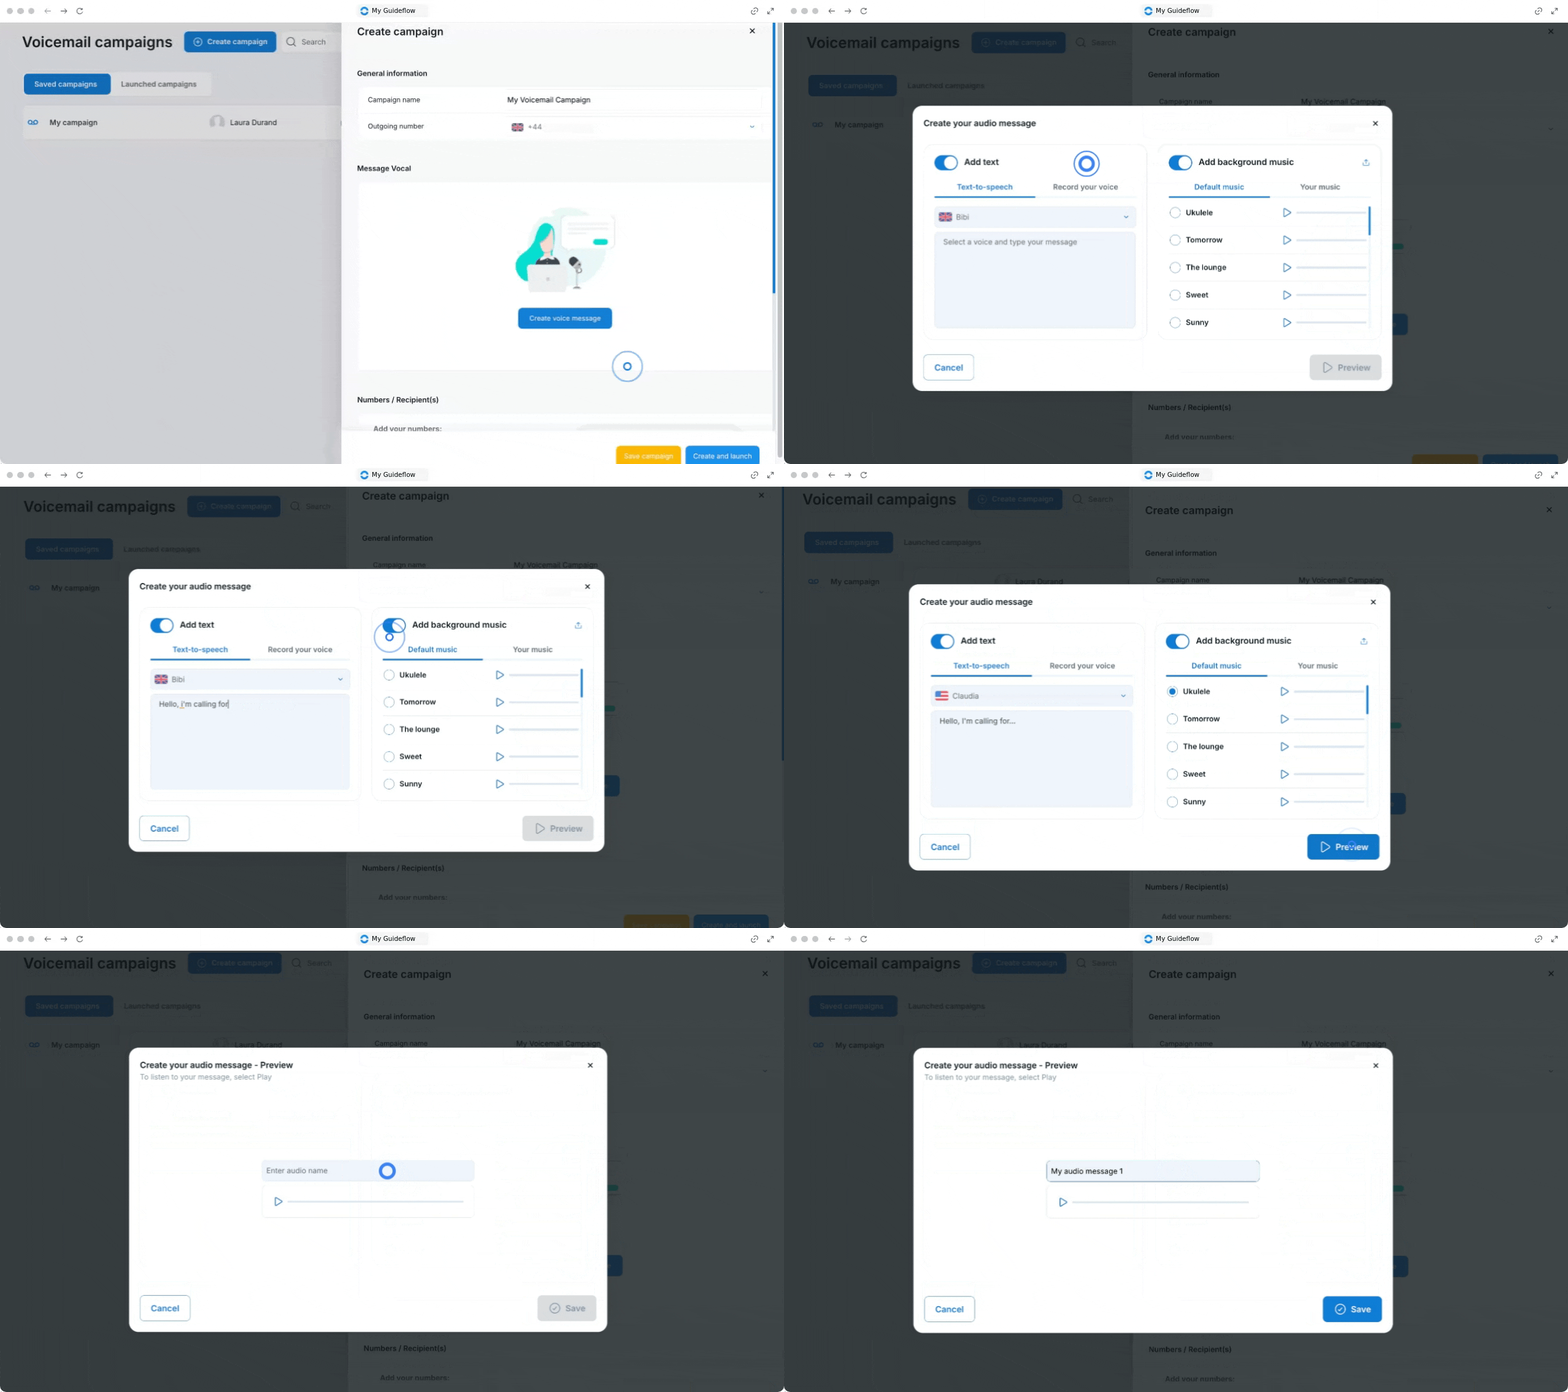
- Add your contacts either by uploading a file or manually.
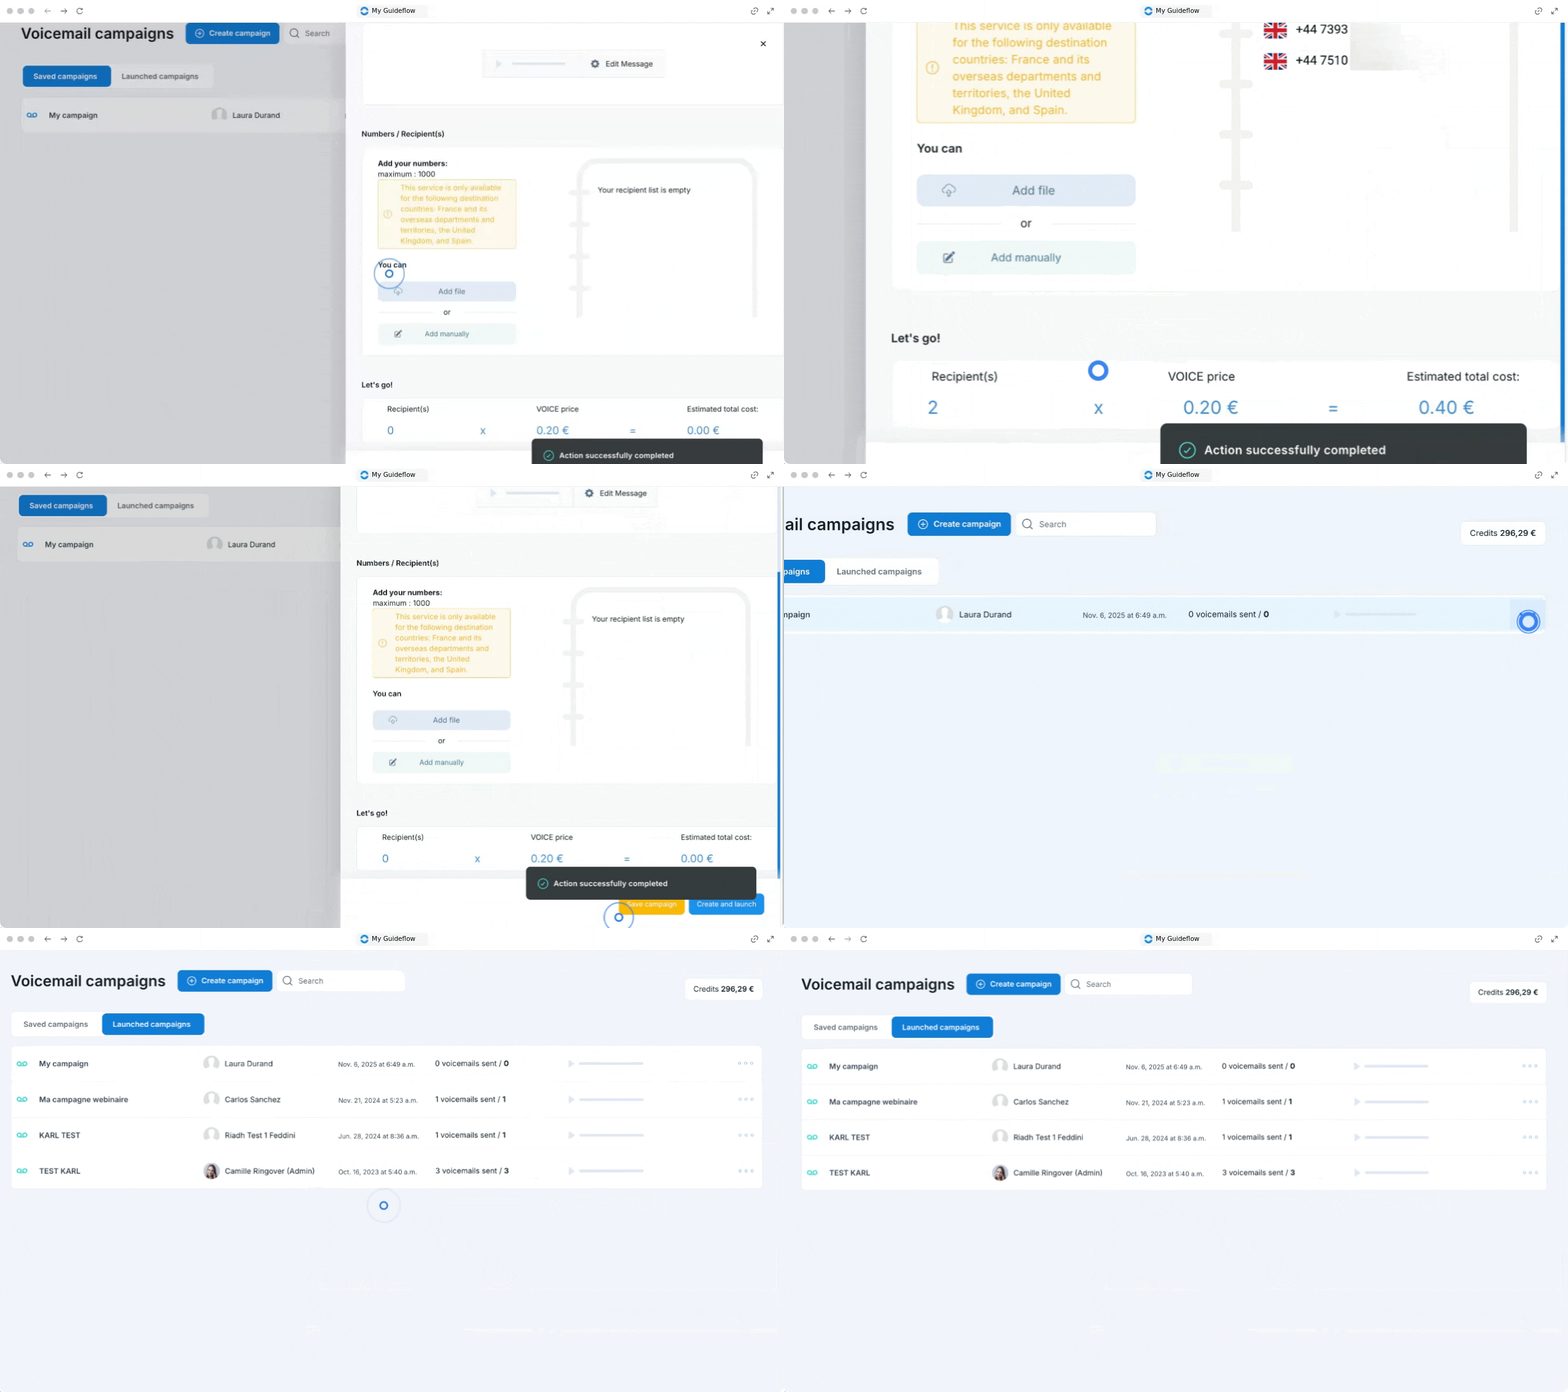
Enter or import the numbers you want to receive the message, separated by a comma or on a new line (maximum of 1000 recipient numbers per campaign).
By selecting “Clean up the list” (bin icon), you can delete all wrong numbers. This feature should be used only to remove invalid numbers.
The cost of your campaign is automatically updated in line with the number of Voicemails sent (1 Voicemail = €0.20).
Click on “Create and launch” to send your Voicemail campaign.
3. Save and launch your campaign
Once your campaign is prepared, you can save it as a draft or launch it right away.
- Click to save a draft of your campaign.
- Go to saved campaigns to find your draft.
- Click the three dots.
- Click to launch it.
Afterward, you can find and track your newly launched campaign directly in the launched campaigns list.
Q&A
1. How do I send a voice message to someone?
To send a voice message, you first need to record it. You can access this feature in the “create a new campaign” menu. You have the option to listen to the message and re-record it if necessary. Next, you just need to provide your recipients' numbers by importing a list. Ringover allows you to clean up your list and remove incorrect numbers and those not located in mainland France. Finally, just click "launch the campaign" to send the message.
2. How do I send a voice message without calling?
As an individual, it is generally necessary to go through your operator's voicemail server to send a voice message without calling. Typically, the user must dial the server's number, then it prompts them to enter the recipient's phone number. The user can then leave their message. With Ringover, all this is simplified. Just record the message to be sent, select the recipient's phone number(s), and send your message. There is no need to go through an operator or third-party service.
3. How do I send a voice message with my iPhone?
You need to switch to Ringover's web app to launch your voice message campaigns. You can do this from your iPhone by going to app.ringover.com. Your dashboard is also available on mobile at the following address: dashboard.ringover.com.