
The CRM Autofill Add-on helps your team work smarter, not harder.
Powered by AI-driven conversation analysis, this smart add-on automatically detects and fills relevant CRM fields based on your call transcripts.
This means your sales and support reps can stay focused on engaging leads and customers, while repetitive and time-consuming data entry is handled automatically.
Currently available for Salesforce (non-customized integrations), Bullhorn, Bullhorn for Salesforce, HubSpot, Zoho CRM, Odoo, Microsoft Dynamics, Sellsy, TargetRecruit, the CRM Autofill is designed to streamline your workflow and save your team hours of manual input. Support for additional CRMs is coming soon.
1. How to activate the CRM Autofill Add-on
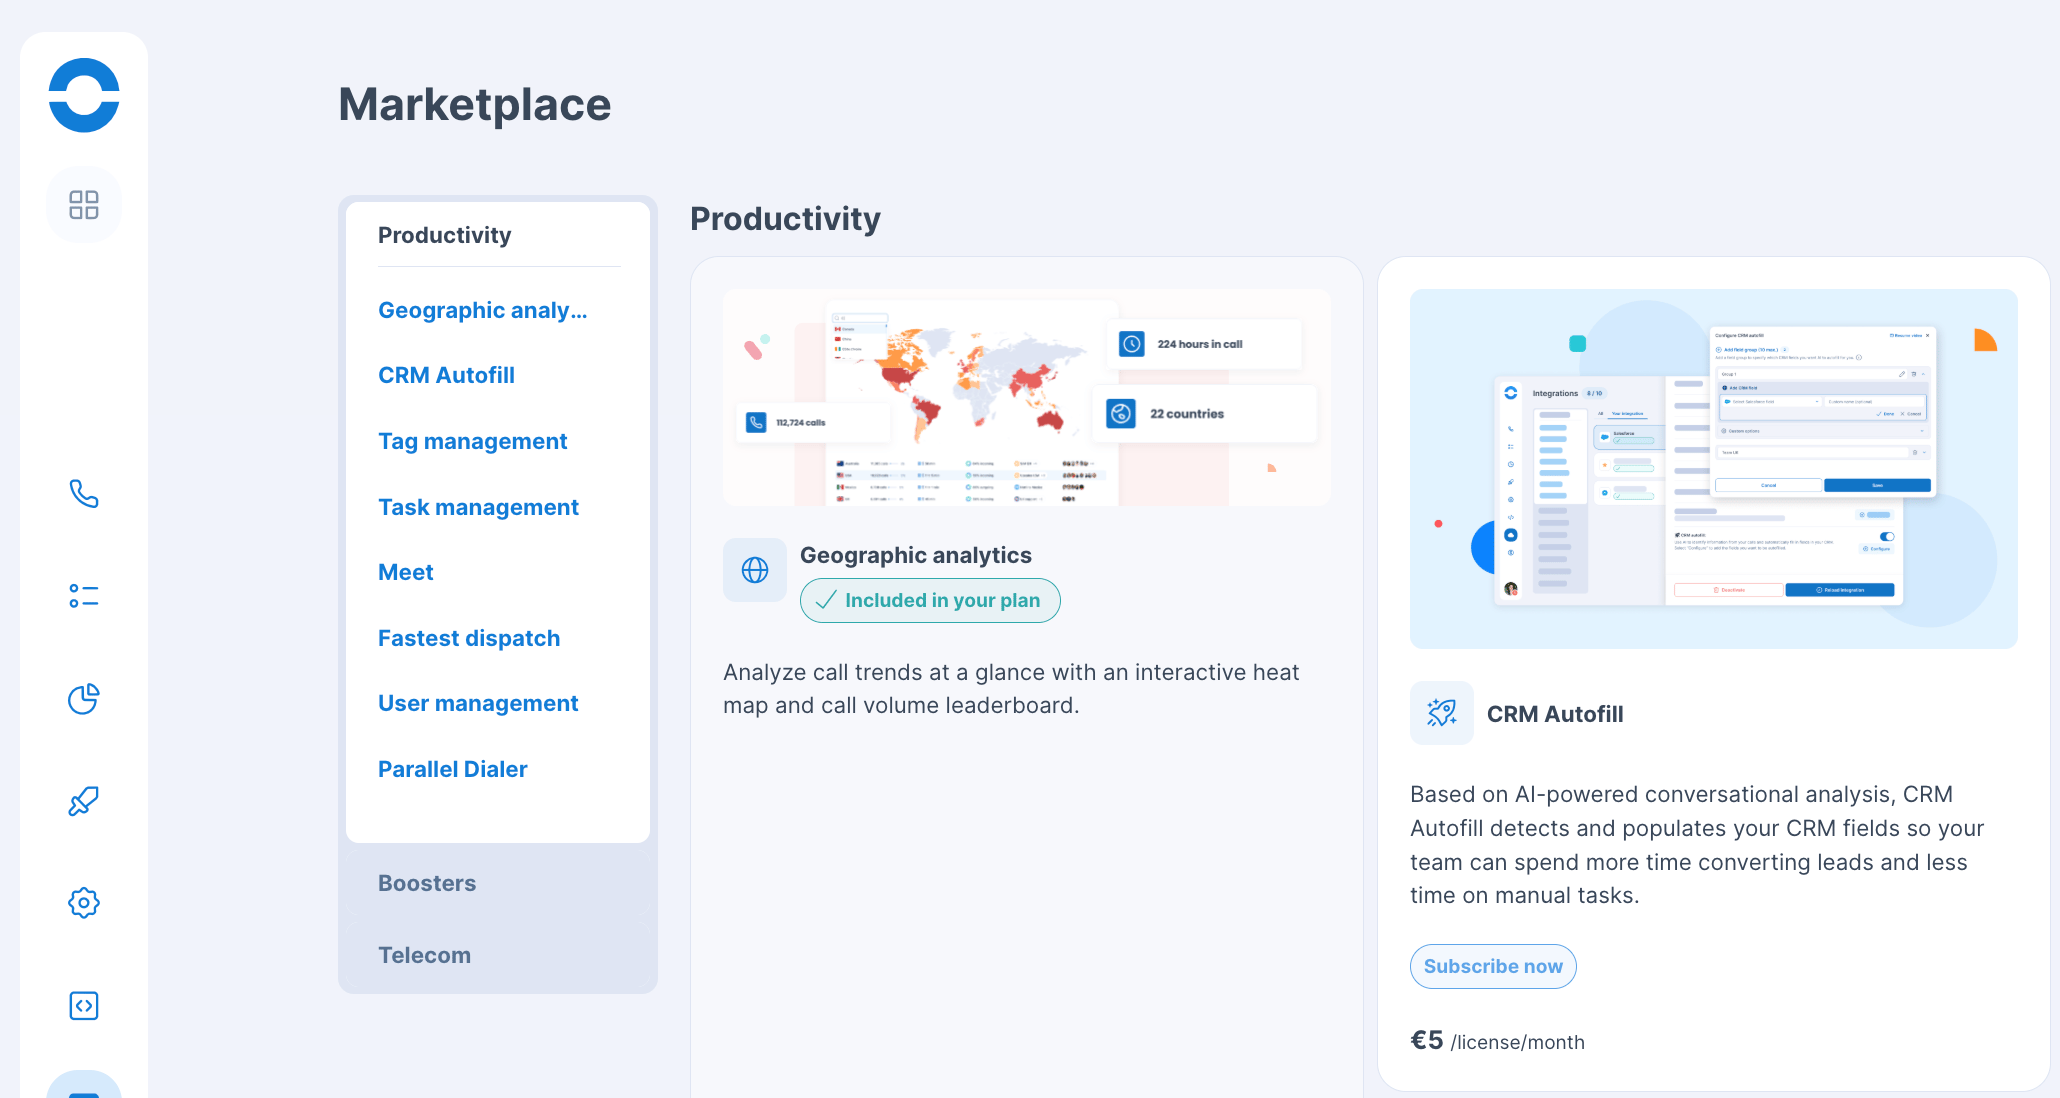
- Visit your Dashboard > Marketplace.
- In the Productivity section, click on "CRM Autofill".
- Click "Buy now".
2. How to configure the CRM Autofill Add-on
- Once you have purchased the Add-on, go to the Integrations page.
- Click on the "Your integrations" tab.
- Click on a supported CRM (eg. Salesforce):
Scroll down to the bottom of the CRM configuration settings panel, until you reach the "CRM Autofill" section.
- Turn on the toggle to activate the Autofill settings.

- You will be presented with the configuration modal:
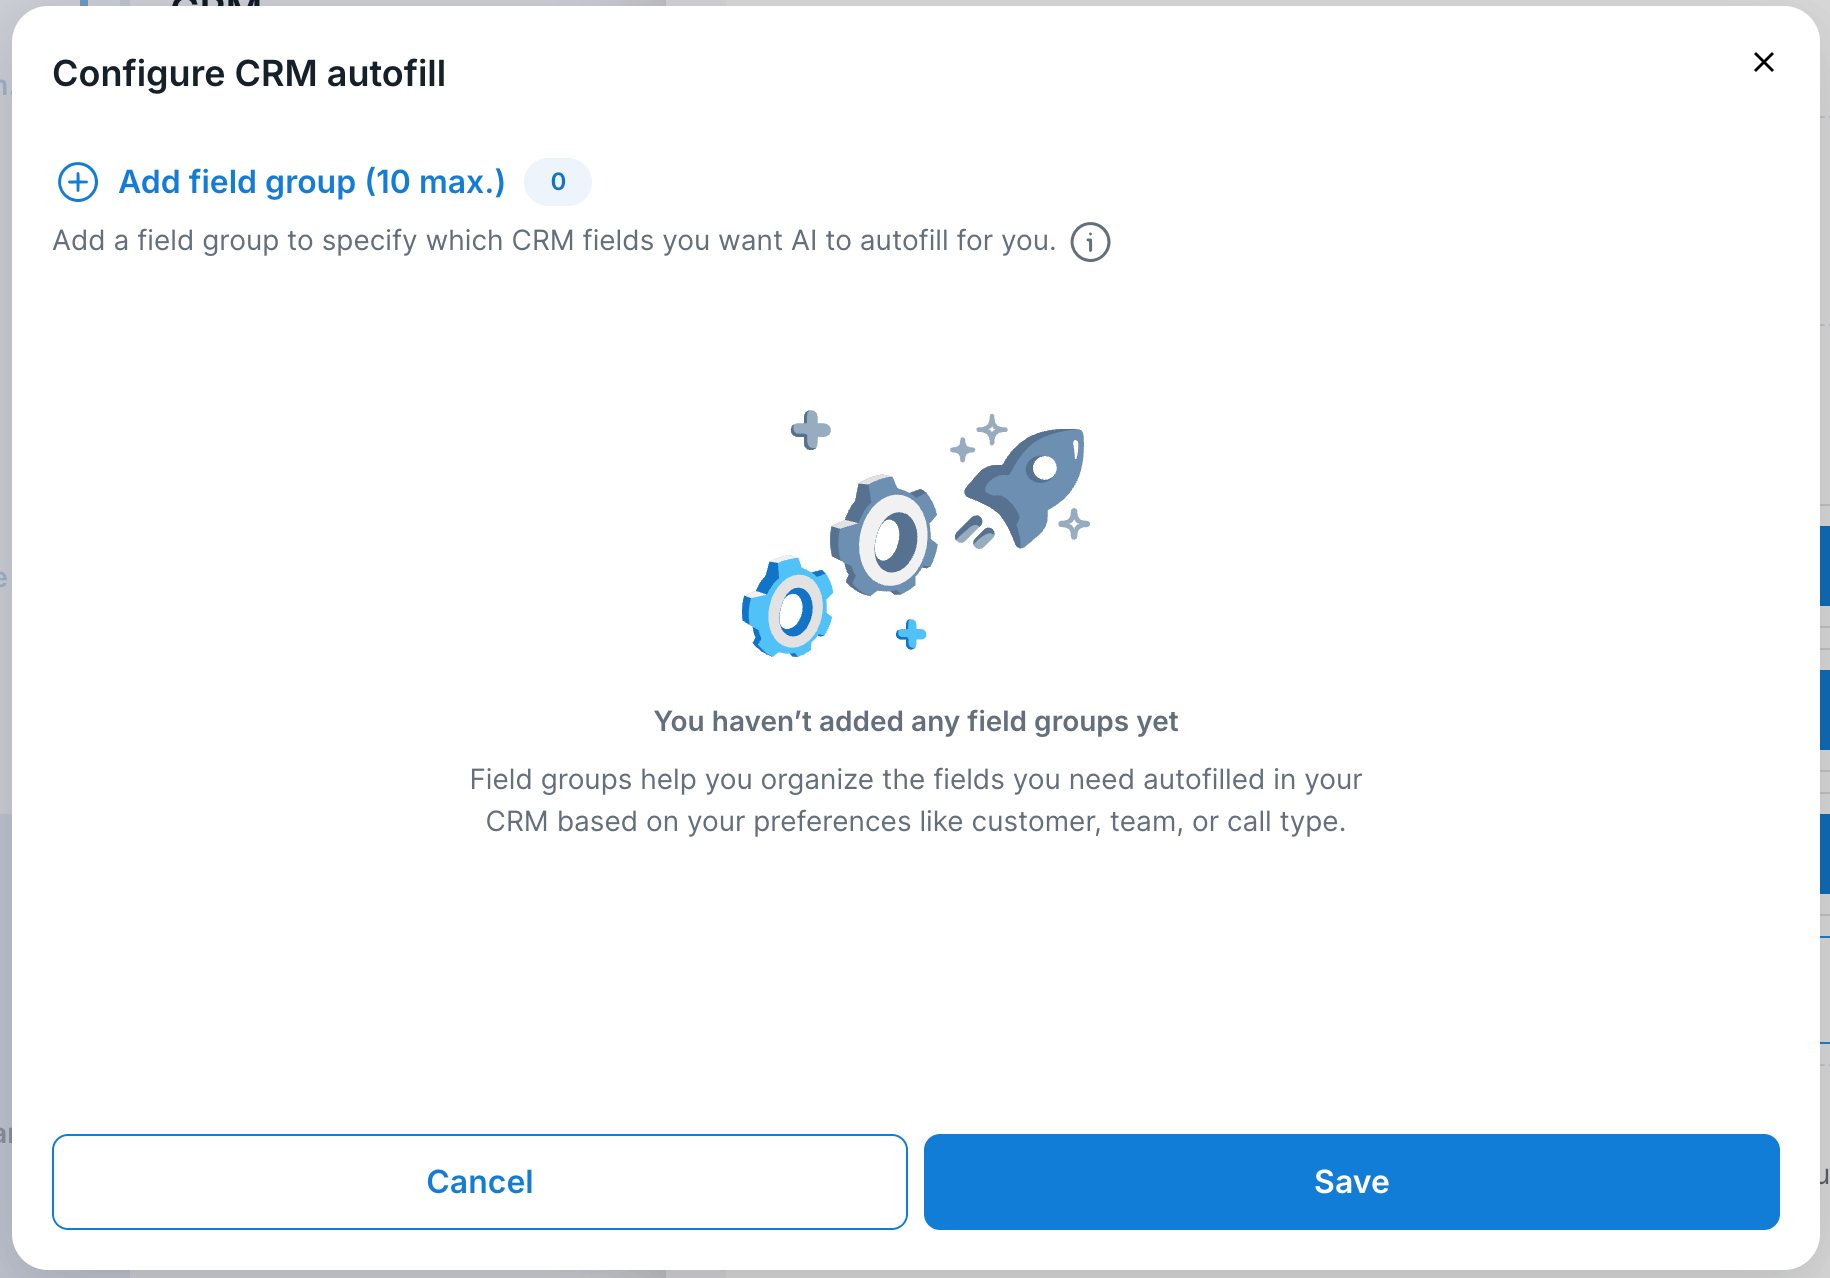
Step 1. Add a field group
💡 Field groups allow you to save specific configurations tailored to different use cases.
For example, you can create a field group named "SDR calls" to extract information from your sales representatives’ discussions with prospects.
Later, you might create another field group for your Support team, with different autofill settings that target a separate set of CRM fields and use distinct prompts to extract relevant information.
Let’s start by typing "SDR calls" in the Field group as an example:
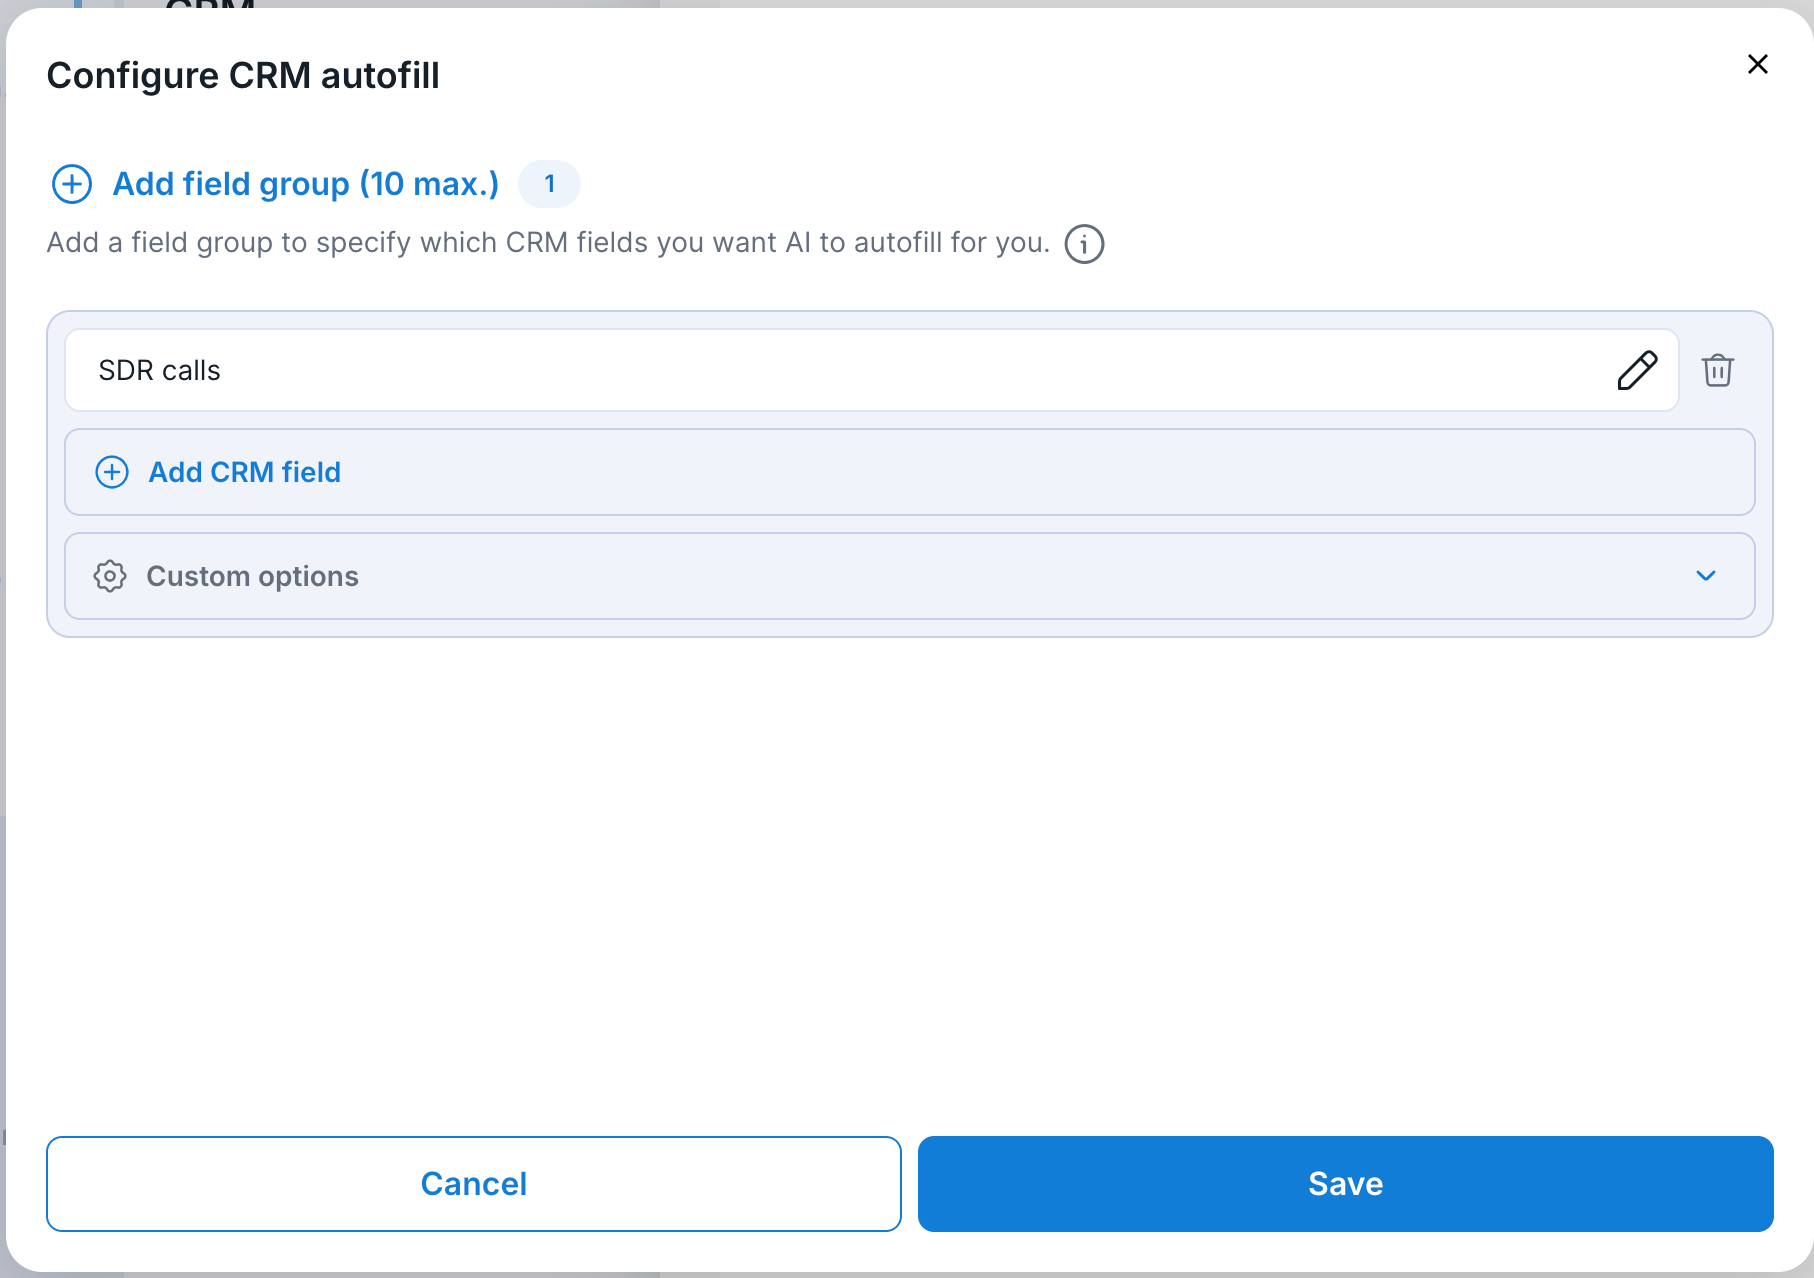
Step 2. Add a CRM field
- Next, click on "+ Add CRM field" and a submenu will open.
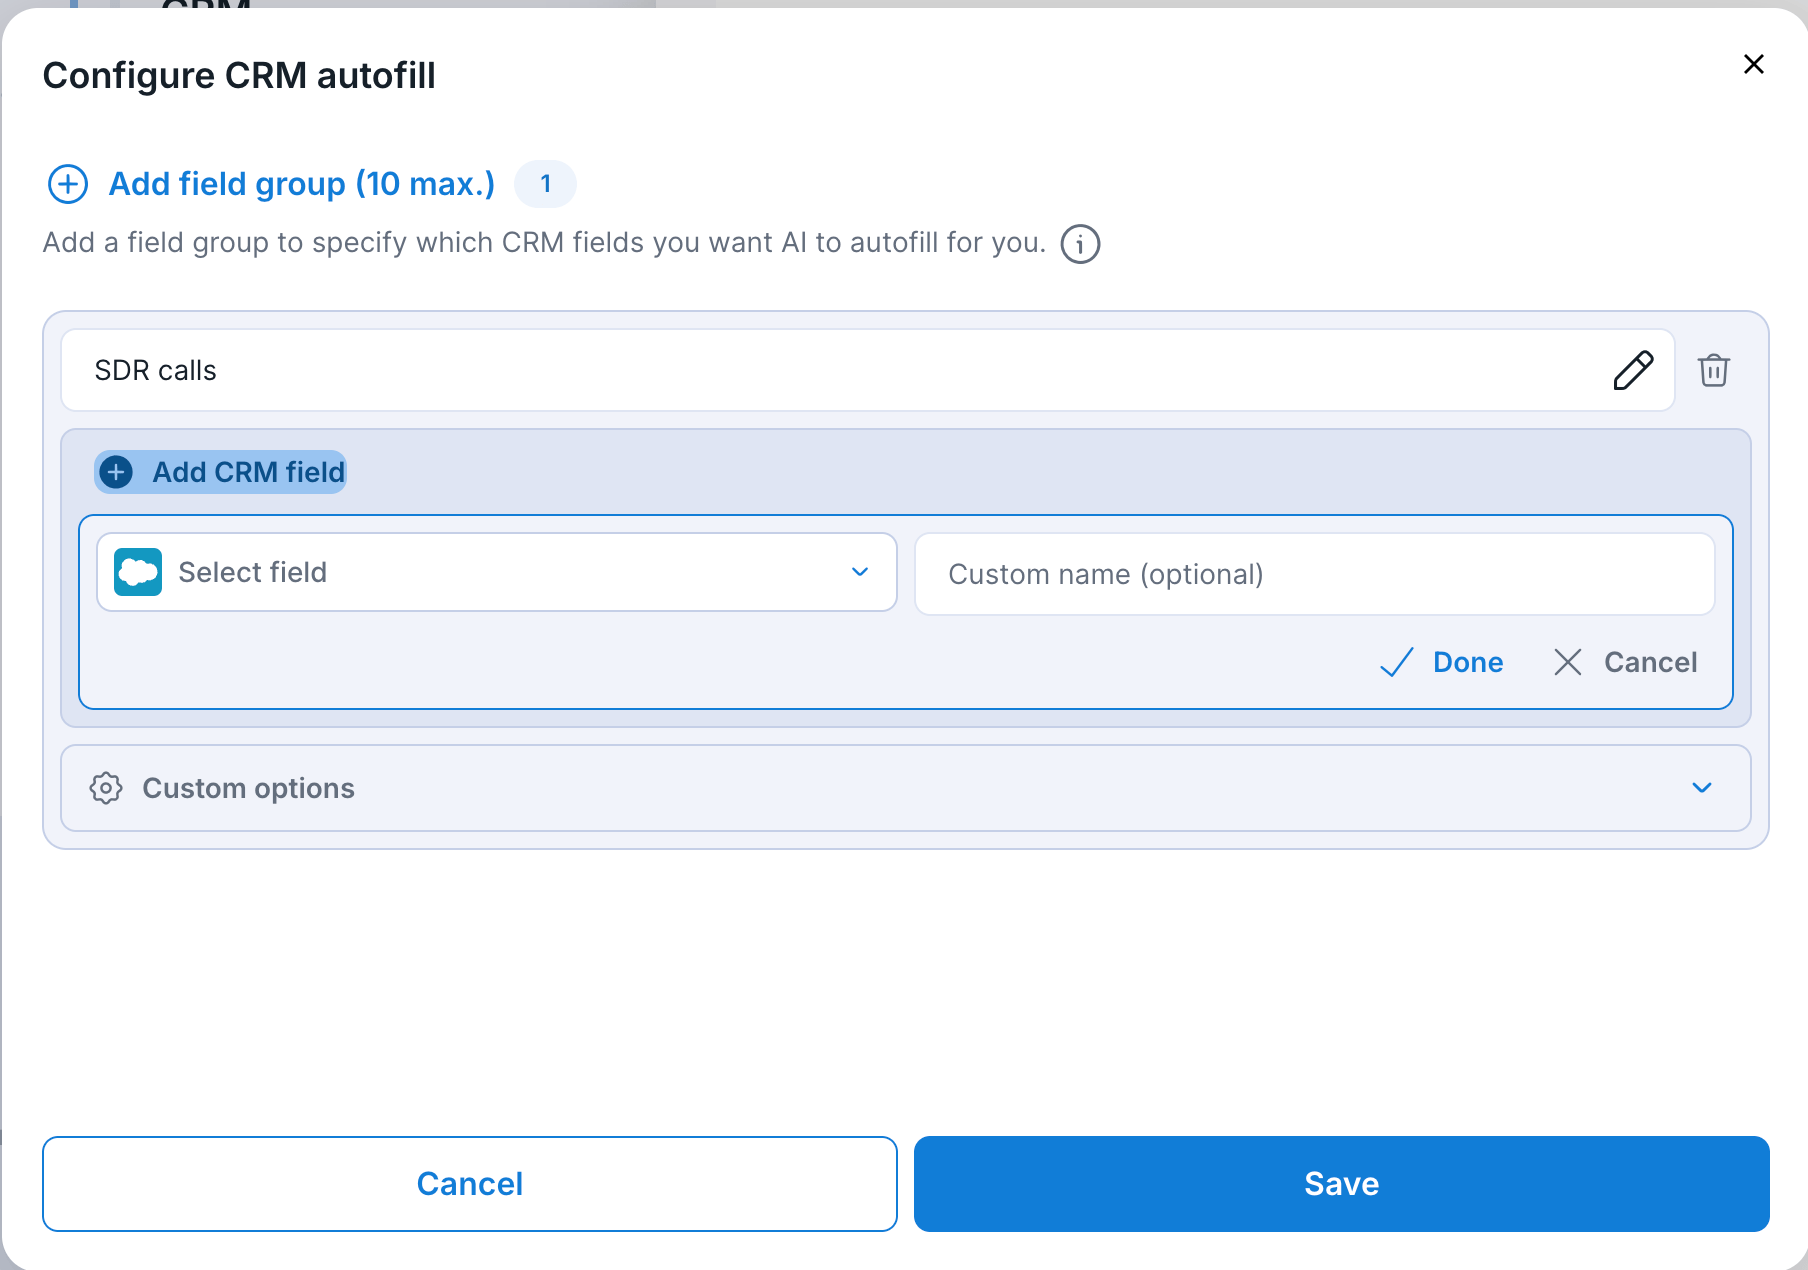
- You can pick your CRM field in the left hand selector.
- Then you can give it a name in Ringover in the right field.
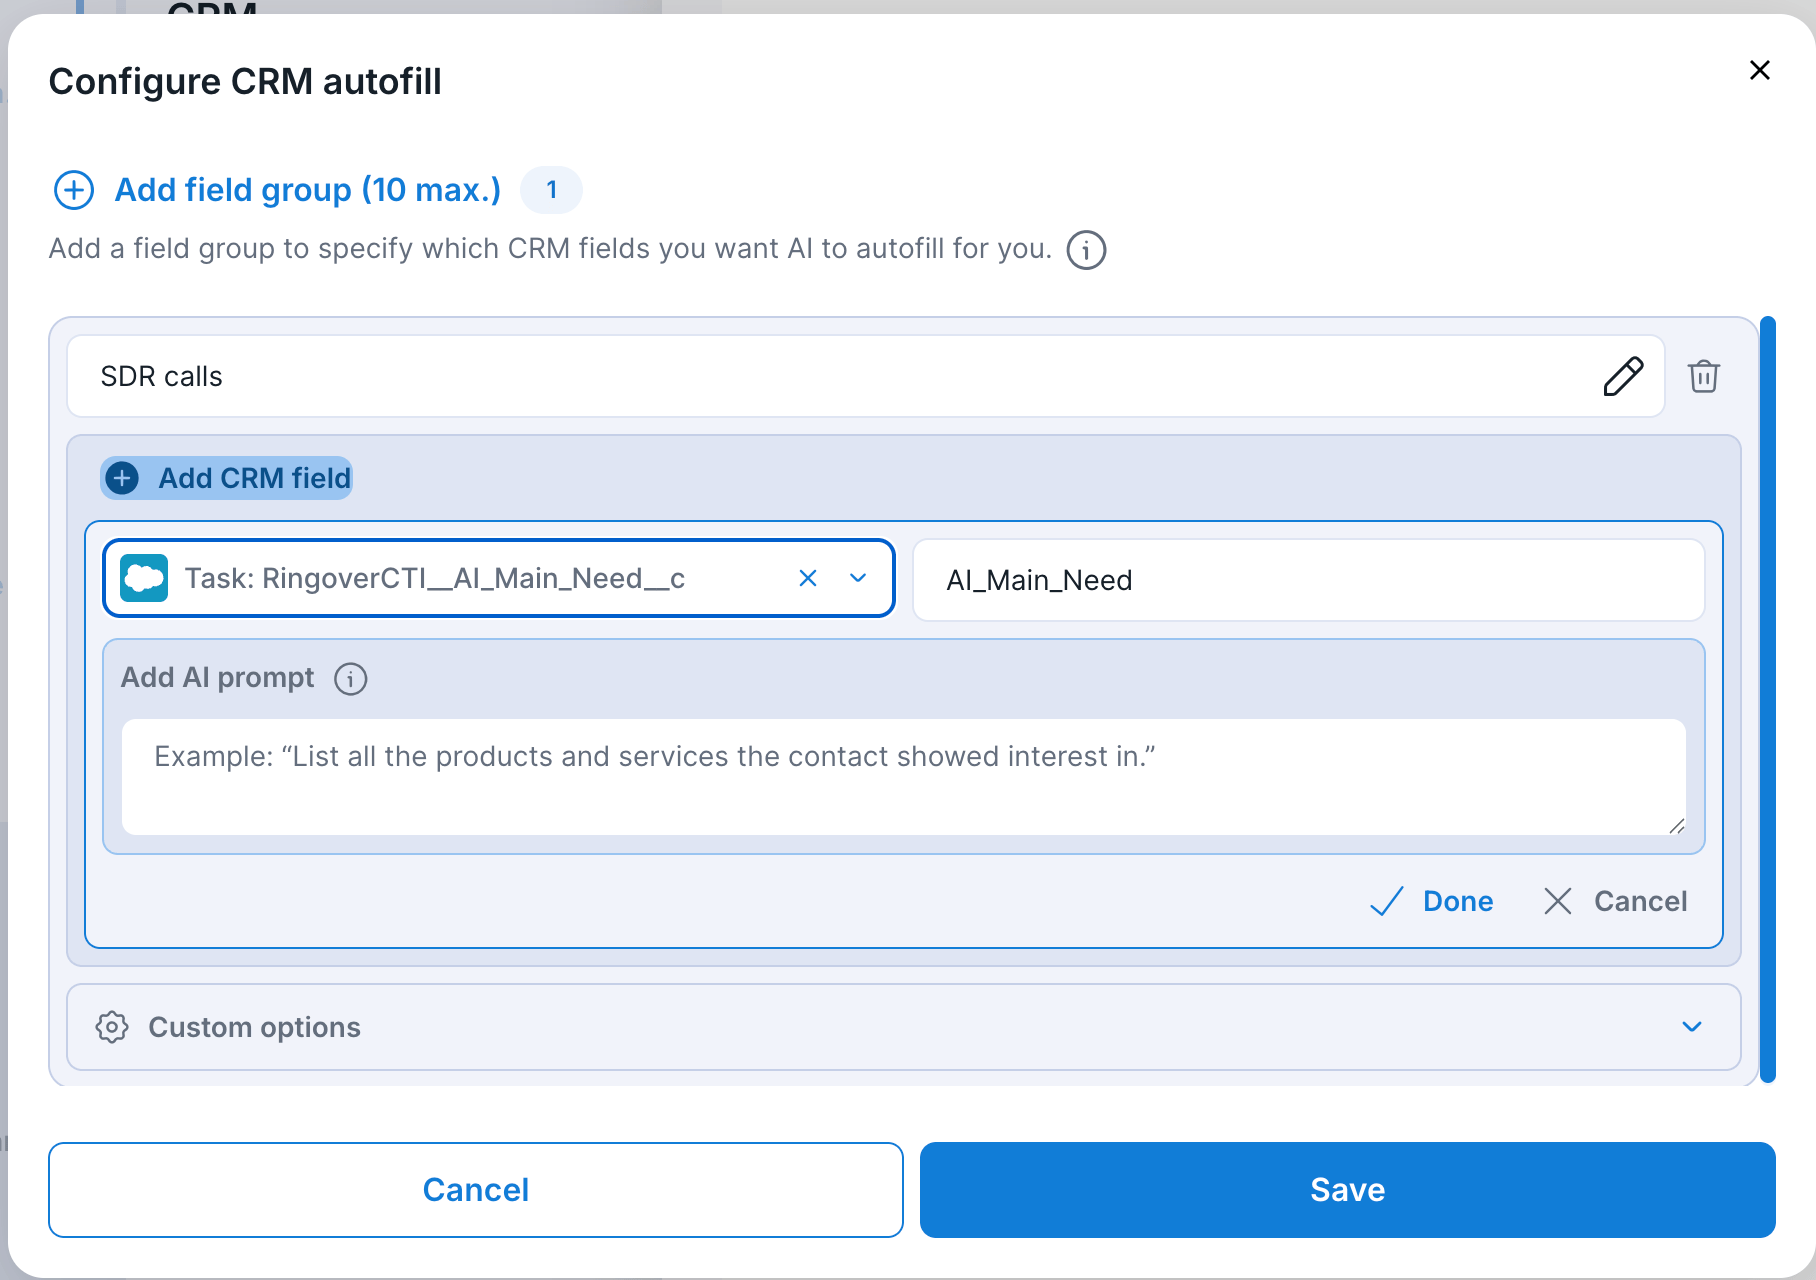
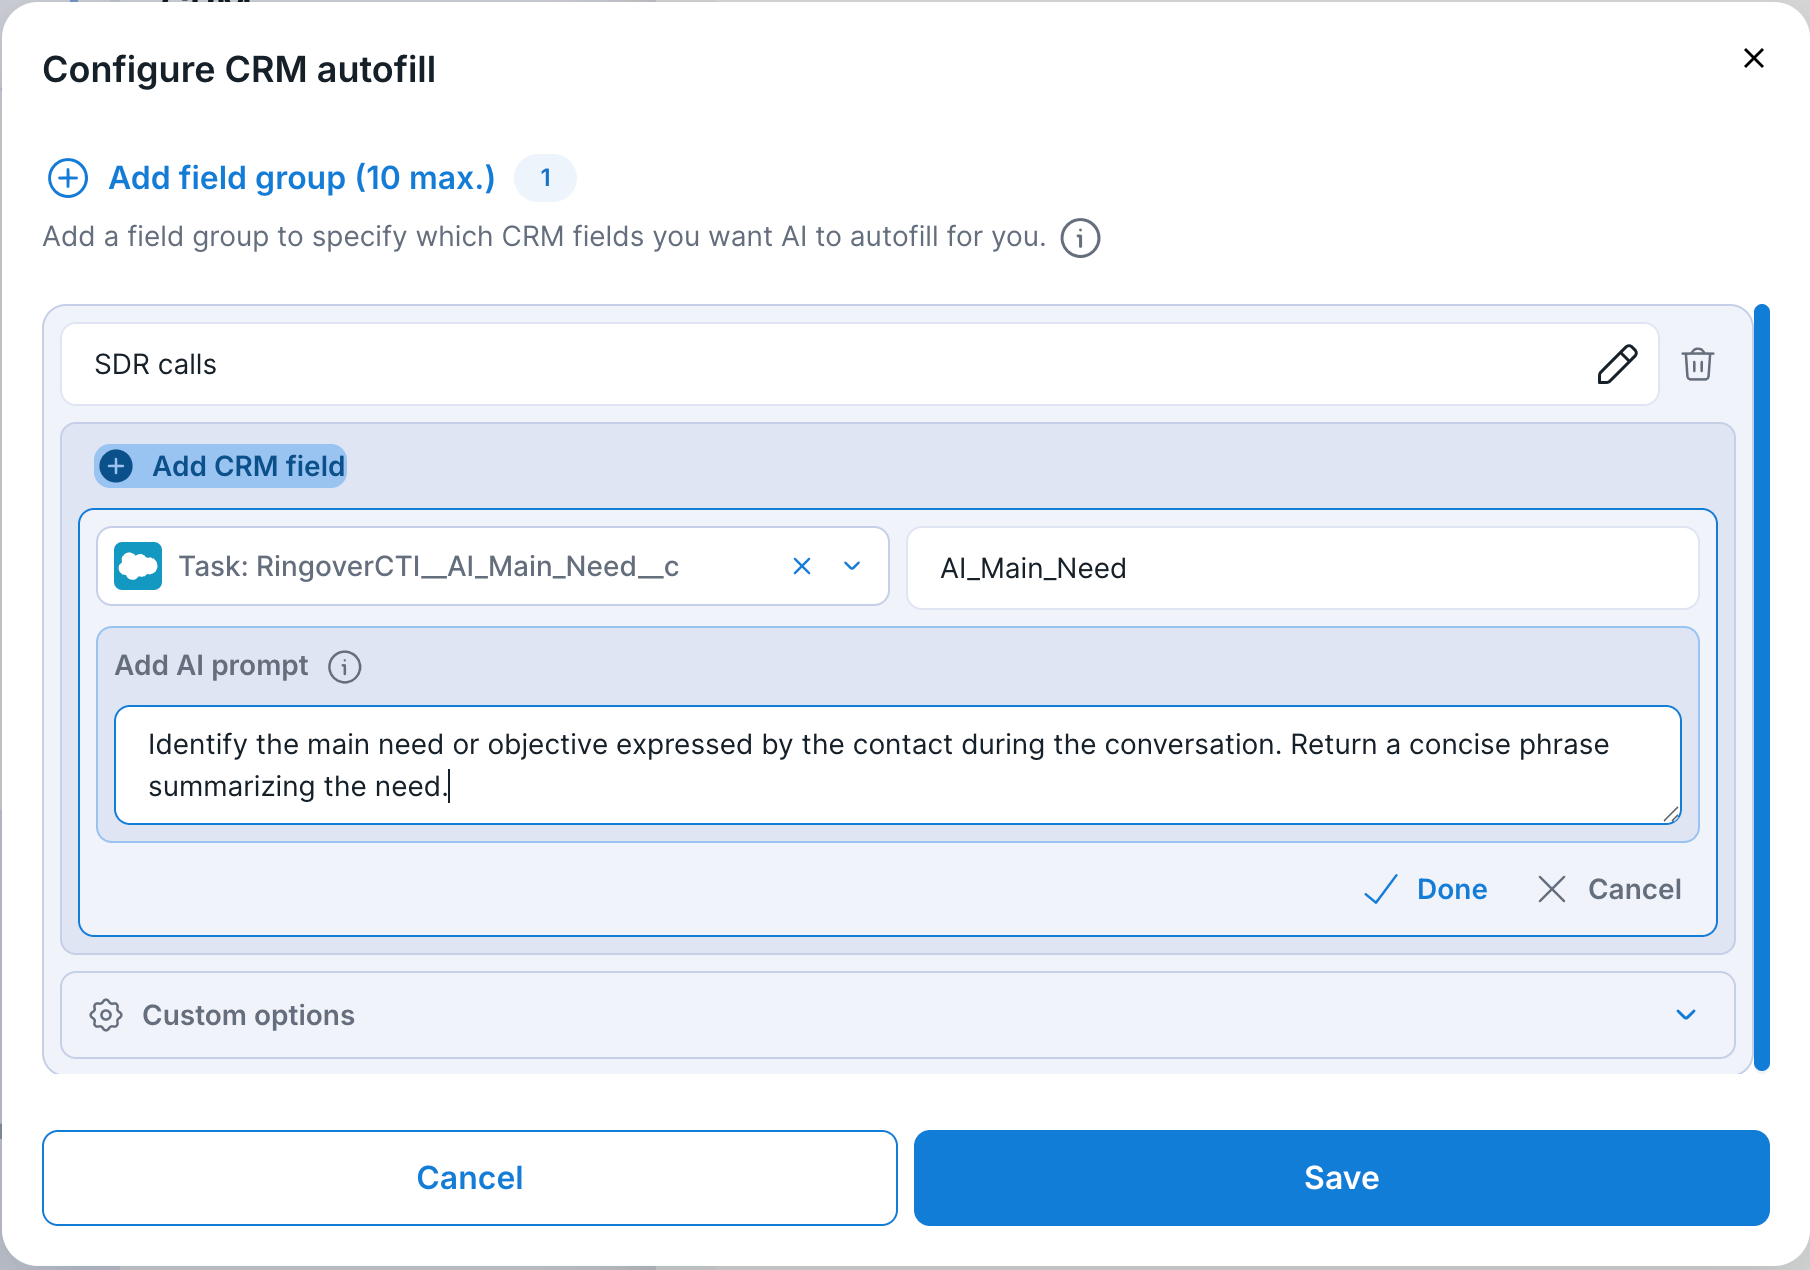
In this example, we select a Task custom field in Salesforce meant to capture the prospect's main need and named it "AI_Main_Need" in Ringover.
💡 Supported objects (for Salesforce):
- Lead
- Contact
- Account
- Task
💡 Supported field formats (for Salesforce):
- Text
- Date/time
- Boolean (yes/no)
- Single picklist
- Multi picklist (a dropdown allows you to detect only specific values among the list, if needed)
🟦 When Autosave is OFF (default setting):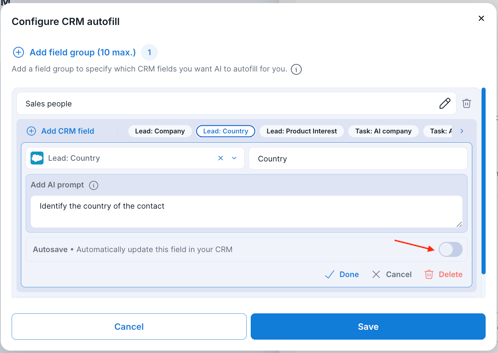
Users can review detected values before updating the CRM.
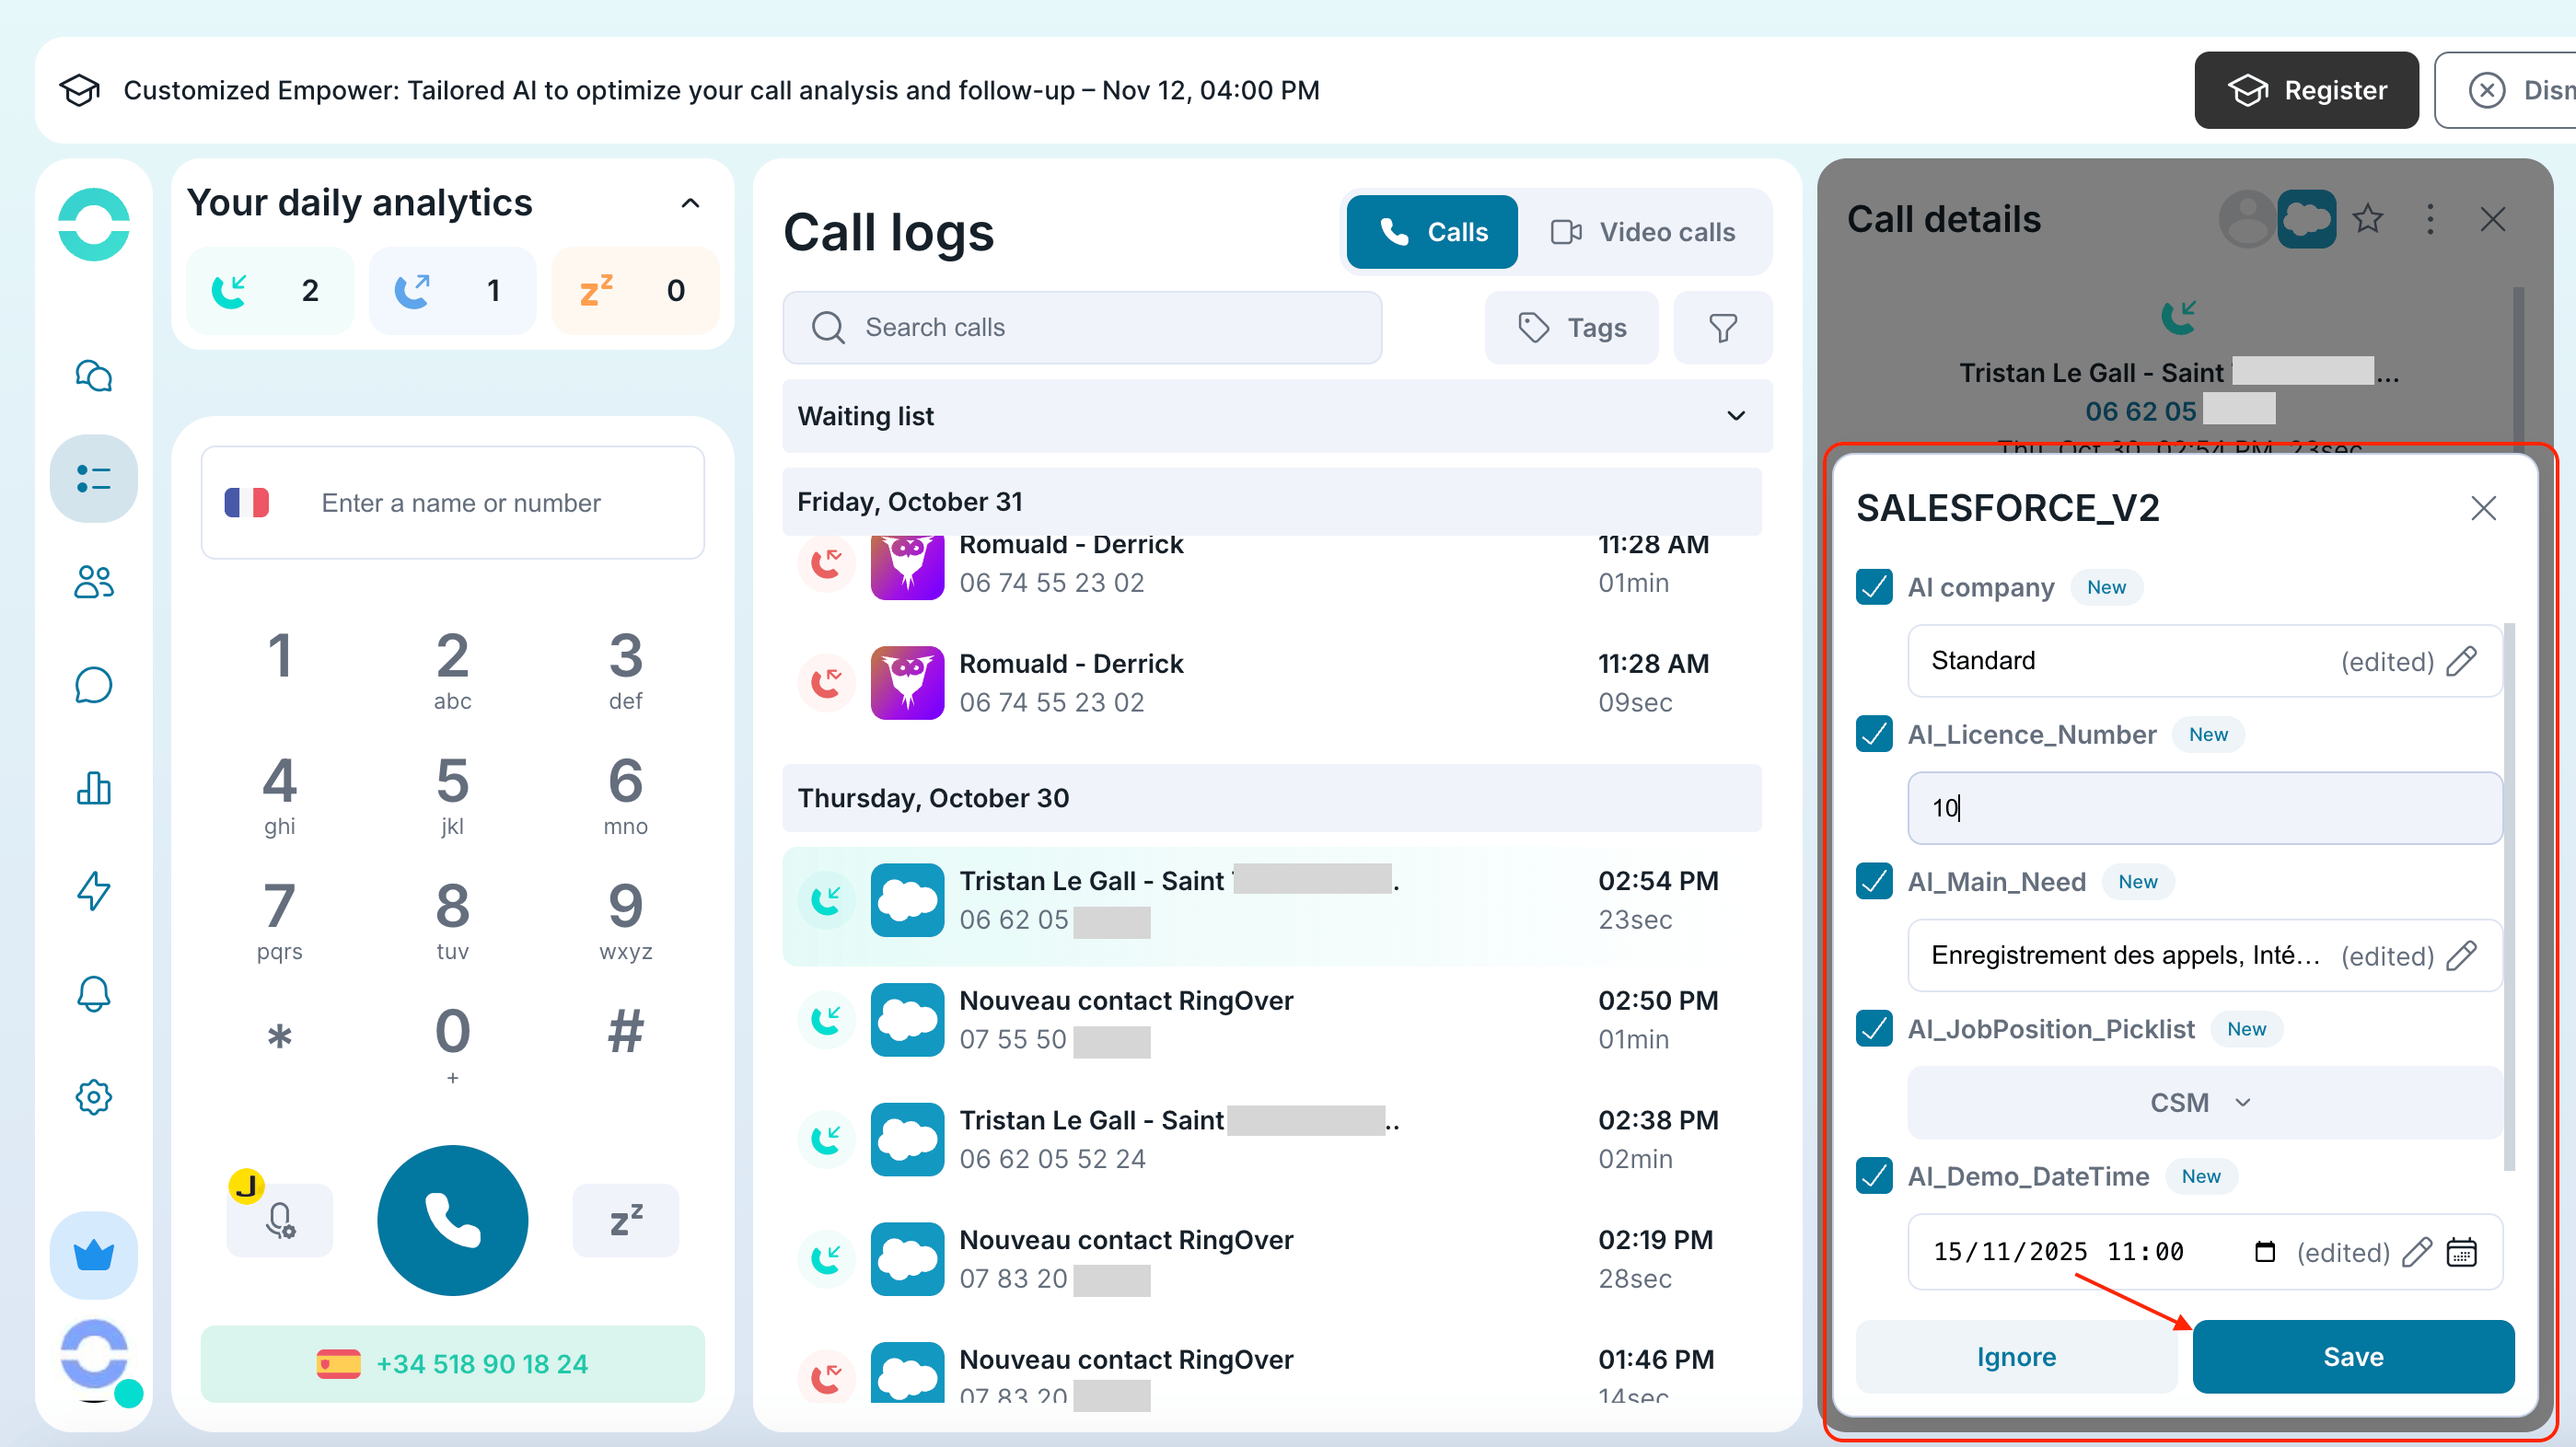
A small CRM Autofill button appears in the call log whenever relevant information is found.
Click it to open the review form, check or edit the suggested values, then tick the fields you want to push and click Save to update your CRM manually.
🟦 When Autosave is ON (manually enabled):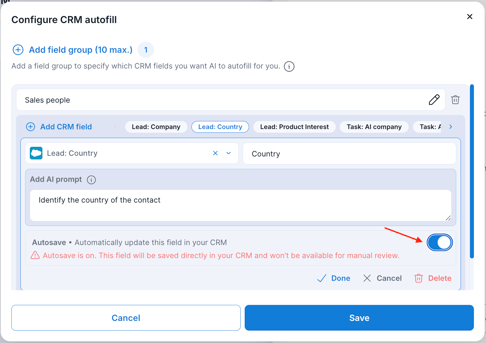
If Autosave is intentionally turned on, the detected value will be automatically inserted into the CRM without manual confirmation.
Step 3. Add a prompt
Next, we're going to add the following prompt to detect the prospect's need expressed during the call, thanks to Ringover's AI.
⚠️ Prompt guidelines:
- For best results, write one clear instruction per field, using simple language.
- Be specific about what to extract, when it should be extracted, and what format the response should follow.
- Clarify that if the information is not mentioned, no value should be returned.
- The information will be returned in the language of your prompt
Below is a list of prompts that will work efficiently in a context of prospecting calls.
| Field name | Prompt |
| Meeting Date | If the conversation is about scheduling a demonstration, then identify the date the contact wants for the demonstration. Only a future date should be returned. |
| Competitor | The name of the competitor’s service or provider currently used by the contact. If none is mentioned, do not return anything. |
| Job position | The job title or role of the contact if it is mentioned during the conversation. If it is not shared, do not return any value. |
| Number of licences | The number of licenses the contact wants to purchase, if mentioned during the call. Return only the number. |
| Conversation | Determine whether the contact is a real human engaged in a live conversation. If so, return ‘Yes’. If the call was a voicemail, answering machine, or automated response, return ‘No’. Return only a Boolean value: Yes or No. |
| Remaining Commitment Period | Identify the remaining contract or commitment period if the contact mentions it during the call. This refers to how much time is left on their current service or vendor agreement. Return the duration (examples: ‘3 months’, ‘until December 2025’). If no commitment period is mentioned, do not return a value. |
| CRM name | The CRM currently used by the contact. If the CRM is not mentioned, do not return anything. |
Click "Done" once you are done editing the field.
- Remember to click "Save" to save your whole configuration at any time.
- Closing the modal will result in losing unsaved configuration.
Step 4. Repeat the operation
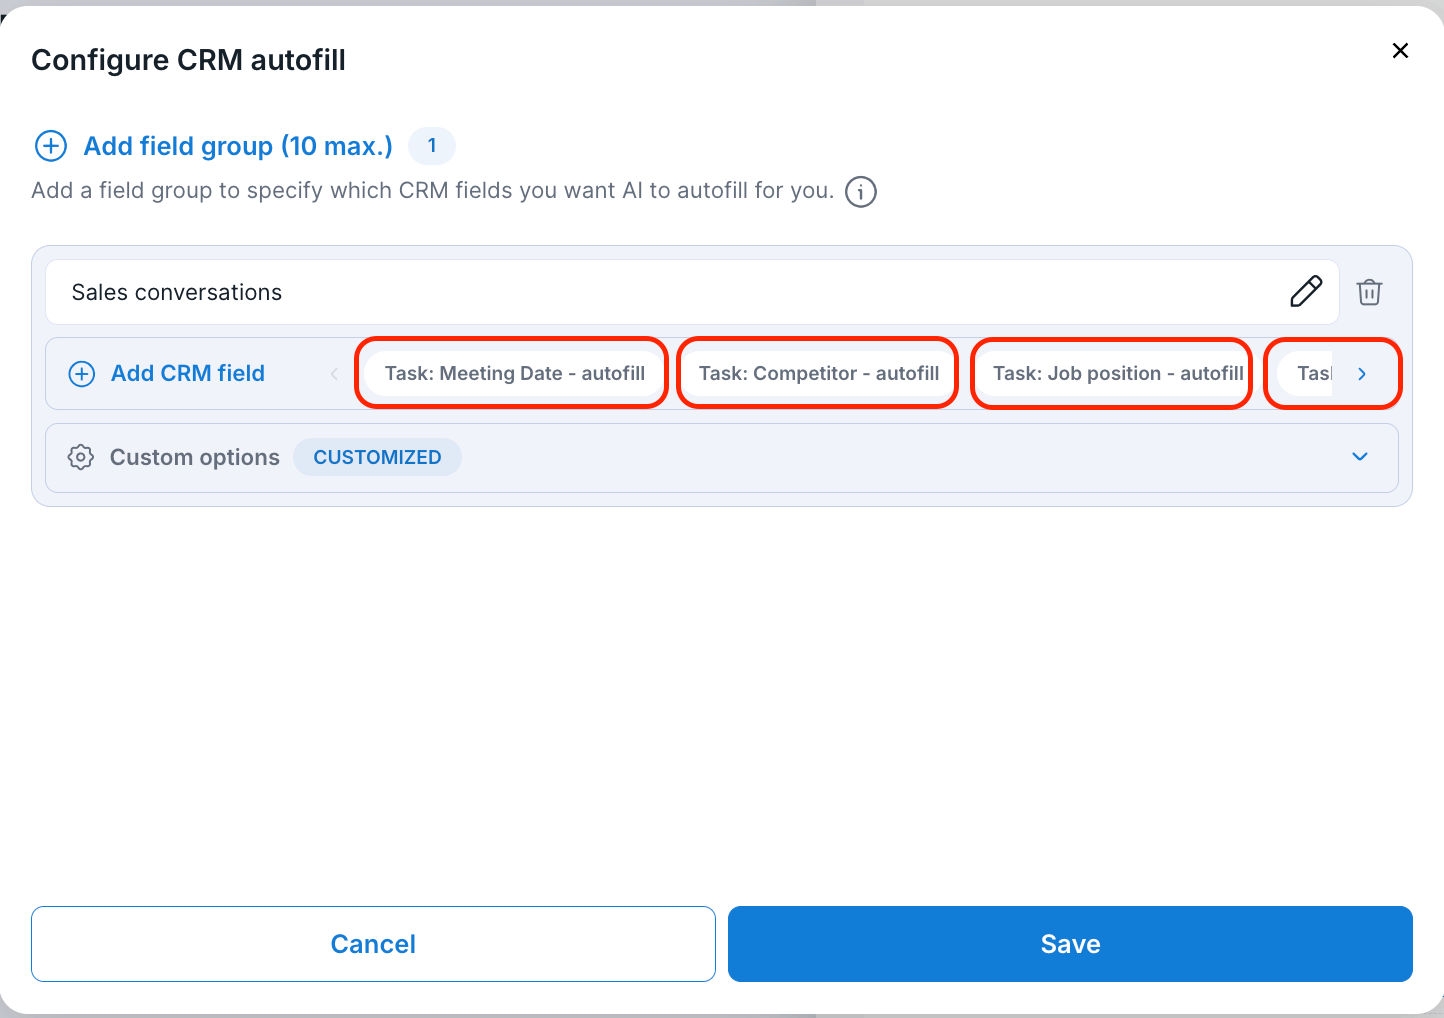
- To add more fields, repeat the operation by clicking on "Add CRM field".
- The fields will be displayed in a horizontal list. Click on any of them to edit or tweak the prompt to your liking.
Step 5. Add custom options (optional)
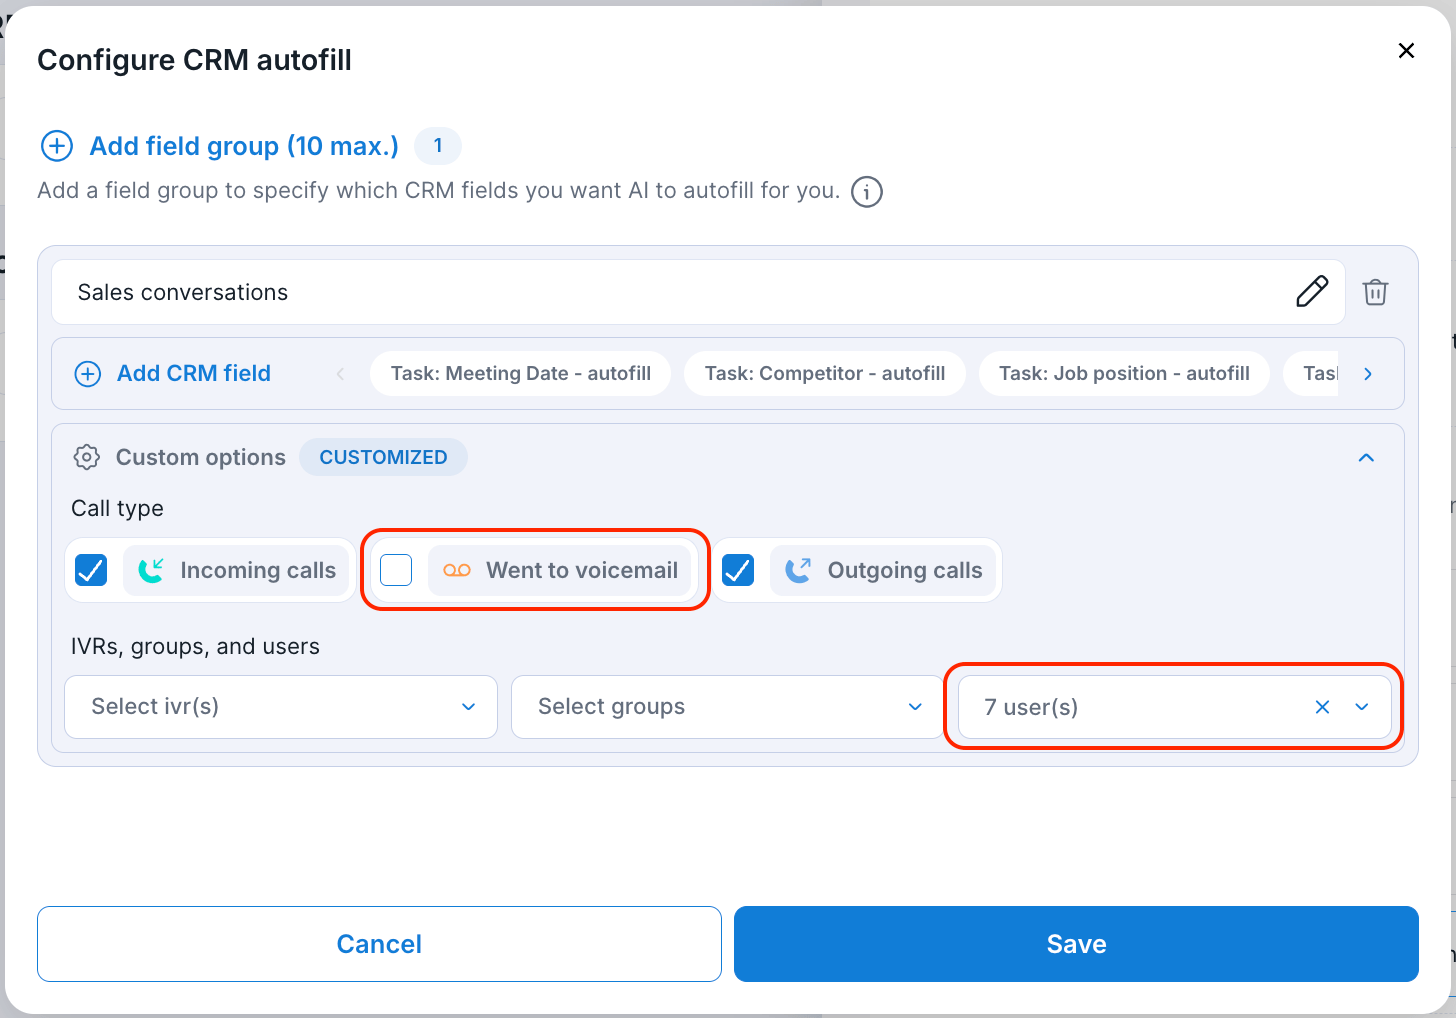
Without custom options being applied, the Autofill will start detecting values across ALL your call types and update your CRM fields across ALL the users who are part of your integration (in this example, users who are mapped in the Dashboard's Integration > Salesforce settings).
You can narrow down the perimeter on which the Autofill is applied by opening the custom options menu:
- Call types: by default 3 types are preselected (Incoming calls, Went to voicemail, Outgoing calls)
- IVRs: by default none are selected
- Groups of users: by default none are selected.
-
Users: by default, all are selected. You must select specific users to restrain the selection.
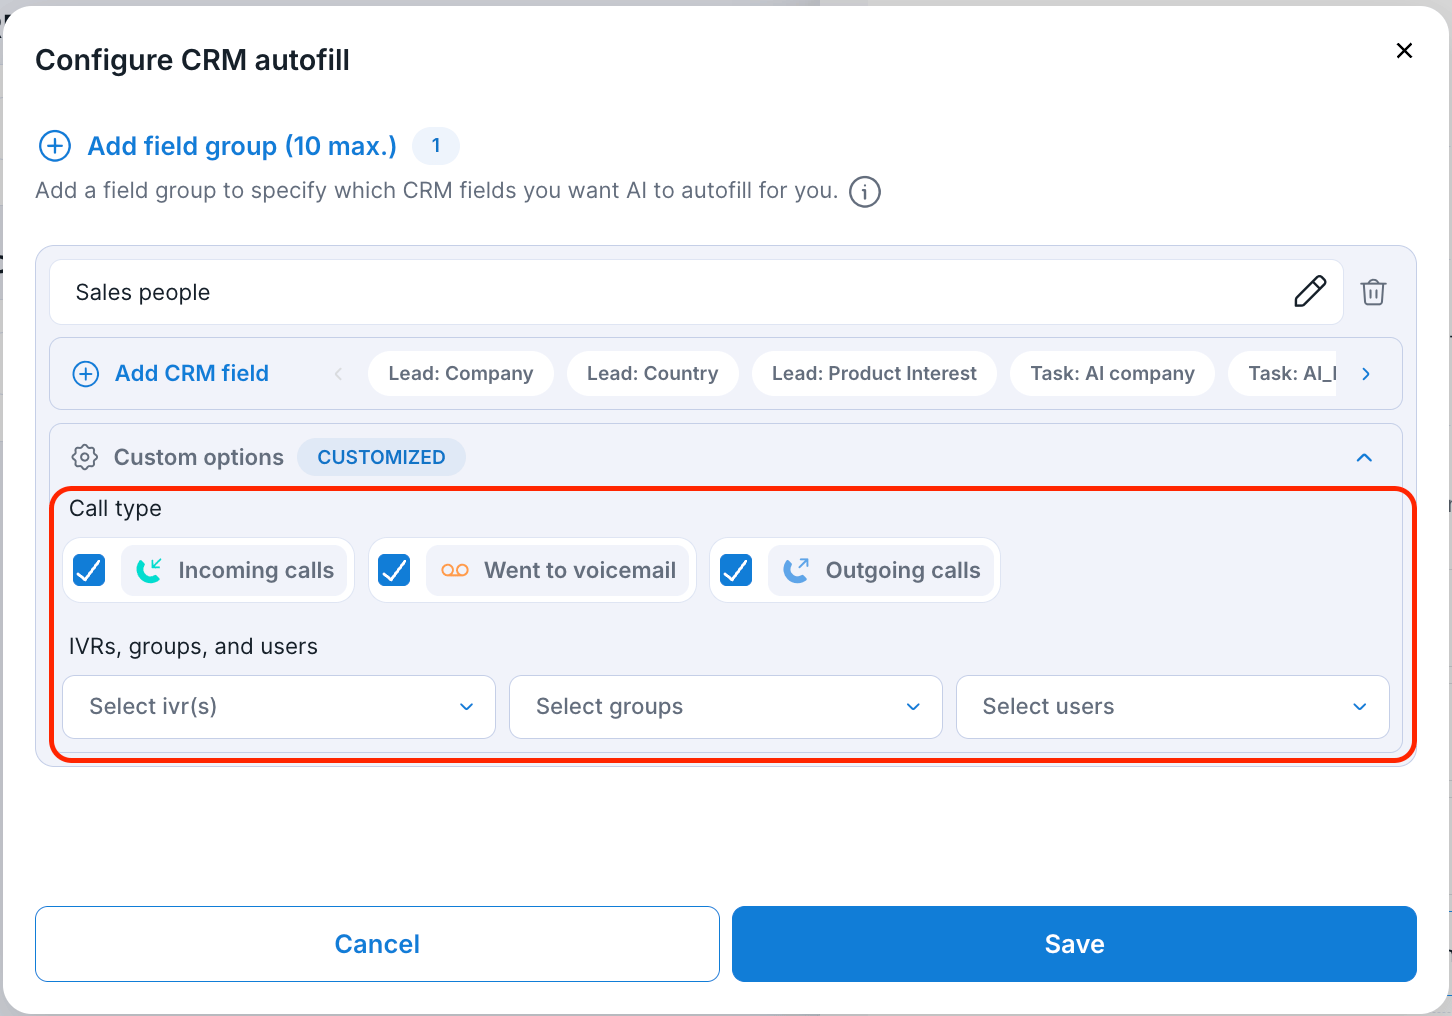
In the example below, we have excluded the calls going to voicemails, and applied the detection across 7 users only that we have handpicked from the dropdown menu:
3. How to see the results in your CRM
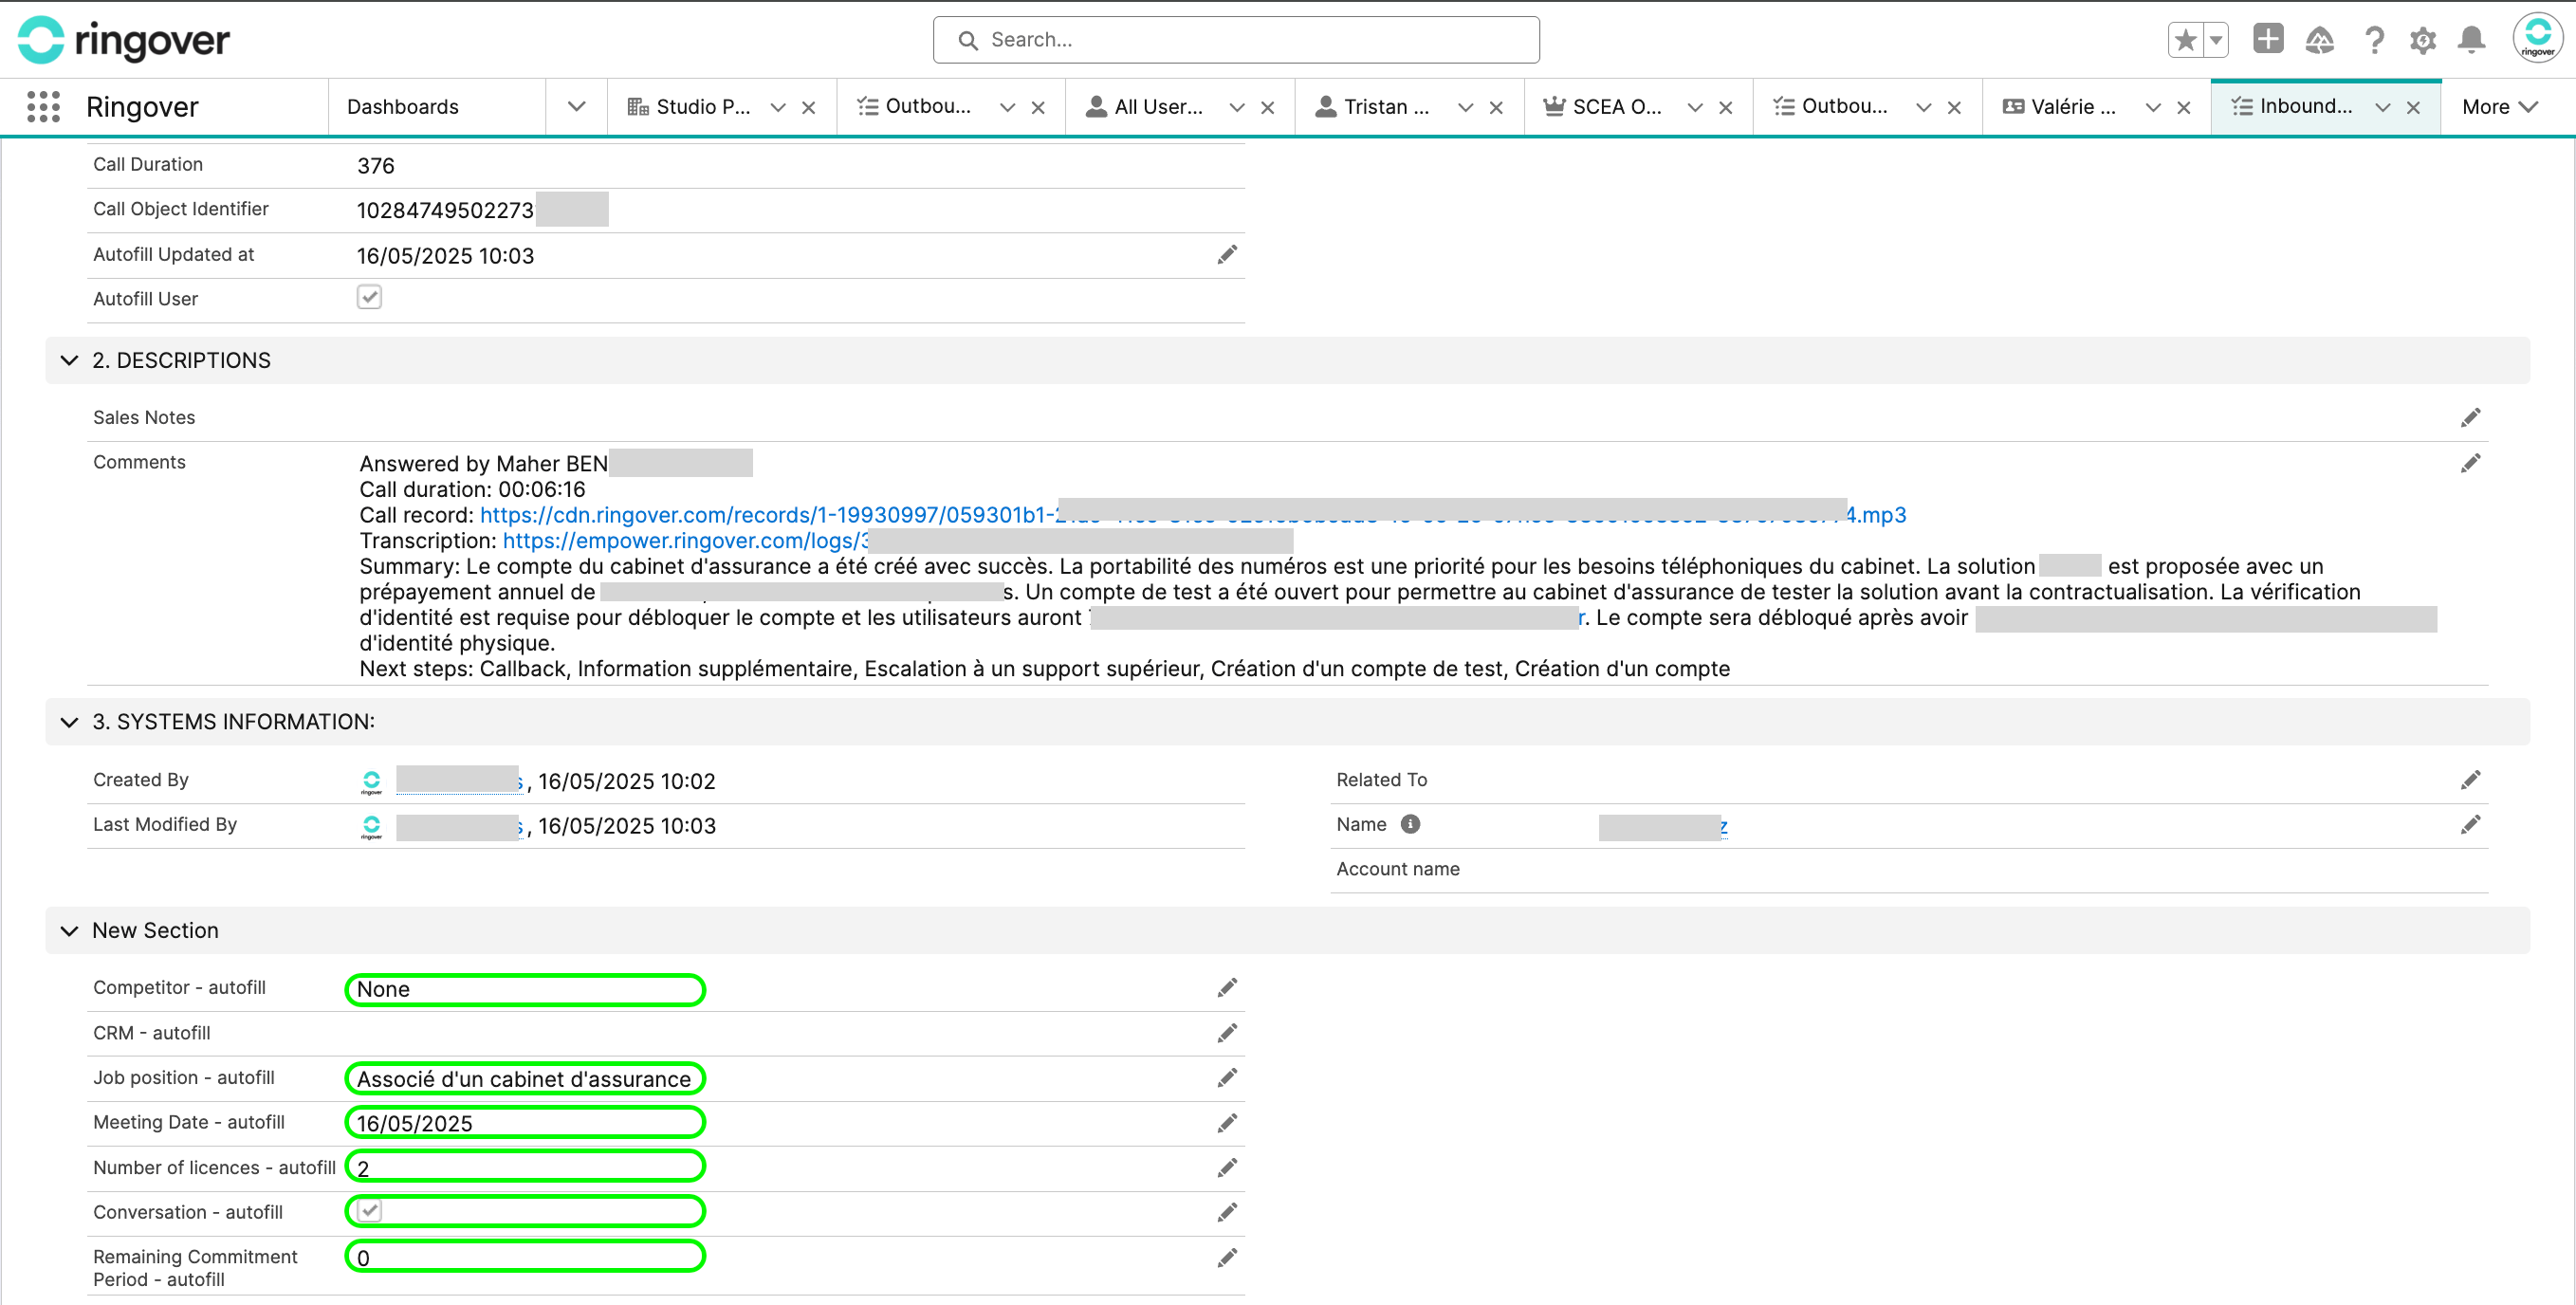
- Navigate to the record in your CRM, whether it's a task, or an object page.
- In the example below, we navigate to the Salesforce task, from the Ringover call logs.
- The Autofill CRM AI has detected 5 relevant pieces of information from the call, helping save valuable admin time:
FAQ / Important considerations
Q1: Are my CRM object fields getting overwritten?
⚠️ Important: The fields you choose to map will be auto-filled if the Autosave setting is enabled. We recommend reviewing your field mappings carefully, as Ringover cannot be held responsible for any unintended changes to your CRM data.
✅ Best practice
In its default state, the Autofill CRM runs with "Autosave" off, so it gives you the ability to review, edit and push the information in your CRM, from your call logs.
Q2. What AI is used in the CRM Autofill Add-on, and what happens to my data?
The CRM Autofill Add-on uses Ringover's AI-powered conversation analysis to extract relevant information from your call transcripts and automatically fill predefined CRM fields.
✅ Security & privacy first:
Transcripts are processed within secure and compliant environments hosted in the EU, in accordance with the Ringover Data Processing Agreement (DPA).
The AI model is hosted and runs within Ringover’s infrastructure, not via third-party cloud APIs like OpenAI.
Only the fields you’ve mapped are affected, and you have full control over where data is written.