
Disconnecting an integration allows you to manage your connected tools effectively. In this guide, you’ll learn how to easily disconnect or uninstall the Ringover application from your CRM platform.
Disconnect or uninstall an integration
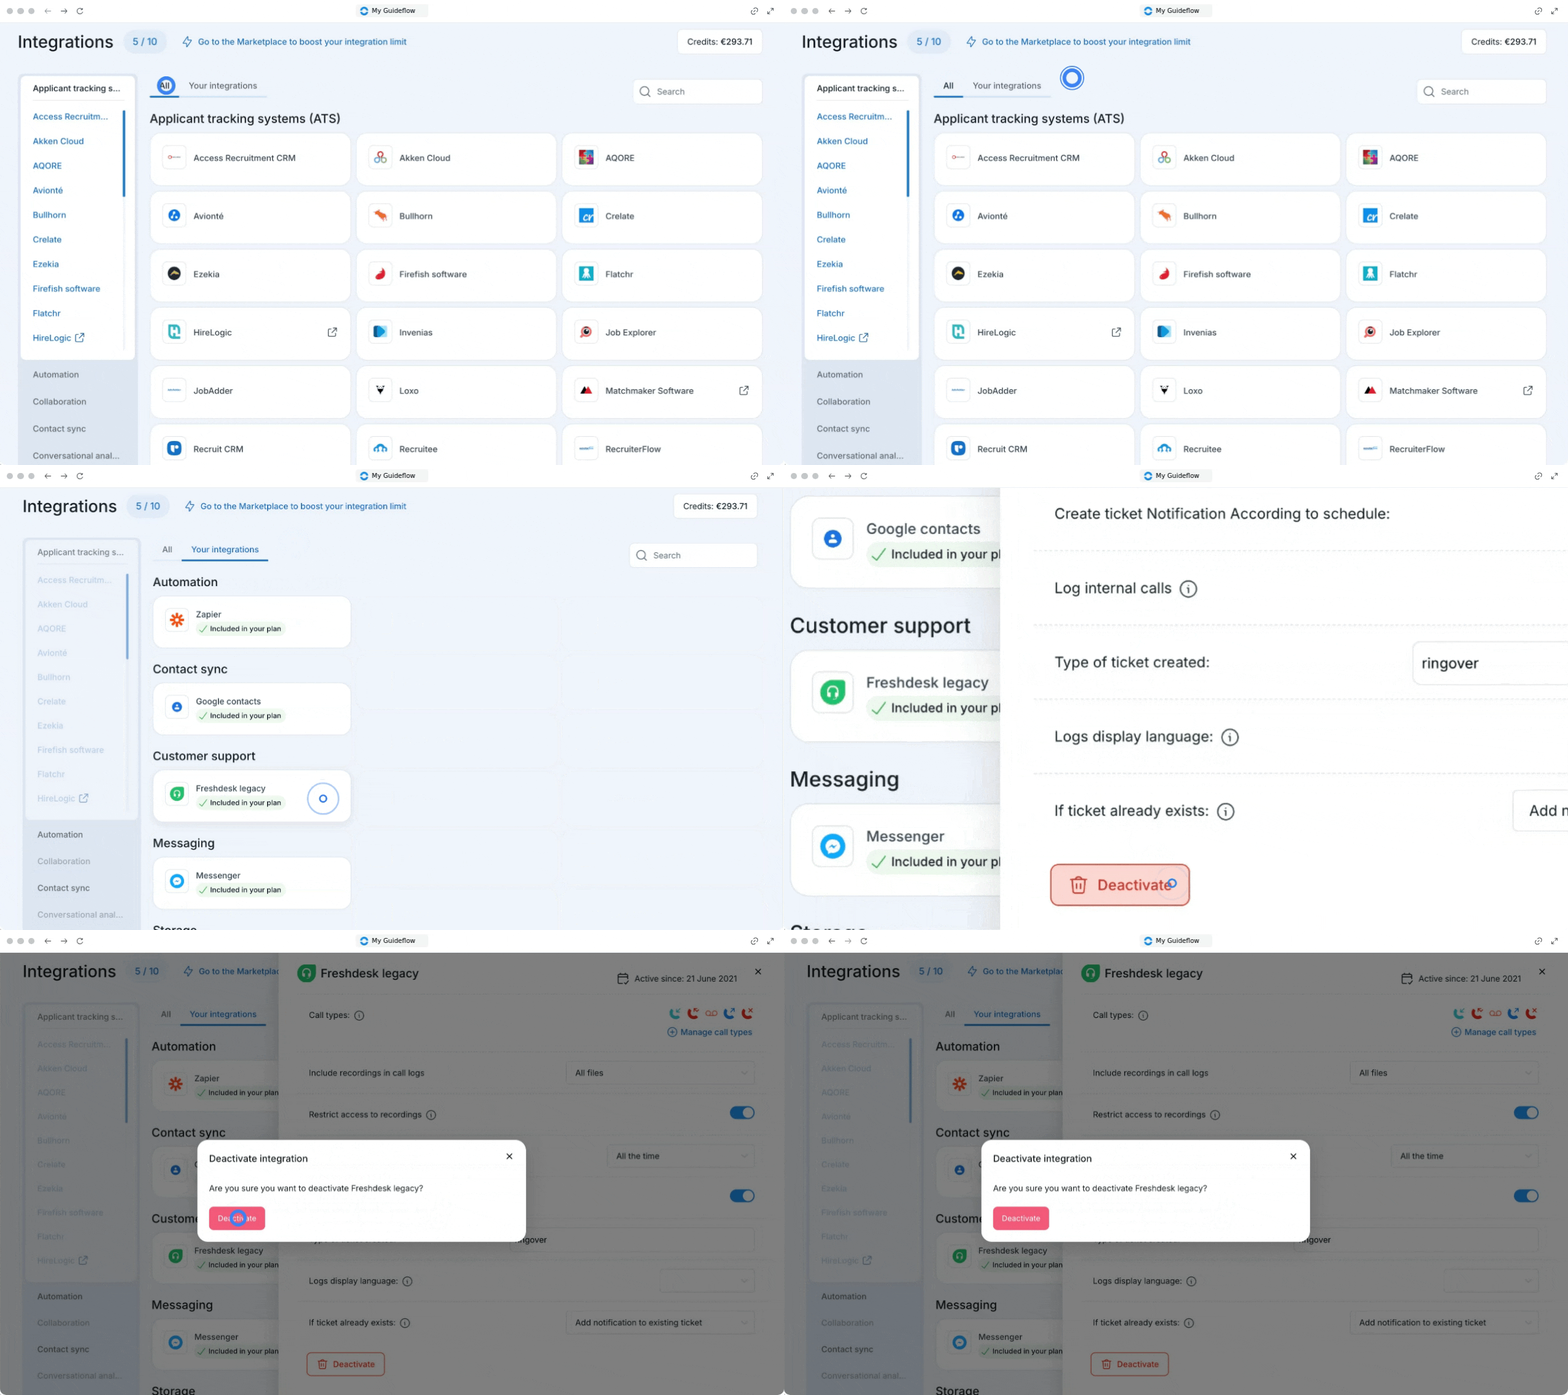
1. Disconnect via the Ringover Dashboard
You can quickly deactivate your CRM integration directly from your Ringover settings.
Log in to your Ringover account.
Go to your Dashboard > Store > Integrations.
Locate your CRM application.
Click on it to access the "Configuration".
Scroll down to find the uninstall option.
Click "Deactivate".
2. Disconnect via your CRM Interface
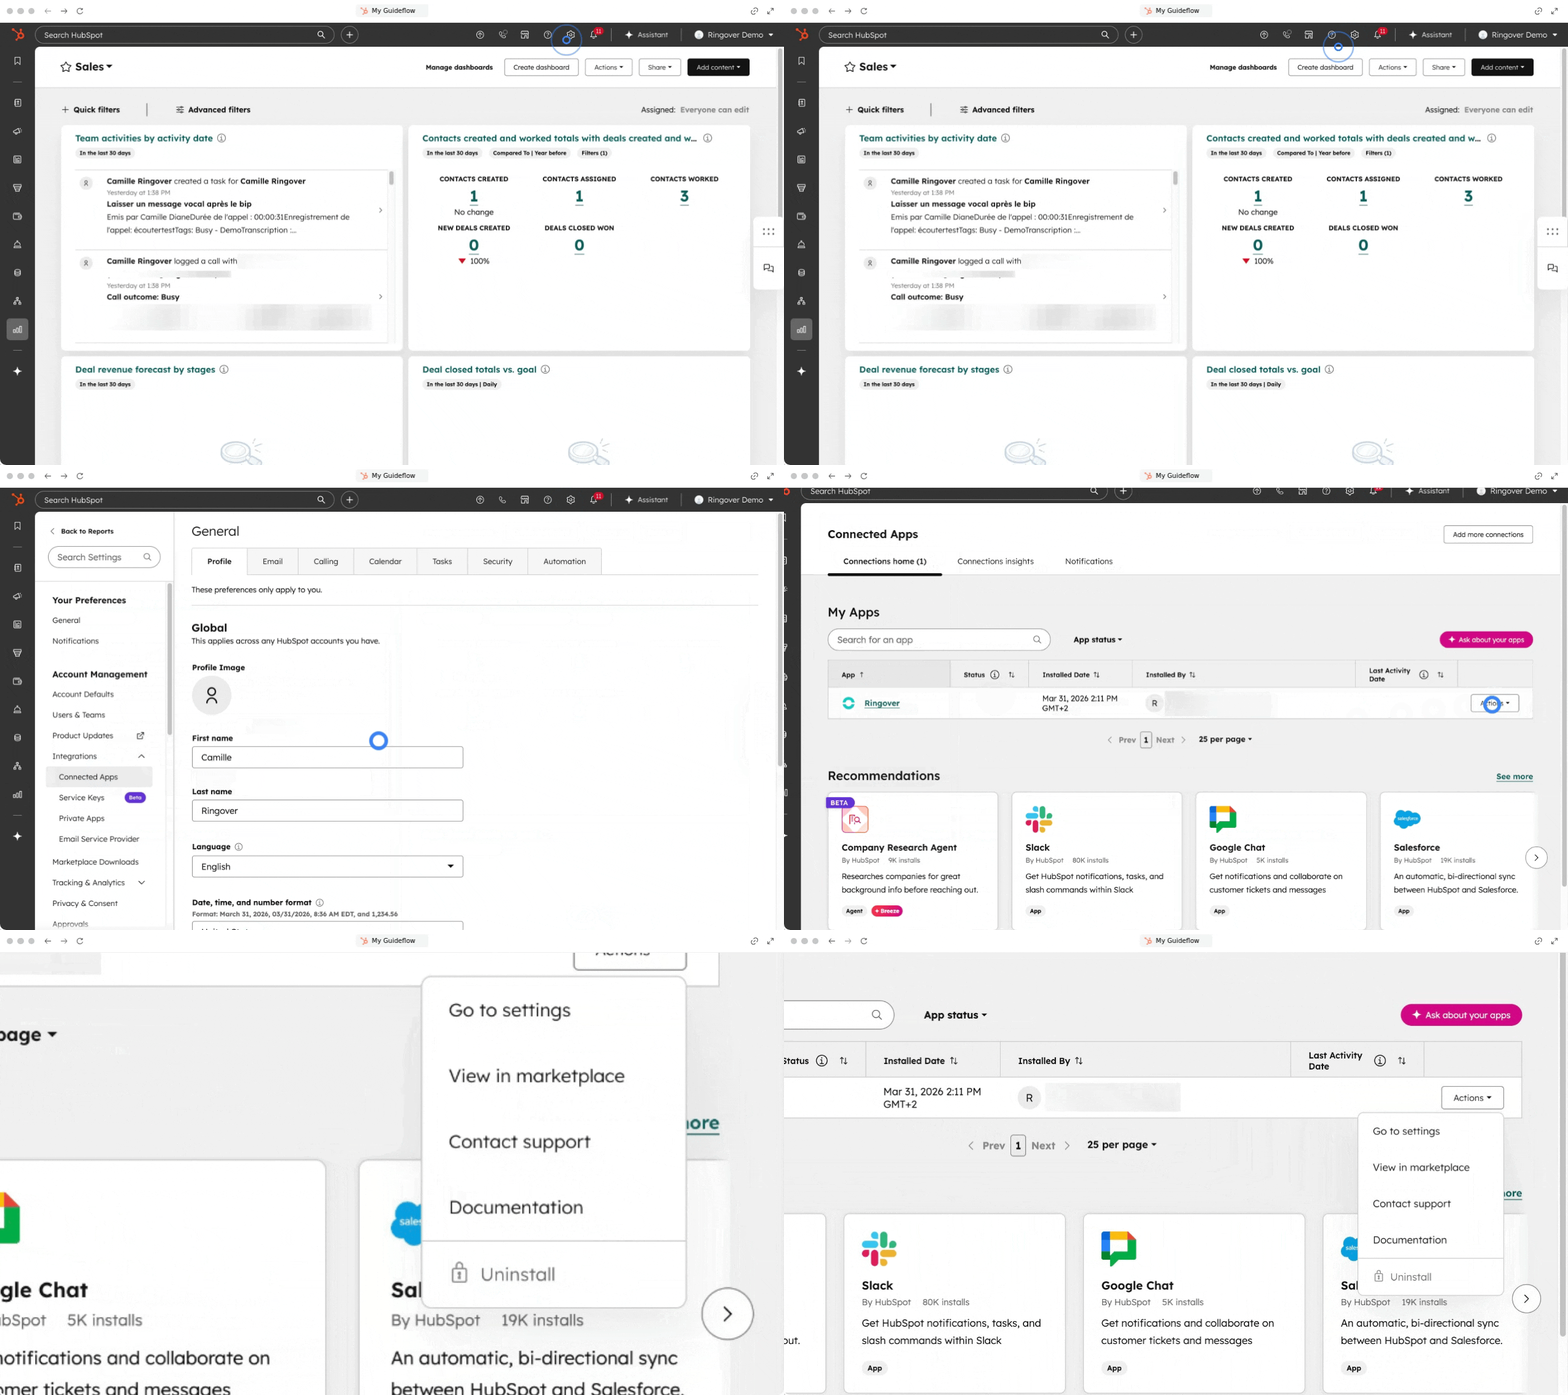
You can also choose to remove the Ringover app directly from your CRM settings (e.g. HubSpot)
Log in to your CRM account.
Go to your Settings (⚙️) > Integrations > Connected Apps.
Locate the Ringover application.
Click Actions.
Select Uninstall.
Type “Uninstall” in the confirmation window and click Uninstall.
3. Effects of uninstallation
Review the impact of removing the application from your CRM.
The application will be disconnected from your CRM account.
All features like synchronisation and call history will stop working.
Data coming from Ringover will no longer sync.
⚠️ Any associated webhooks or processes will be immediately disabled when you uninstall the app.
If you need to reactivate the integration in the future, you will need to follow the installation procedure again from the beginning.
(Optional – for technical administrators) Uninstallation via API
If your integration uses an API connection, it is possible to uninstall the application through the following endpoint:
DELETE /appinstalls/v3/external-install
After uninstallation, a 204 response is returned and account administrators will receive an email notification.
API Documentation: View HubSpot API reference
🎉 You now know how to disconnect or uninstall the Ringover application and can manage your CRM integrations securely.