
The Multi-CRM Contact Selection feature in Ringover gives you full control over which CRM contact receives your call activity logs when multiple contacts share the same phone number. In this guide, you’ll learn how pre-call selection and in-call contact selection work across your extension, web app, and CRM.
Prerequisites
- An active Ringover Business licence with CRM integration enabled.
- Account activation by the Ringover Support team.
How to use Multi-CRM Contact Selection
1. Pre-call selection from the Ringover Extension
Select contacts automatically when initiating click-to-call actions directly from your browser extension.
Extension Click-to-Call
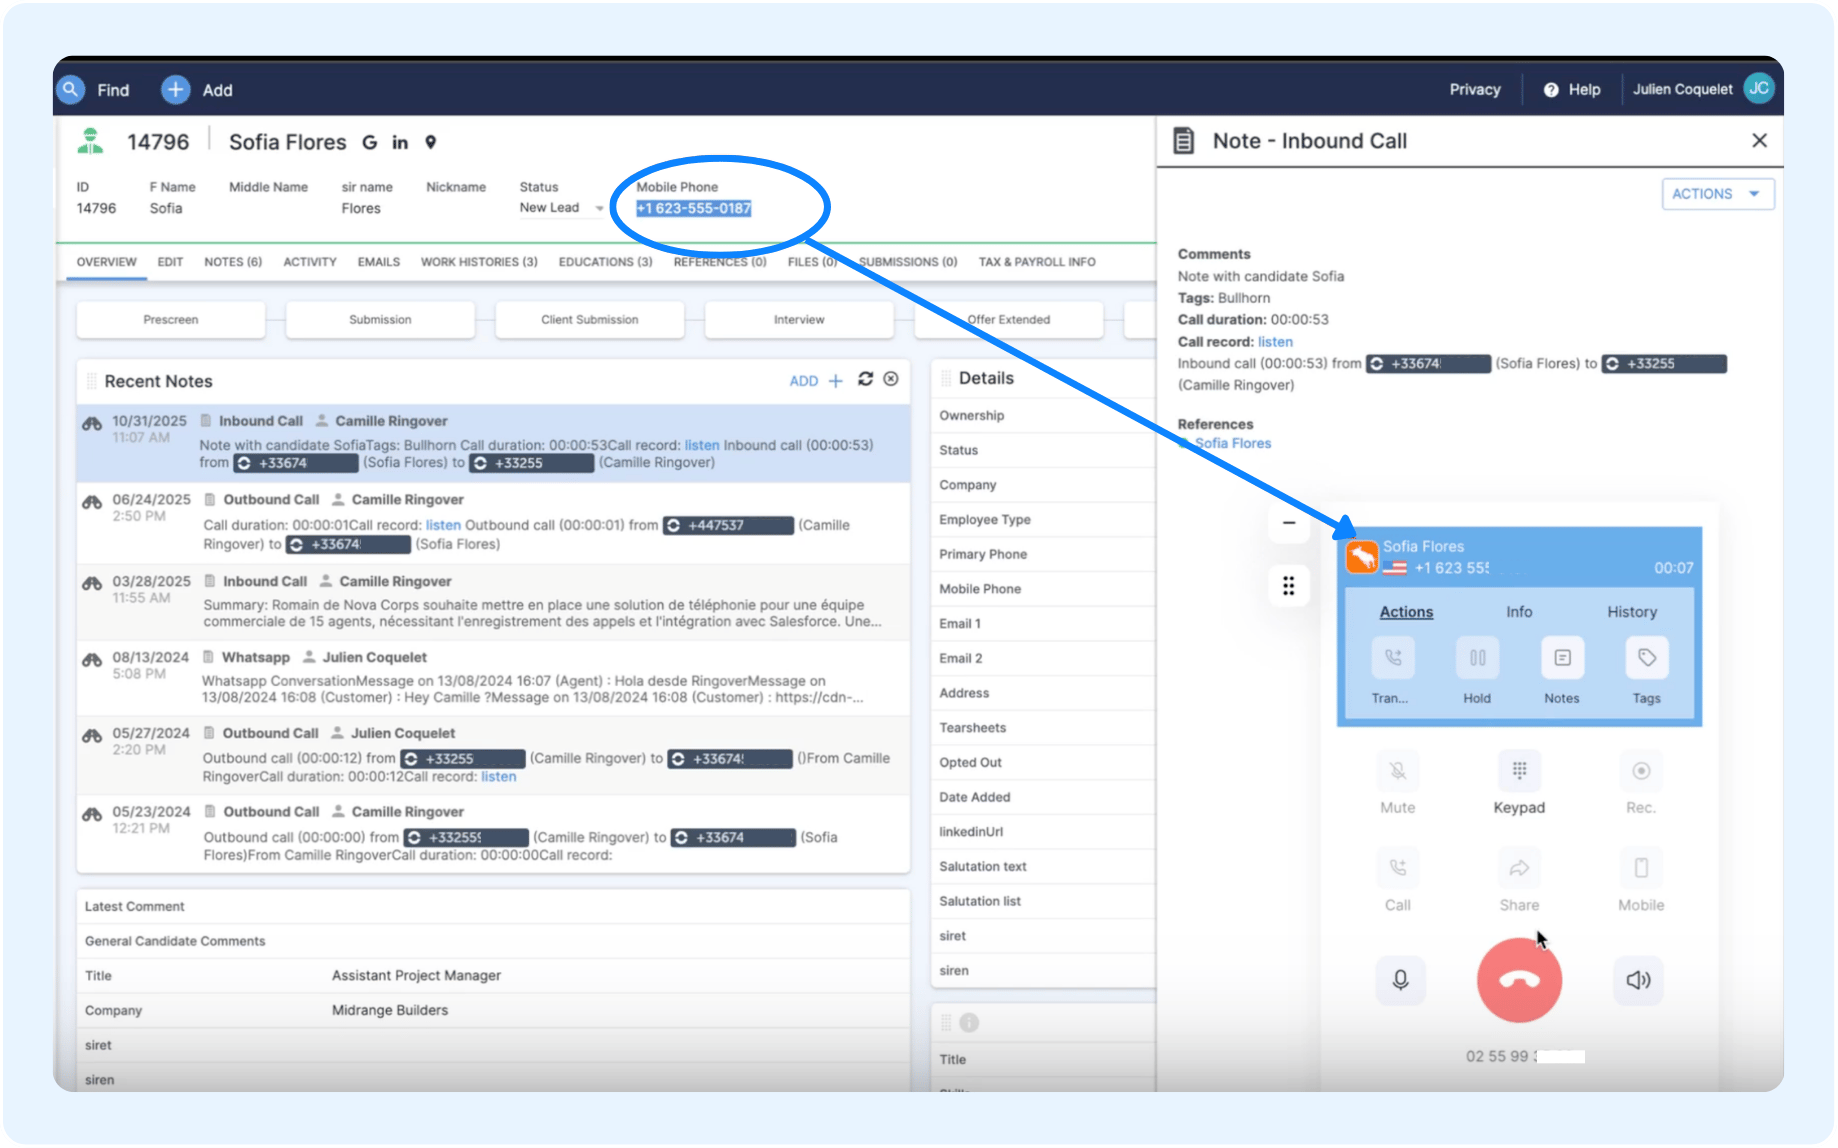
Automatic contact matching based on the specific CRM record clicked. Use this when initiating calls directly inside your CRM via the Ringover extension.
- Click a phone number inside your CRM using the Ringover Extension (🔗 How to use Ringover Dialer extension on Google Chrome).
- The Contact ID is automatically fetched and pre-matched to that exact record.
- Place your call as usual; the call log will associate with the clicked contact.
2. Pre-call selection from Webapp and Click-to-Dial
Choose the target contact prior to placing a call when dialling manually or using the Webapp.
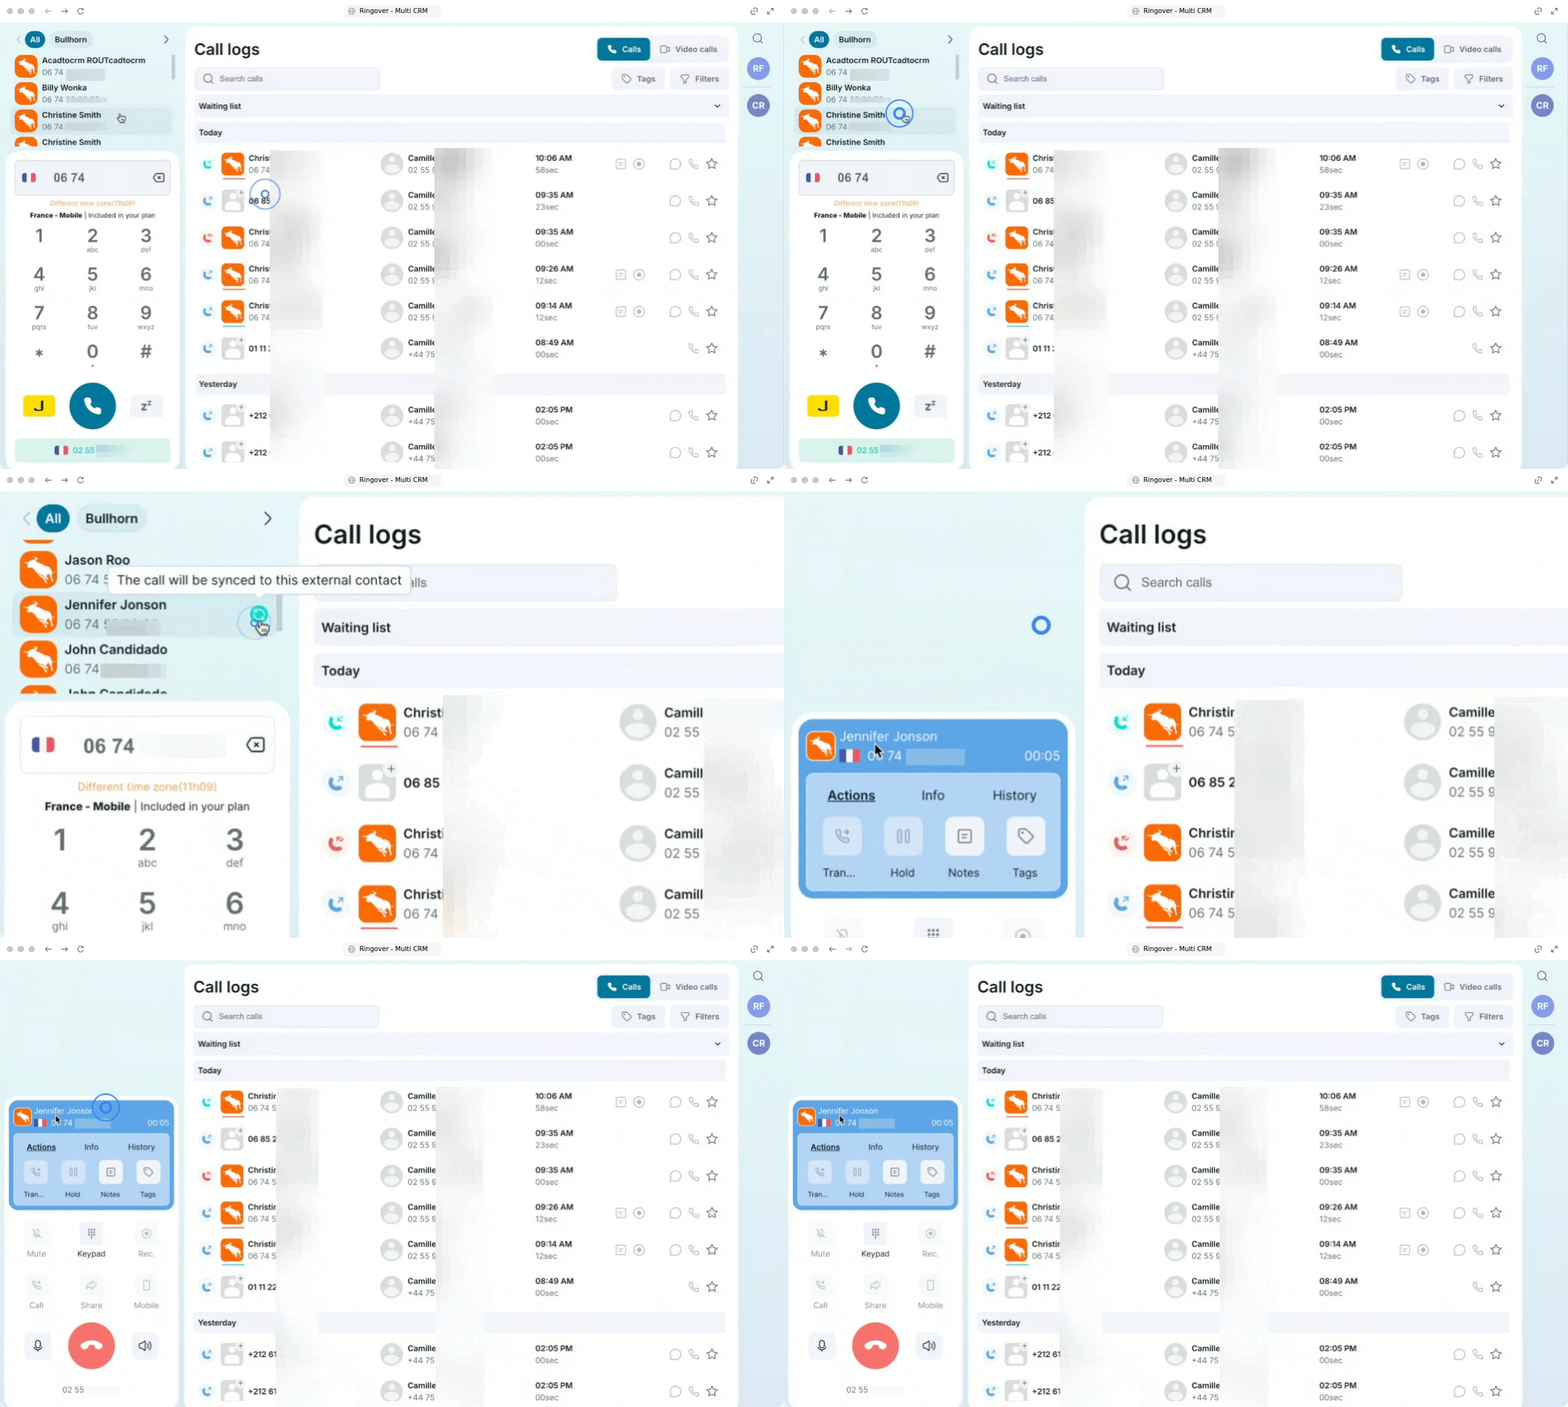
- Open your dialler at app.ringover.com or via the extension.
- Enter a phone number manually.
- View the menu that appears above the dialler displaying all matching CRM contacts.
- Select the correct contact for logging.
- Confirm that the green checkmark icon appears to verify your selection, then start the call.
3. In-call contact selection for inbound calls
Select or change the associated CRM record in real time during an active inbound call.
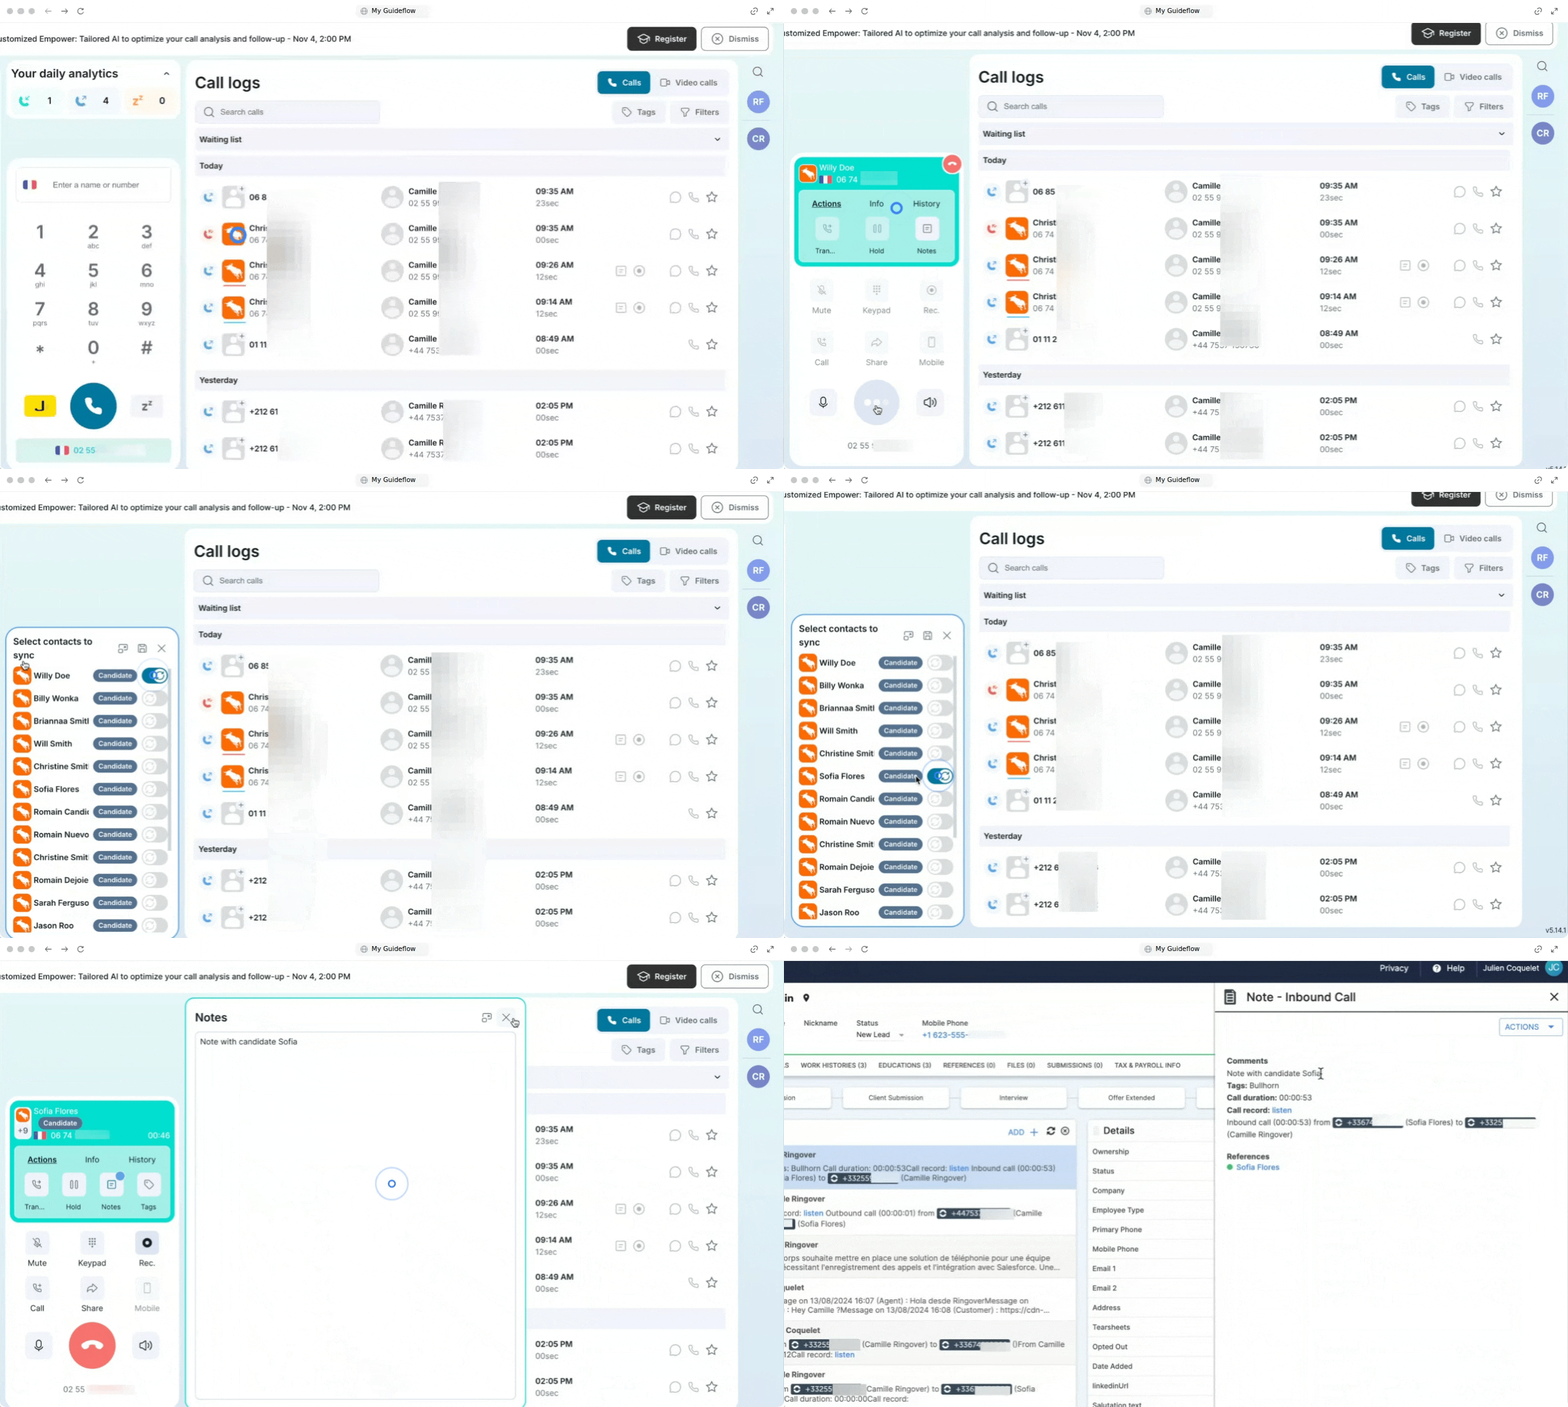
- Answer an incoming call shared by multiple CRM contacts.
- Click the "+" icon with a count displayed inside the active dialler interface.
- Browse the list of matching contacts and sort by compatible CRM or object types (e.g., Candidates, Accounts, Contacts).
- Click to select the correct contact record and confirm.
- Hang up the call; the CRM call activity log will automatically attach to your chosen record.
FAQ
What does this feature do?
It gives users complete control over which CRM contact record receives the call activity log when multiple records share the same phone number.
What does this feature NOT do?
It does not change which contact name is displayed in the internal Ringover call history tab. The Ringover log continues to show the contact found via standard automated number lookup due to system database architecture.
How many contacts can I sync per call?
You can sync a call to one contact per object type. For example, in CRMs like Bullhorn, you can sync to one Contact only, or simultaneously to one Contact AND one Candidate.
Why is this feature enabled on a per-client basis?
To prevent potential confusion regarding discrepancies between CRM log destinations and Ringover's internal call history, Ringover enables this feature per client following proper user onboarding and UX explanation.
🎉 You now know how to use Multi-CRM Contact Selection to ensure call logs are always assigned to the correct client profile!