
Managing your contact permissions allows you to control who can view and edit your connections. In this guide, you’ll learn how to adjust access for yourself, your team, or specific members.
1. Access the Contact Settings
Follow these simple steps to find your contact's permission options:
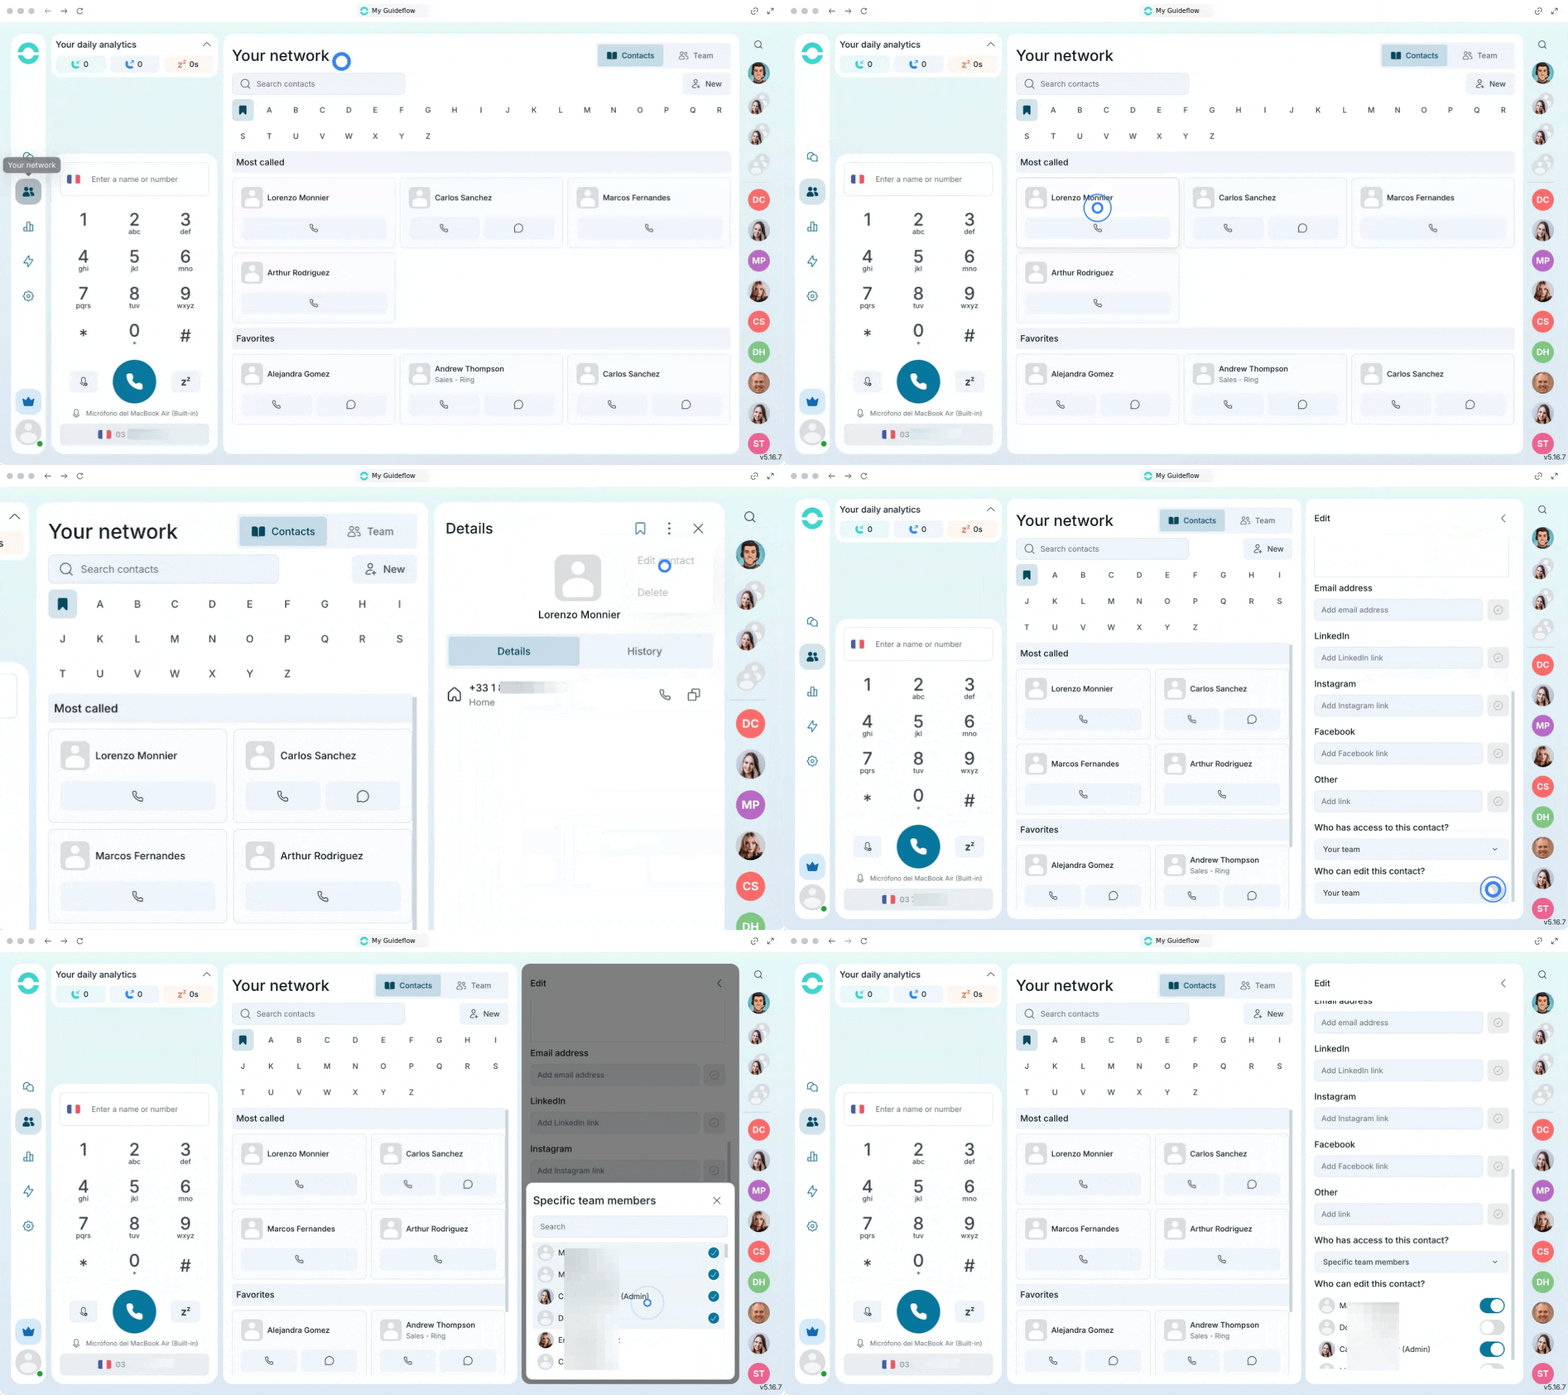
- Go to your network page.
- Choose your contact.
- Click on the three dots on the top right.
- Click on edit contact.
- Go to the "Who has access to this contact" section.
2. Choose access permissions
You have three options to determine who can view or edit your contact.
Only You
Select this option to keep the contact completely private and restricted to your account only.
Your Team
Select this option to share the contact with your entire team.
- Once selected, you must manually activate or deactivate the "Who can edit this contact" option to decide if they get view-only or editing rights.
Specific Team Members
Select this option to share the contact only with chosen individuals.
- Select the specific members you want to grant access to.
- Select which of these assigned members will be able to edit the contact.
Always double-check your editing permissions before saving so you don't accidentally allow unwanted changes to your contact's information.
🎉 You now know how to manage contact access and can ensure your network is shared securely with the right people!