Setting up Webhook
Topics covered:
-
About
-
Steps to set up Webhook
-
Creating new connection
-
Organization selection
-
About
You may find the instructions for setting up Webhook on this document.
Steps to set up Webhook
The following are the steps to setting up Webhook:
Creating new connection:
To create a new connection, follow these steps:
Step 1: Click on “CREATE NEW CONNECTION”
Step 2: To log in click on “Office 365” and select “Show Advance”.
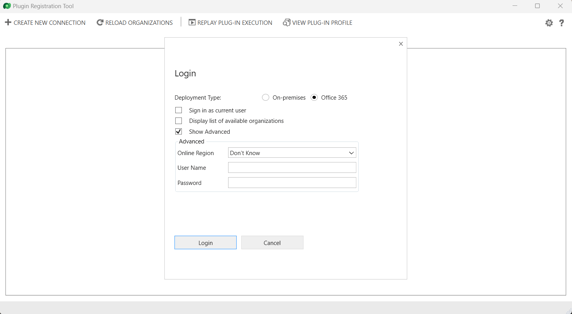
Step 3: Fill in the User Name and Password and then click on Login.
Organization selection:
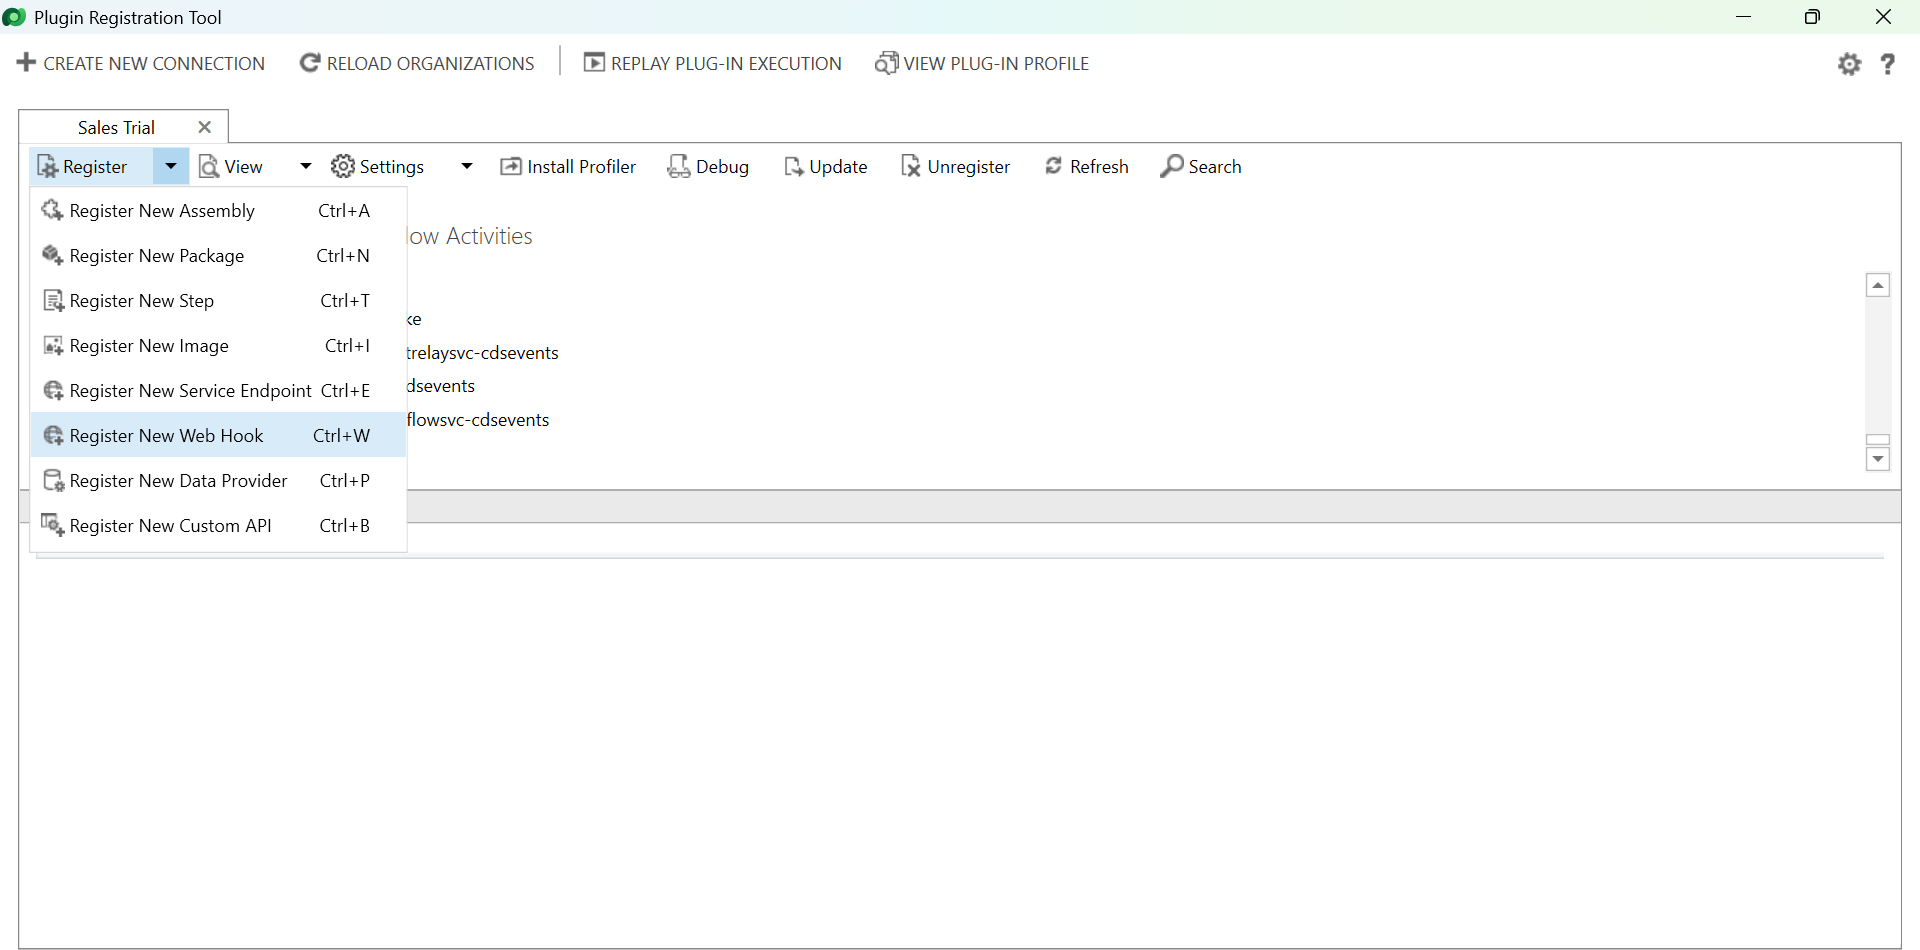
Select the organization you want to create a webhook for.
Step 1: Click on “Register” and select “Register New WebHook”
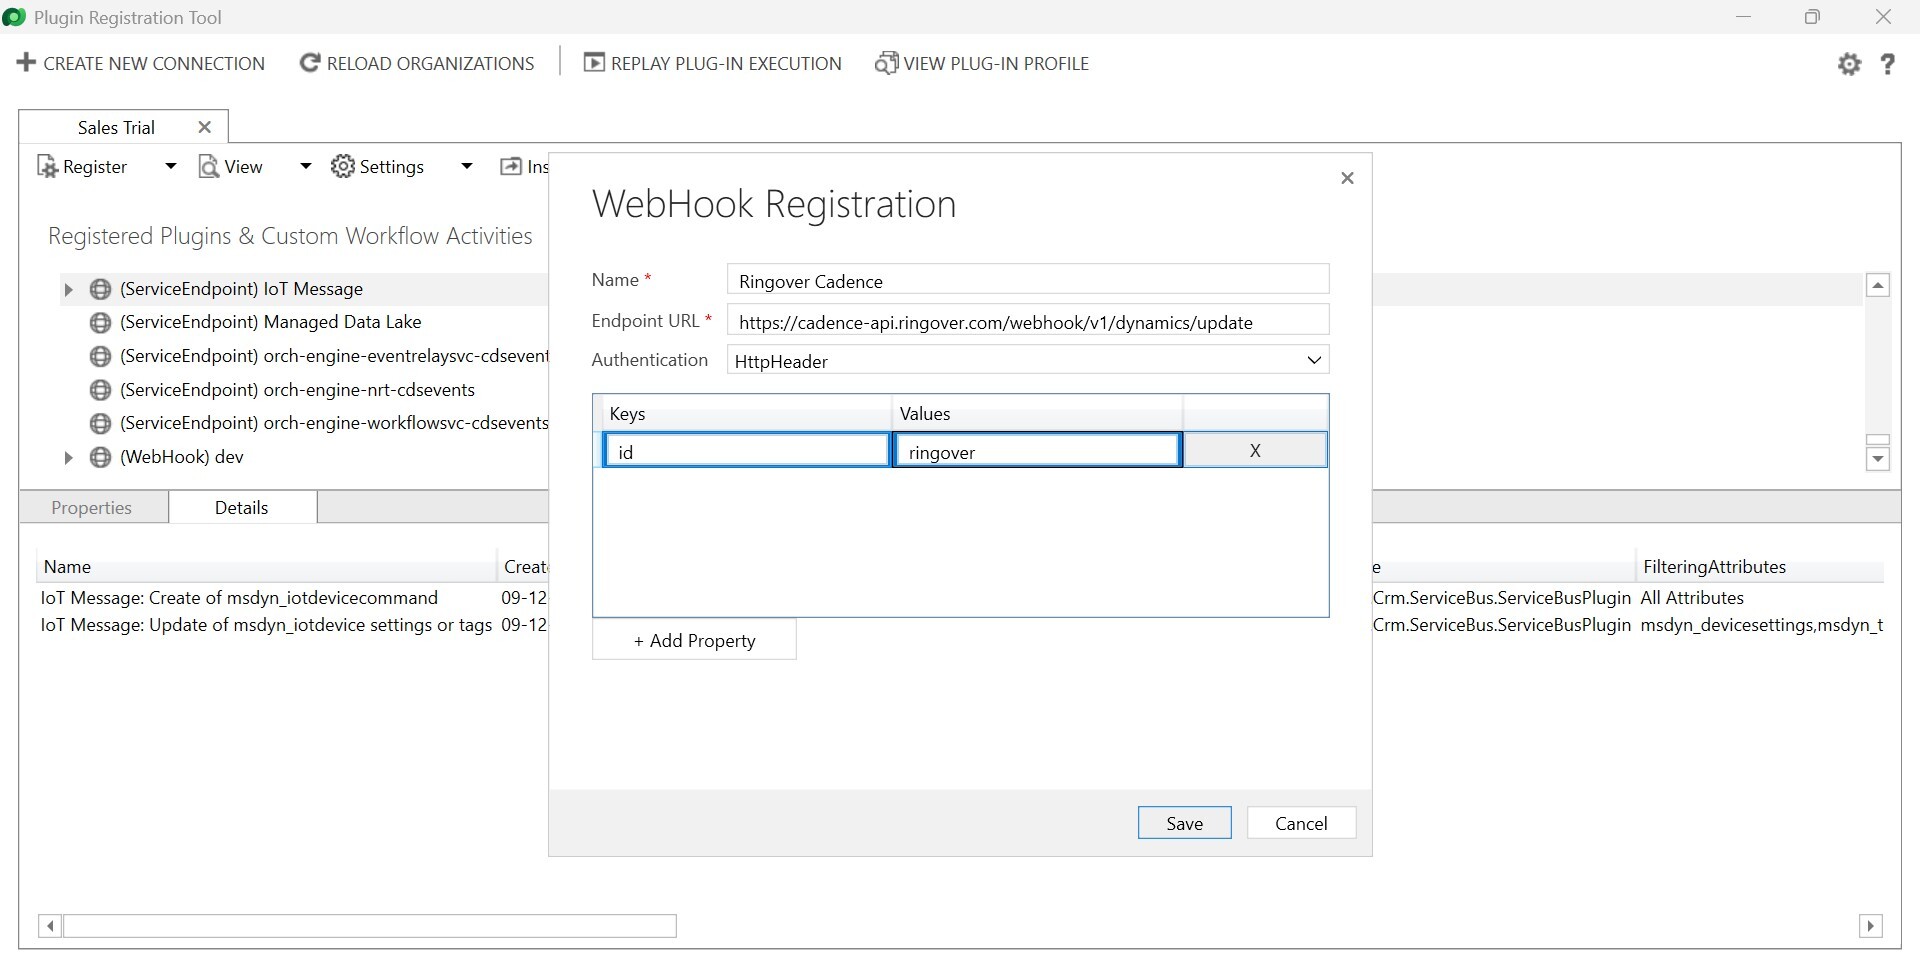
Step 3: Enter the value of the required fields
-
Name: Ringover Cadence
-
Endpoint URL:
-
To access the endpoint URL click here
-
-
Click on "+ Add Property" and add a key value
For example, key = id, value = ringover -
Click on Save.
Step 4: Right click on (WebHook) Ringover Cadence and select Register New Step
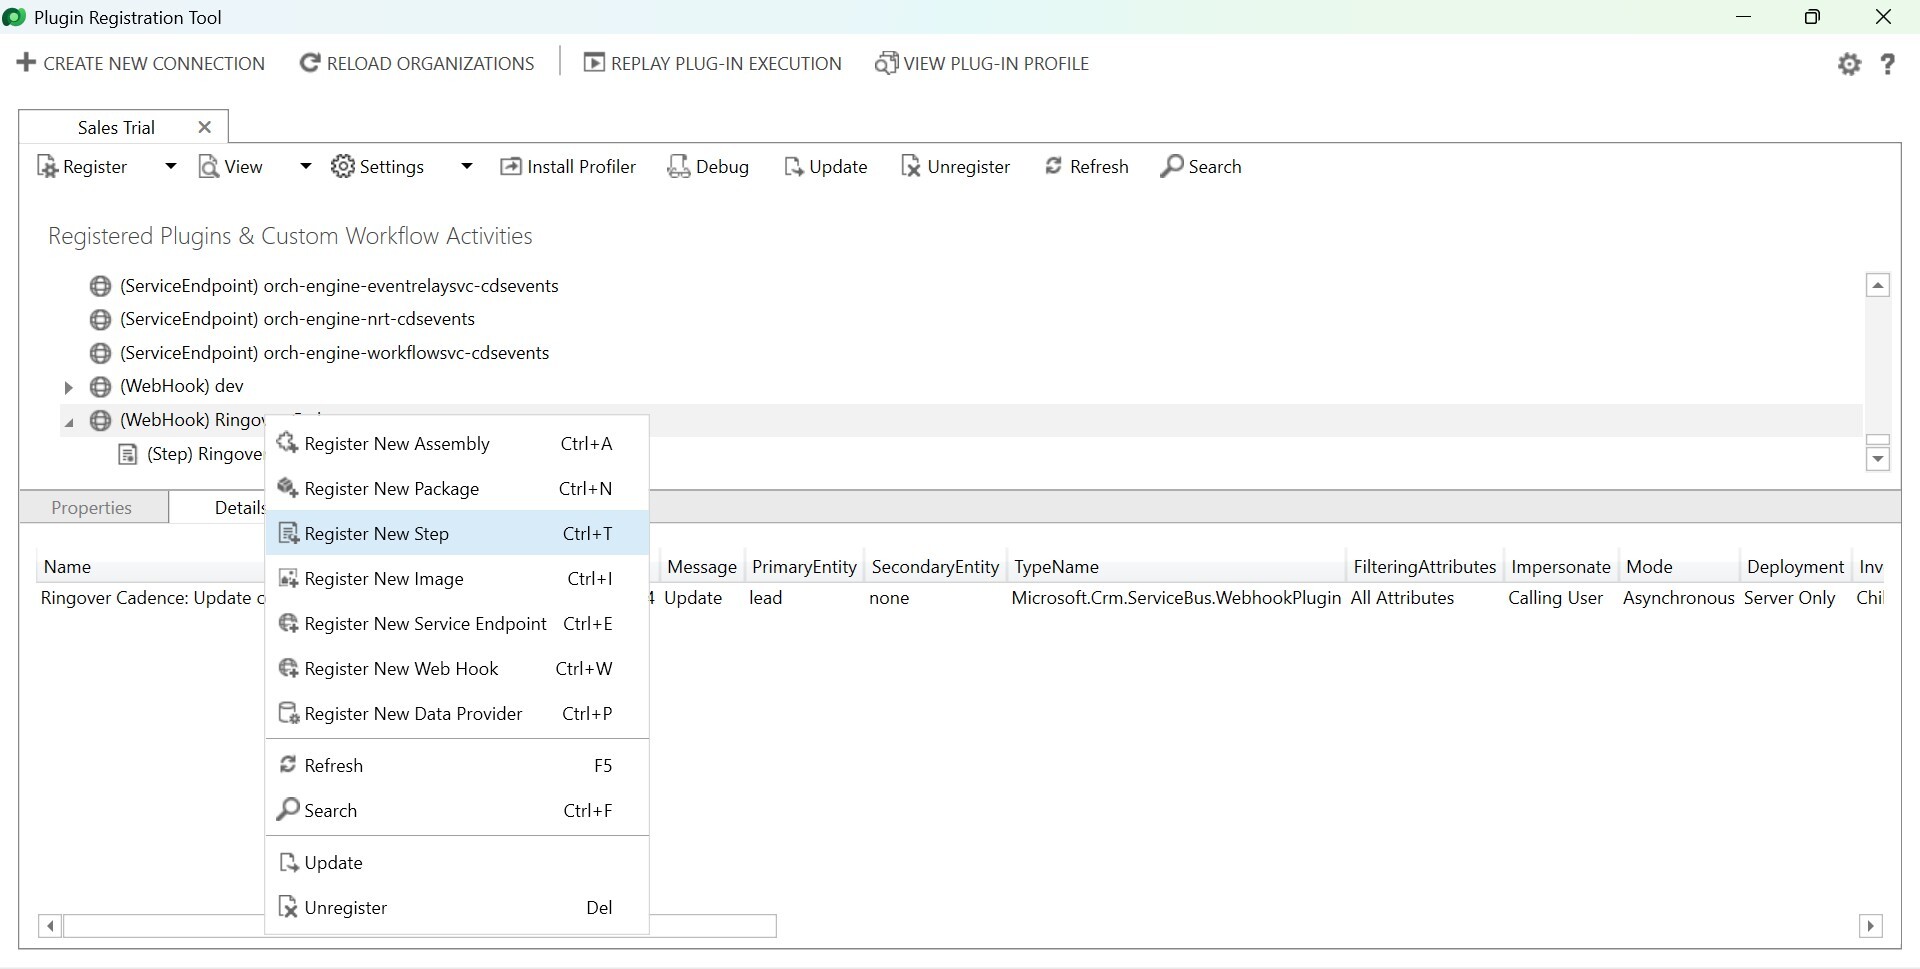
Step 5: Fill out the form as given in the image
Note:
- Execution Mode should be Asynchronous
- Every step should have a different Execution Order
- If a warning pop-up appears after you click the Register New Step button, then click Close to close the warning.
-
For contact:
- Update webhook
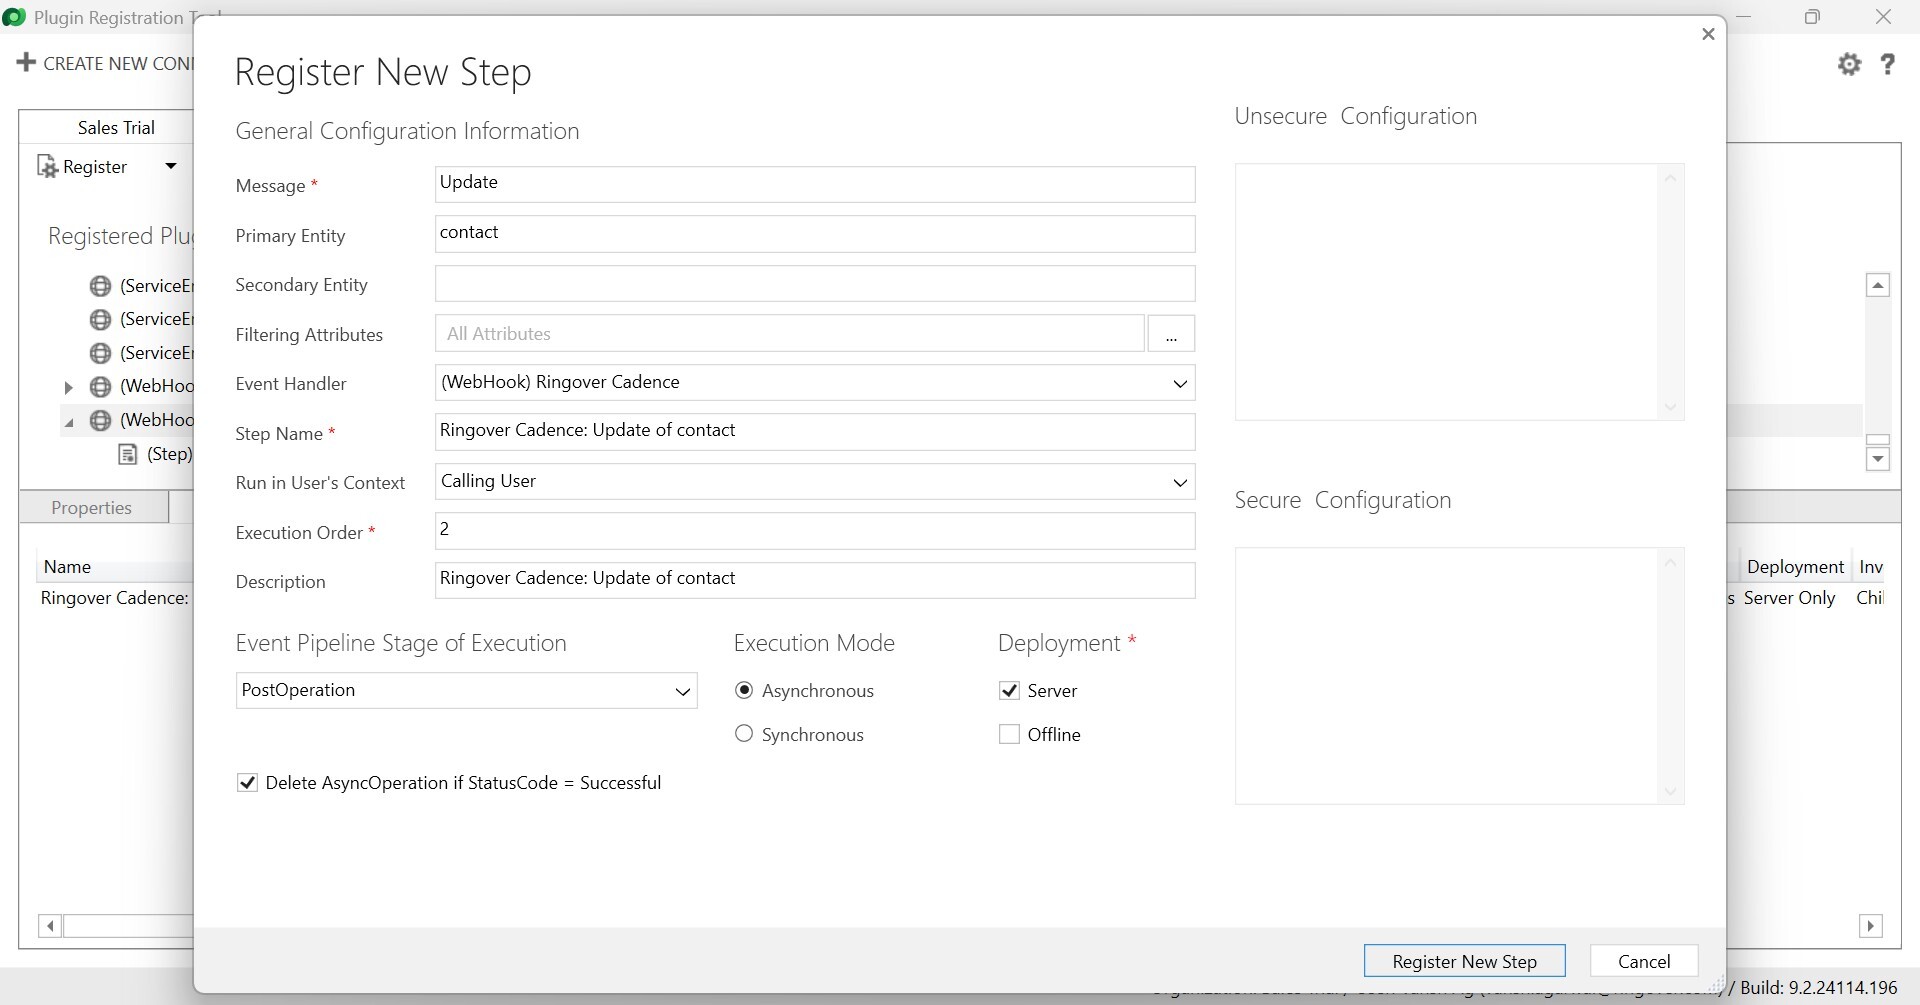
- Delete webhook
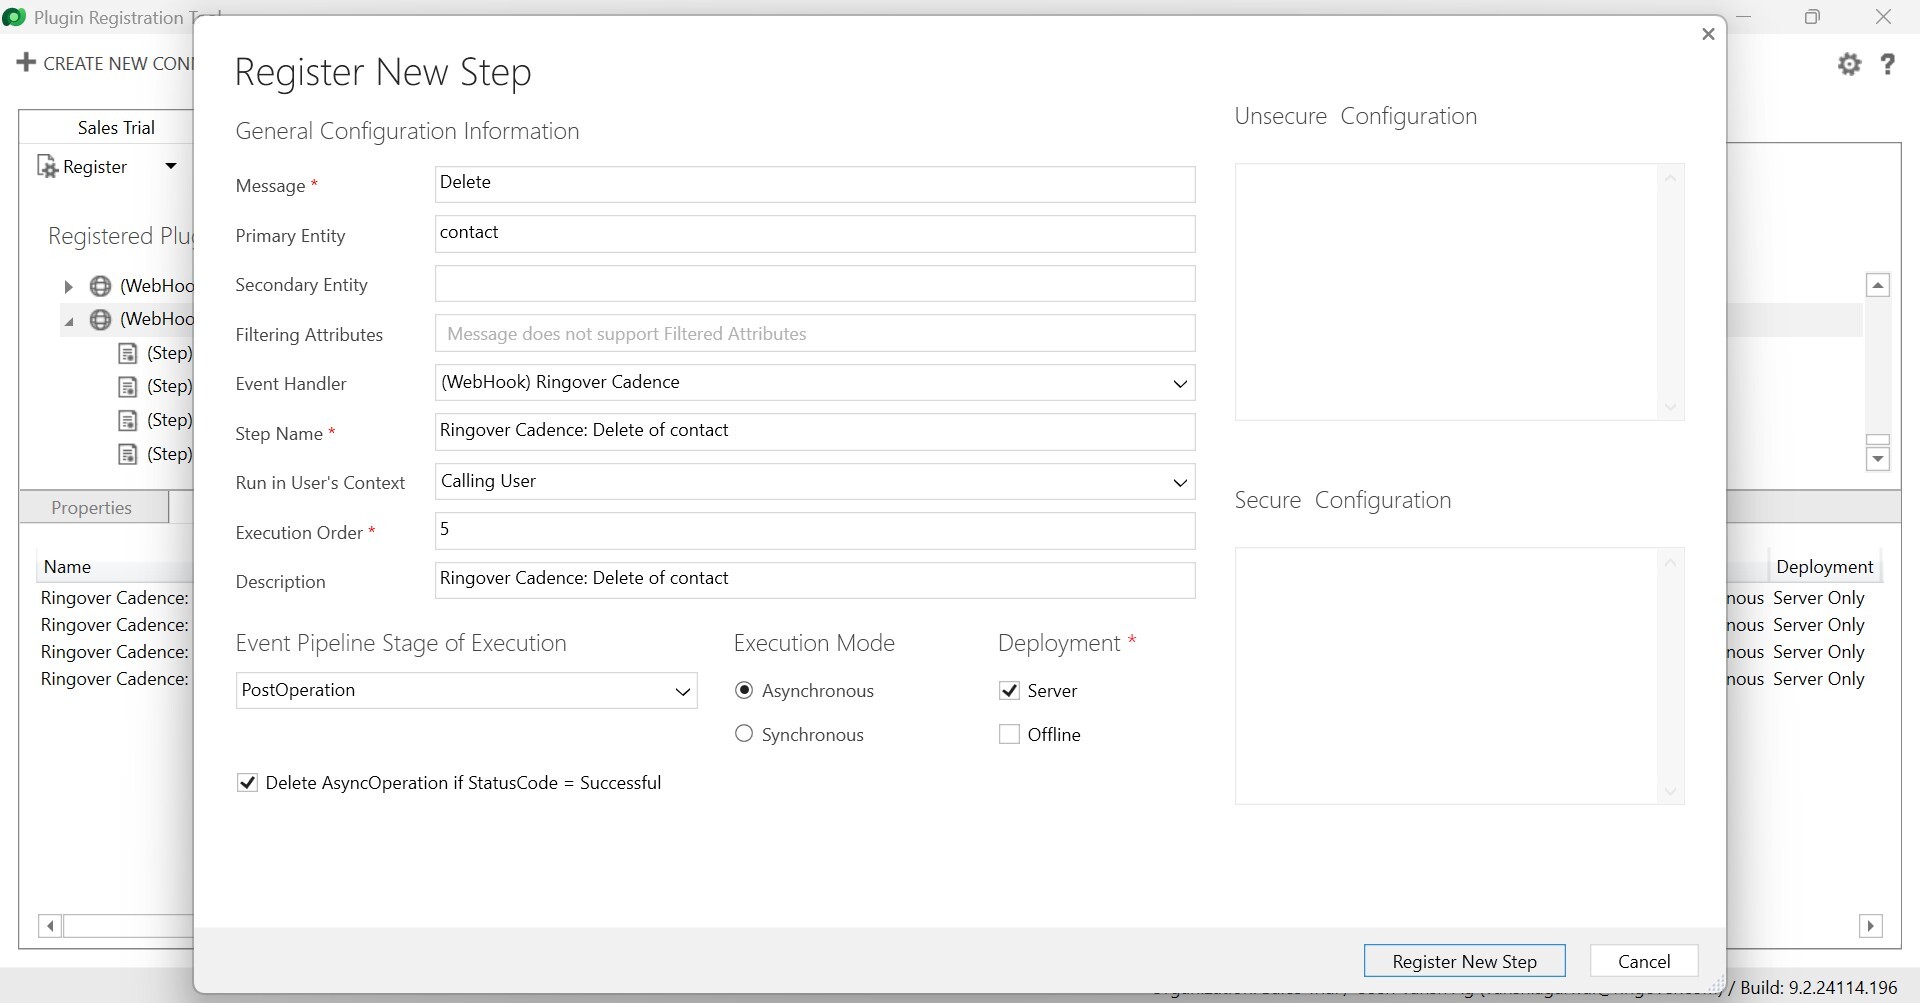
- Update webhook
- Click on Register New Step.
-
For lead:
- Update webhook
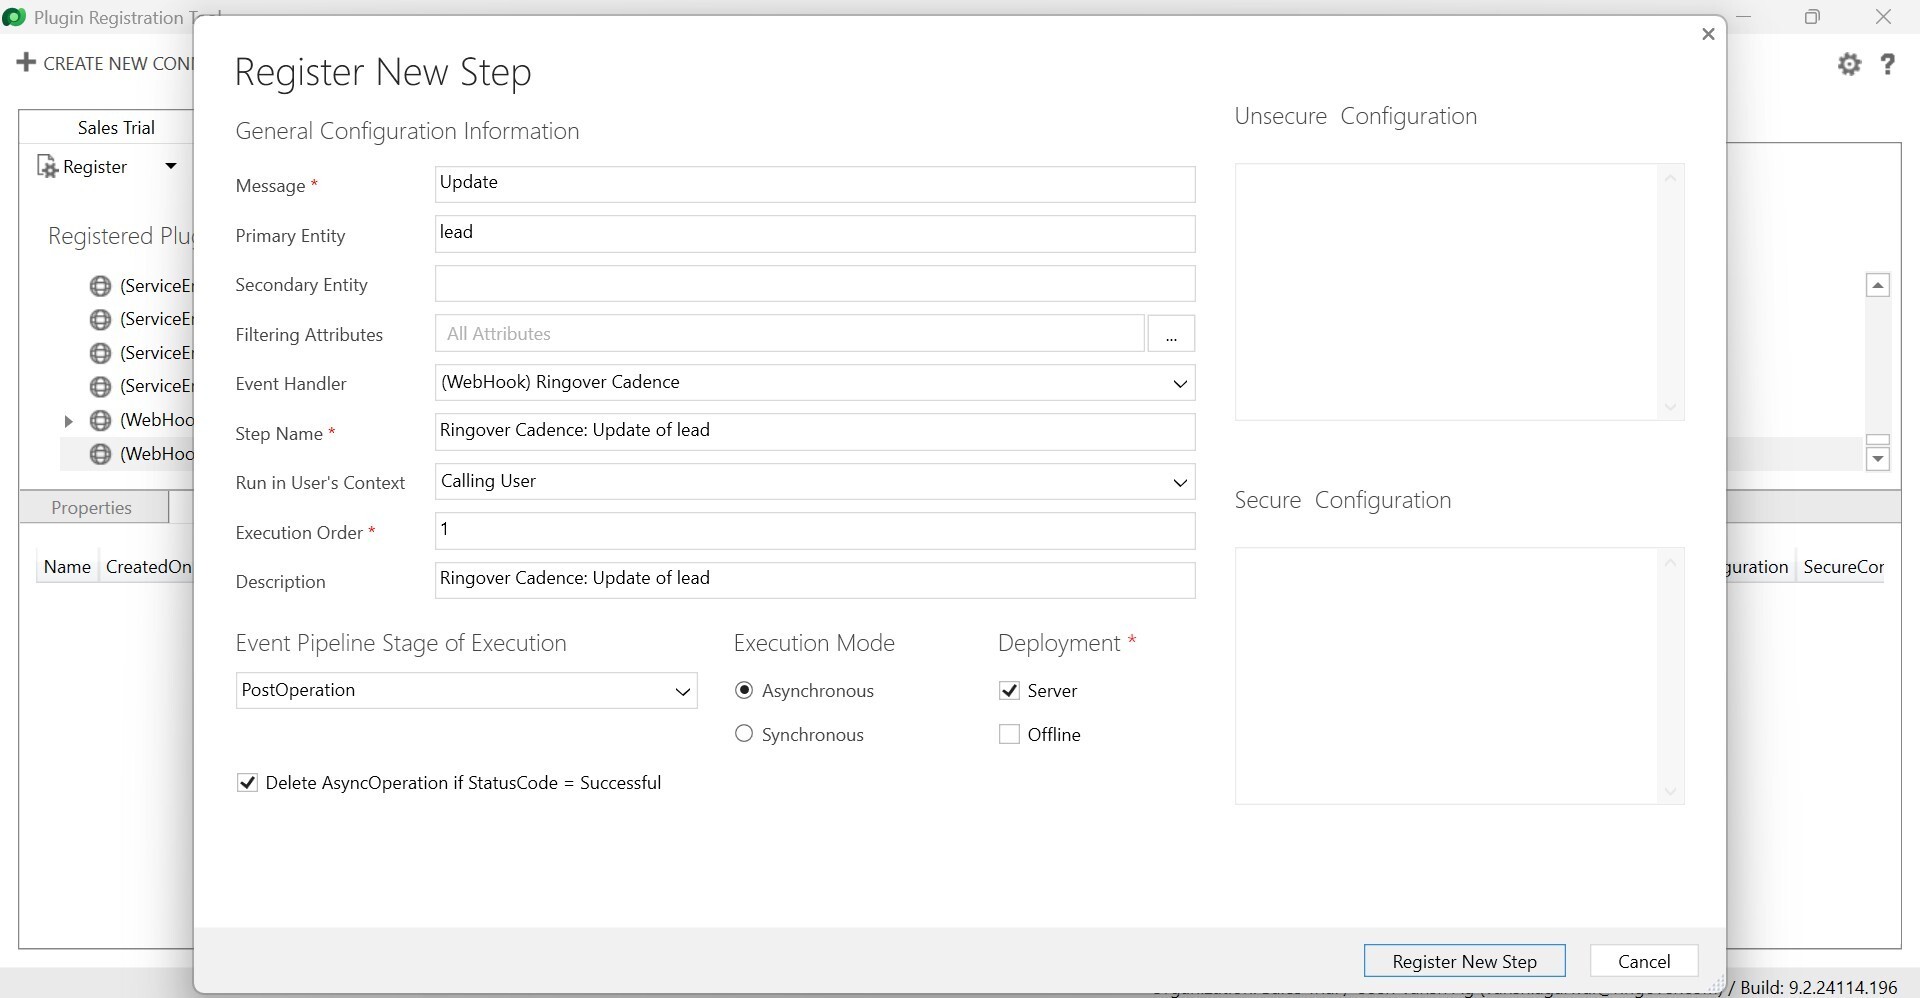
- Delete webhook
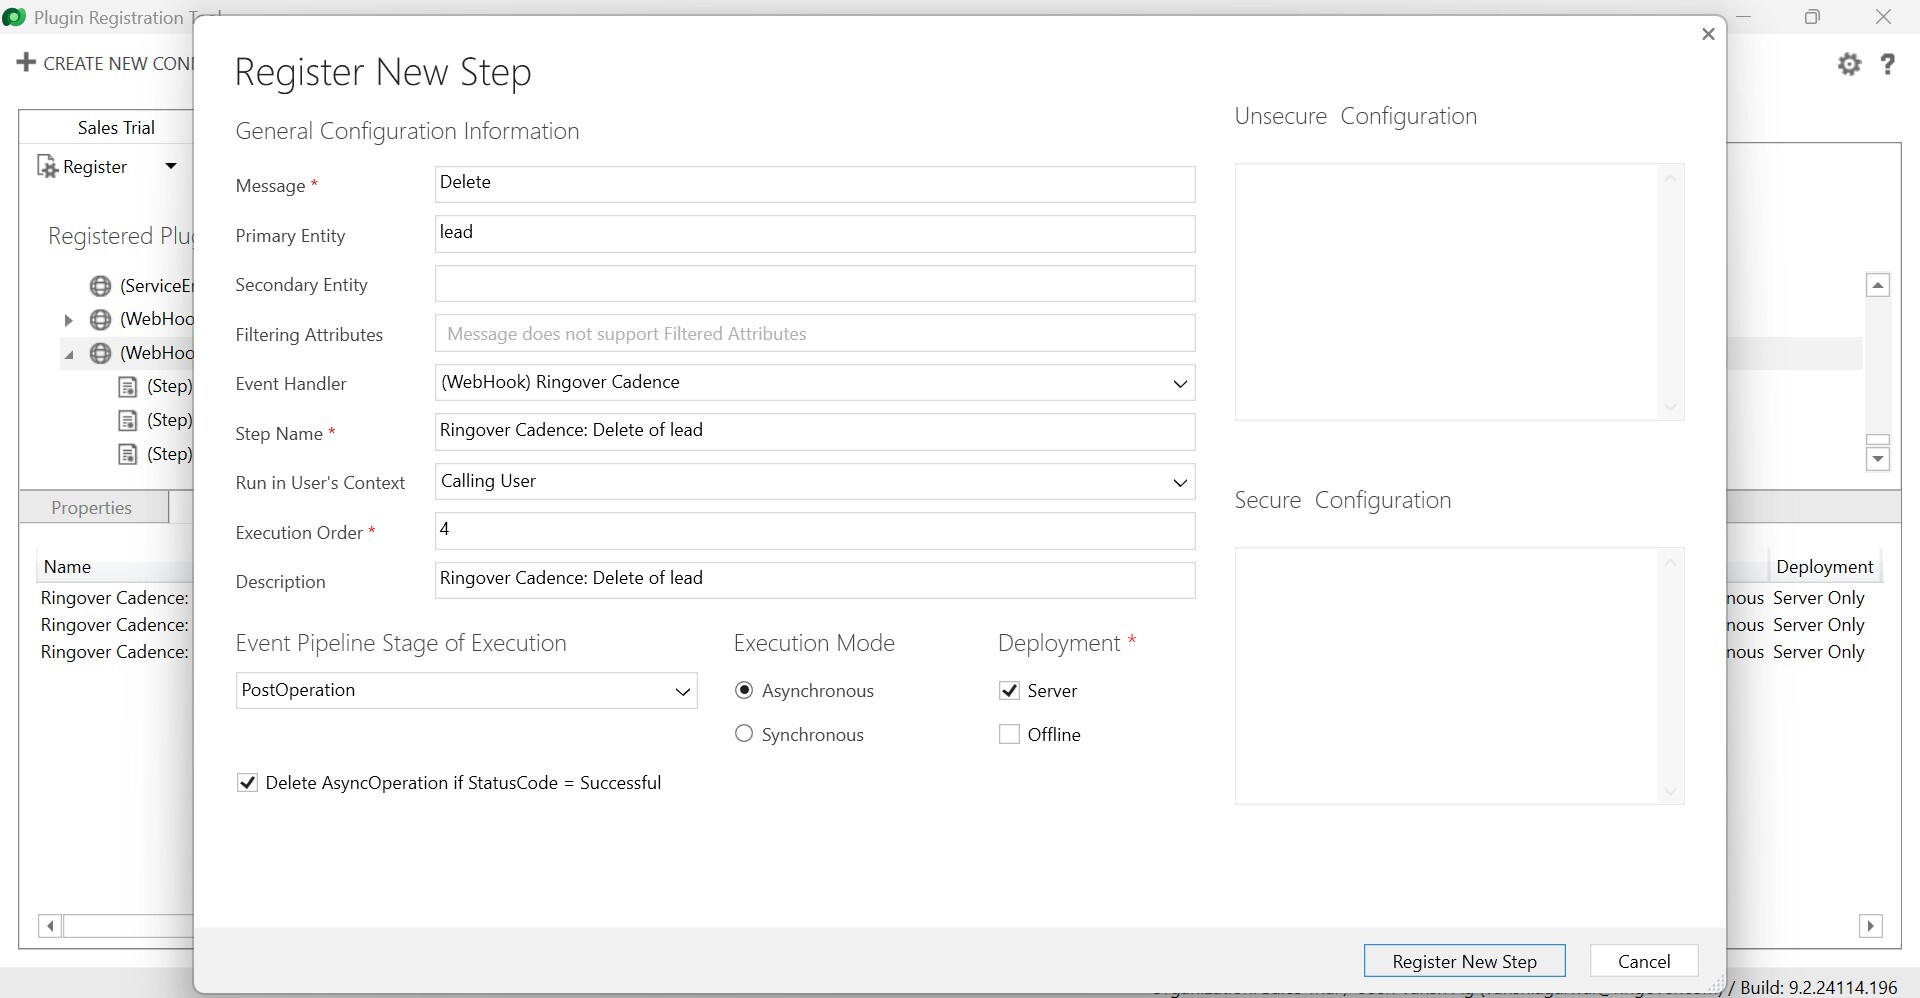
- Update webhook
- Click on Register New Step.
-
For account:
- Update webhook
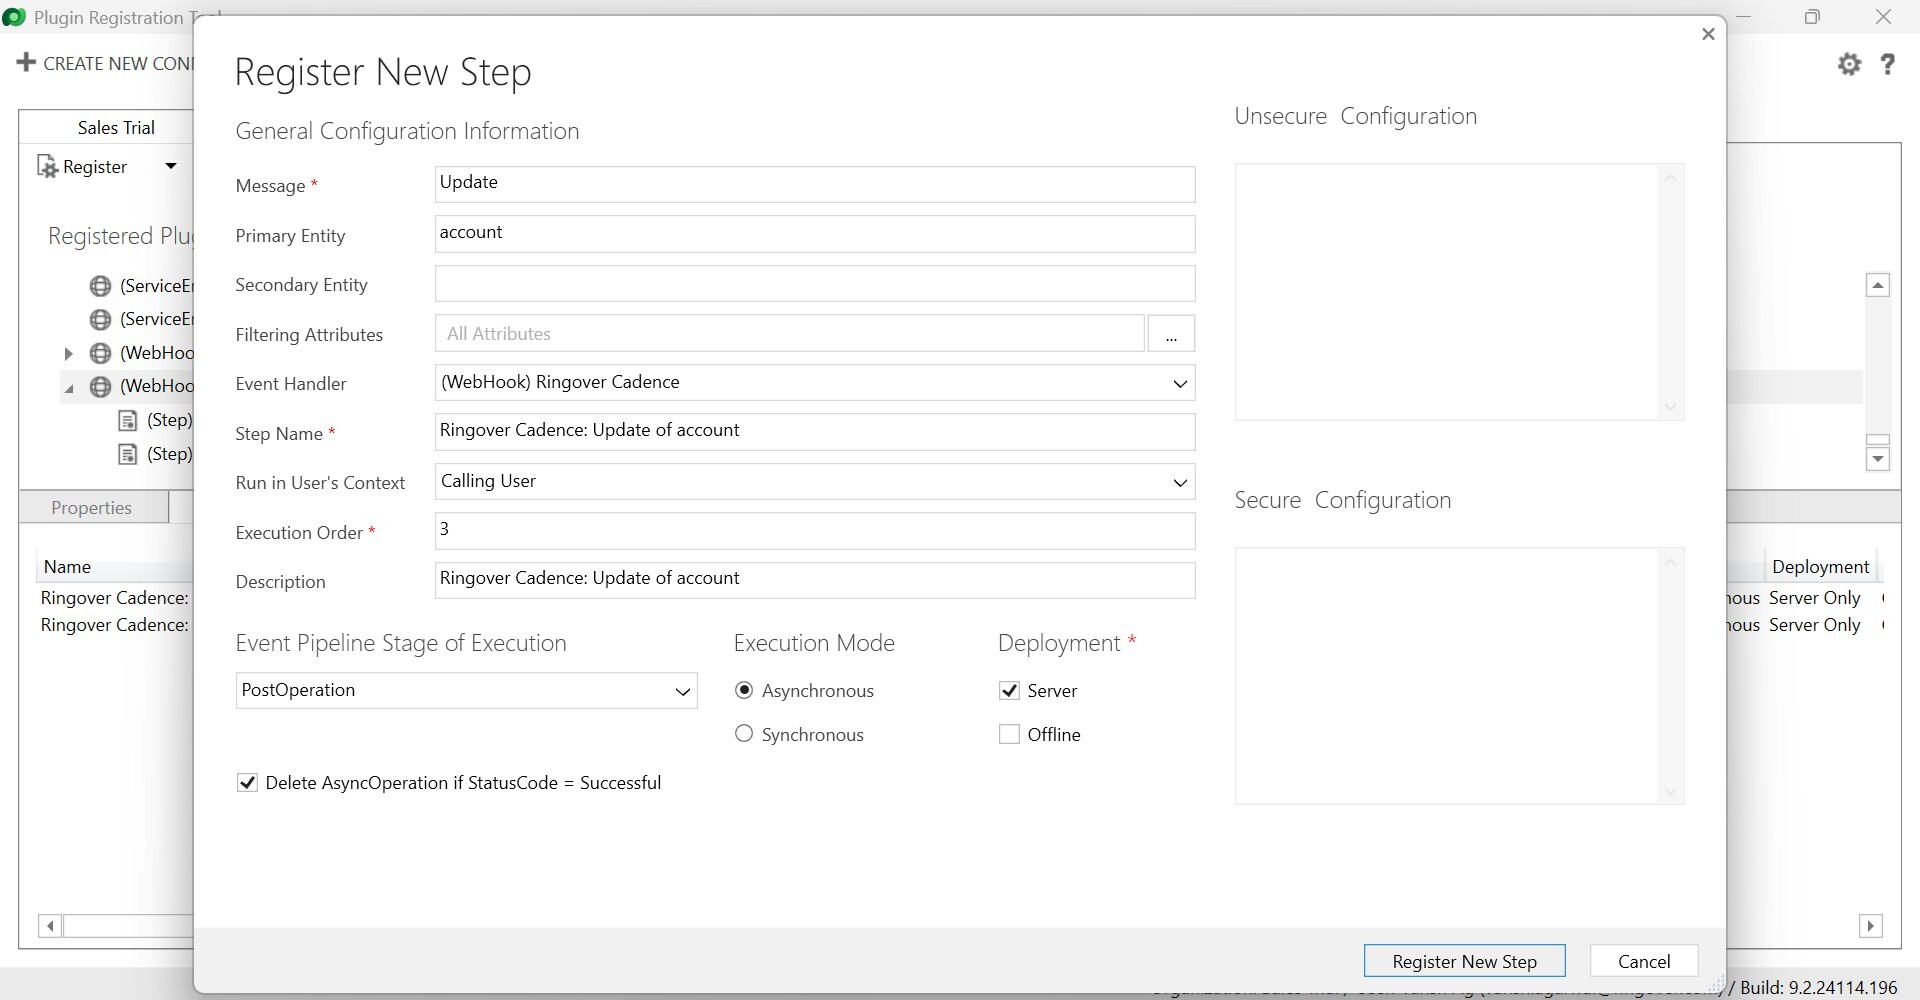
- Delete webhook
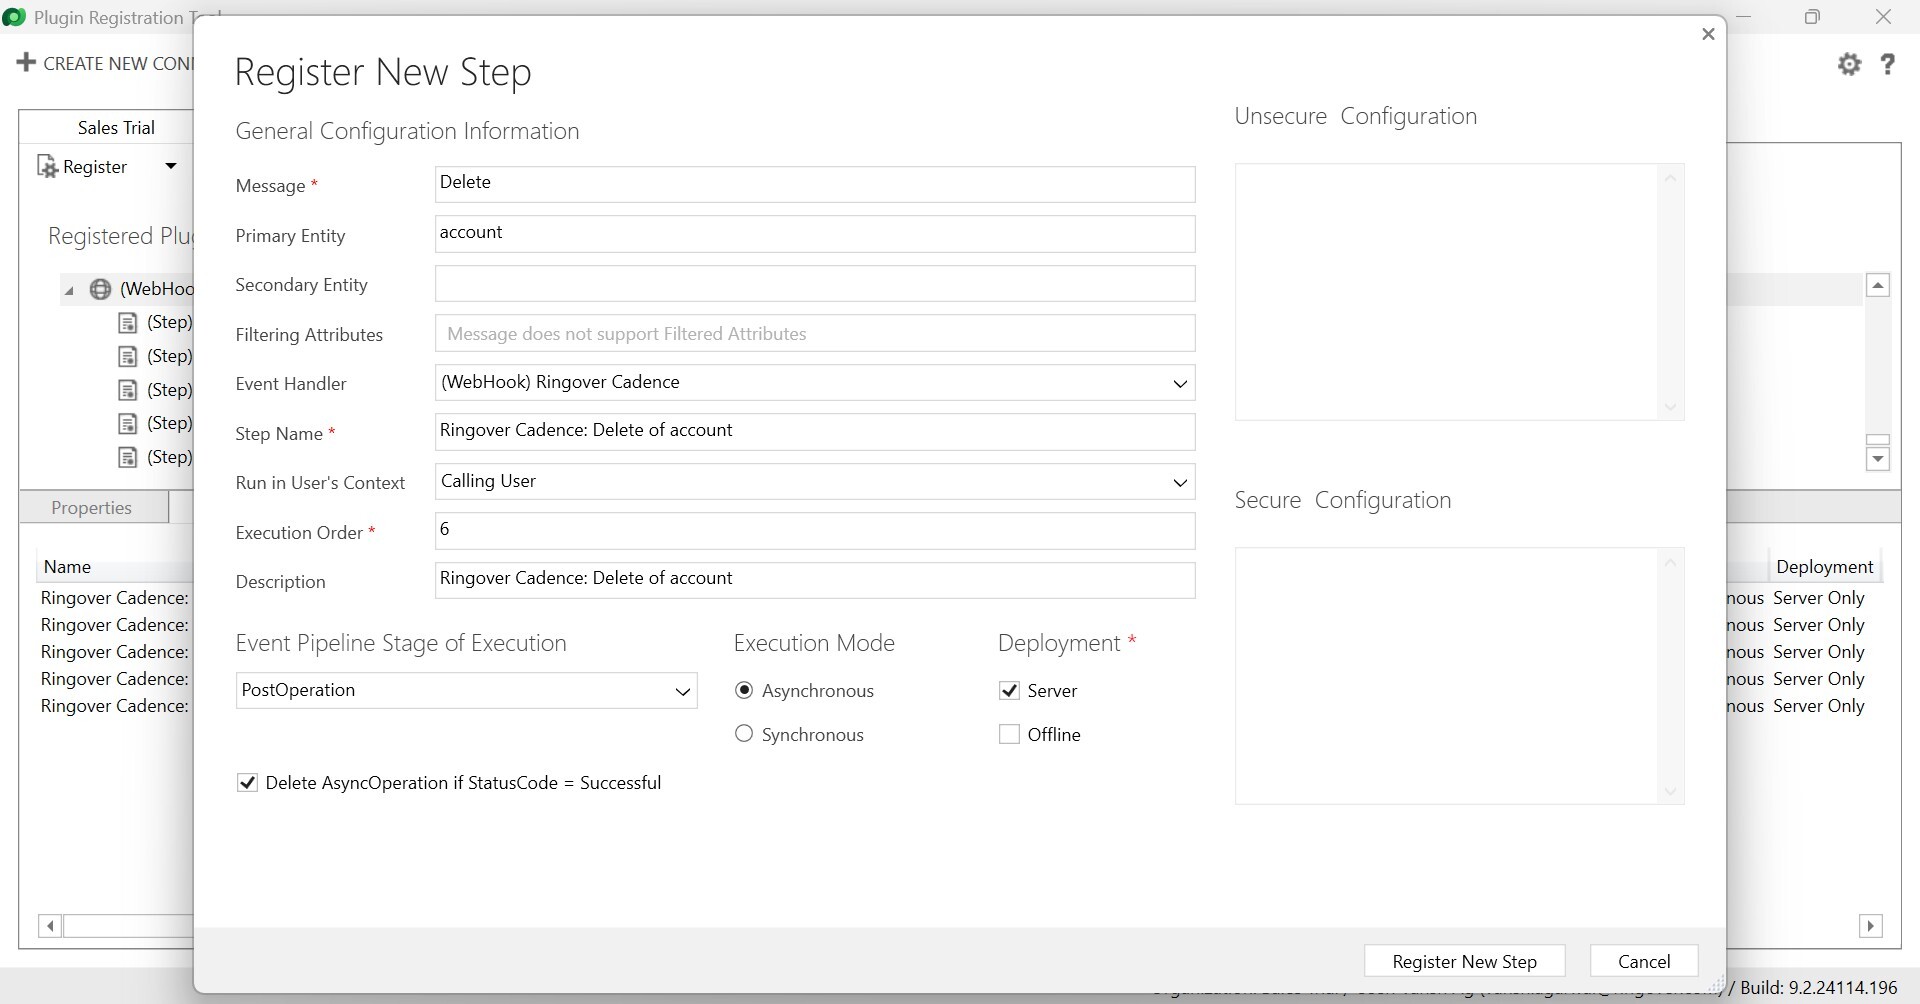
- Update webhook
- Click on Register New Step.
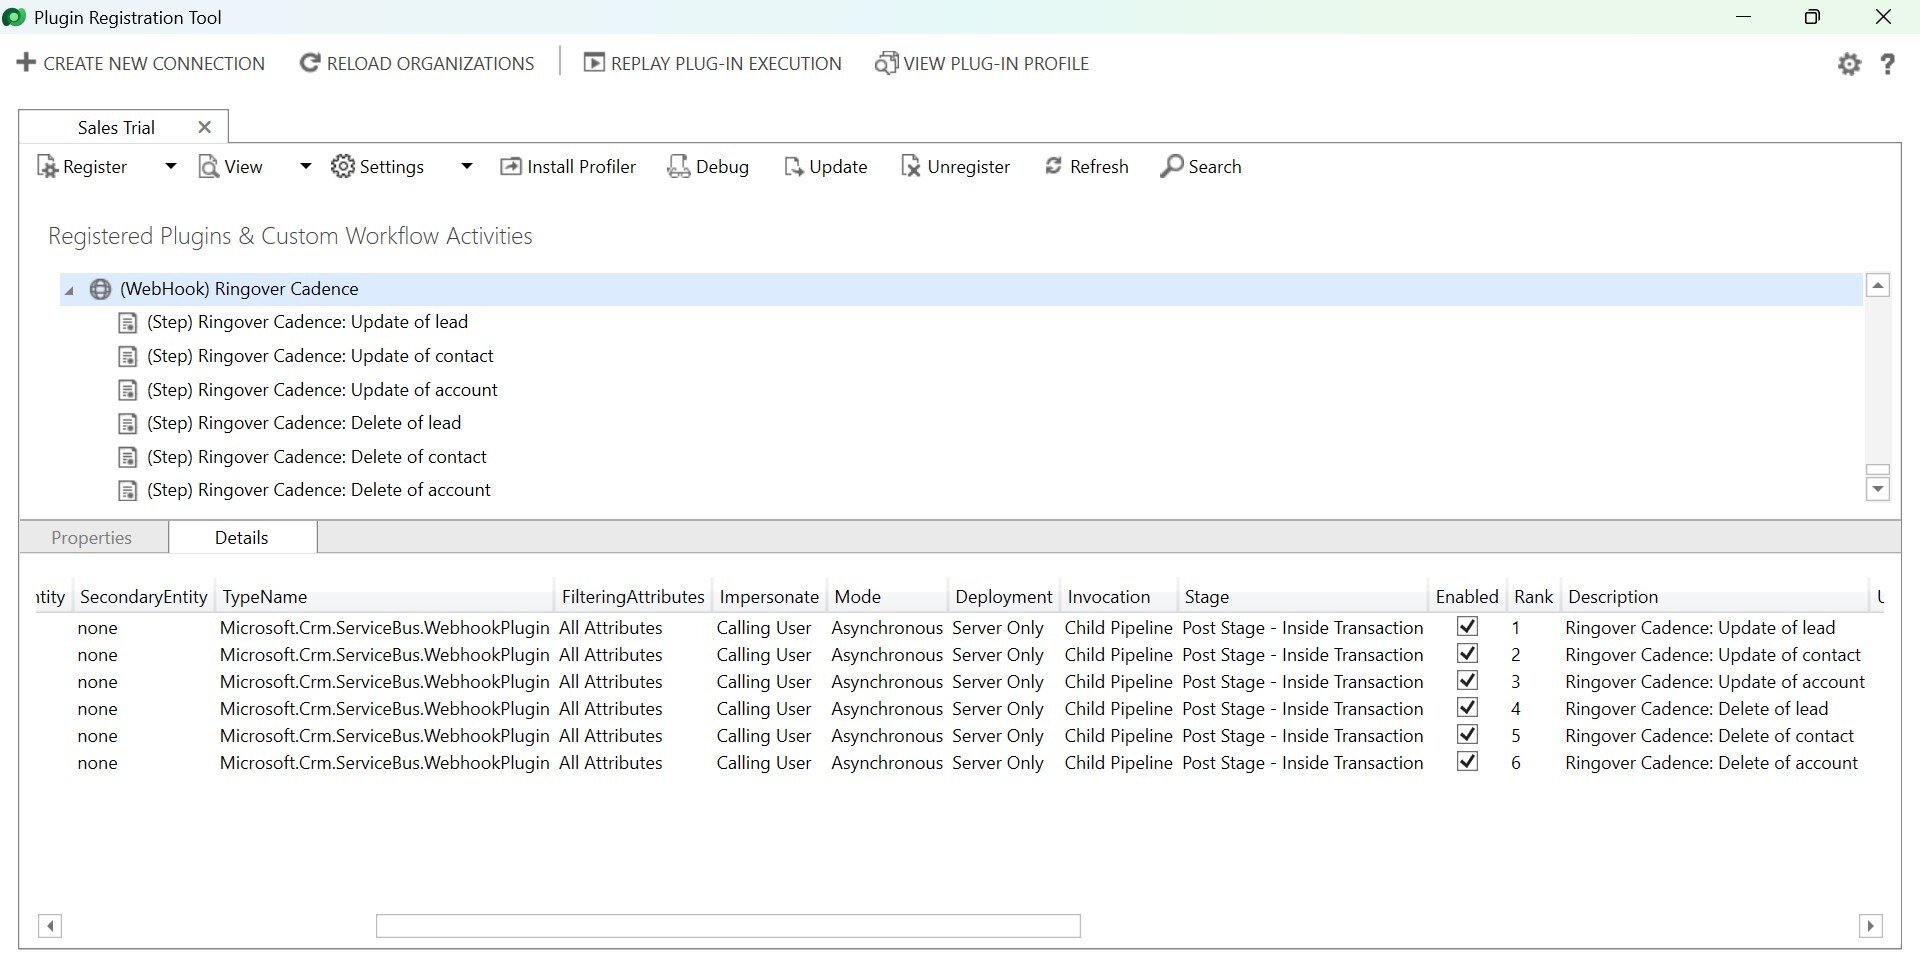
The Webhook will be configured as a result.