
The Ringover integration with Axelor allows you to streamline your business communications by enabling Click-to-Call, synchronizing calls and SMS, and automatically syncing contact records and call logs with your ERP/CRM. In this guide, you’ll learn how to activate the integration, connect your Axelor account, and configure settings.
Prerequisites
- An active Ringover Business account.
- Administrative or technical account permissions in Ringover.
- An administrator account in Axelor.
Set up and configure Axelor integration
1. Activate Axelor in Ringover
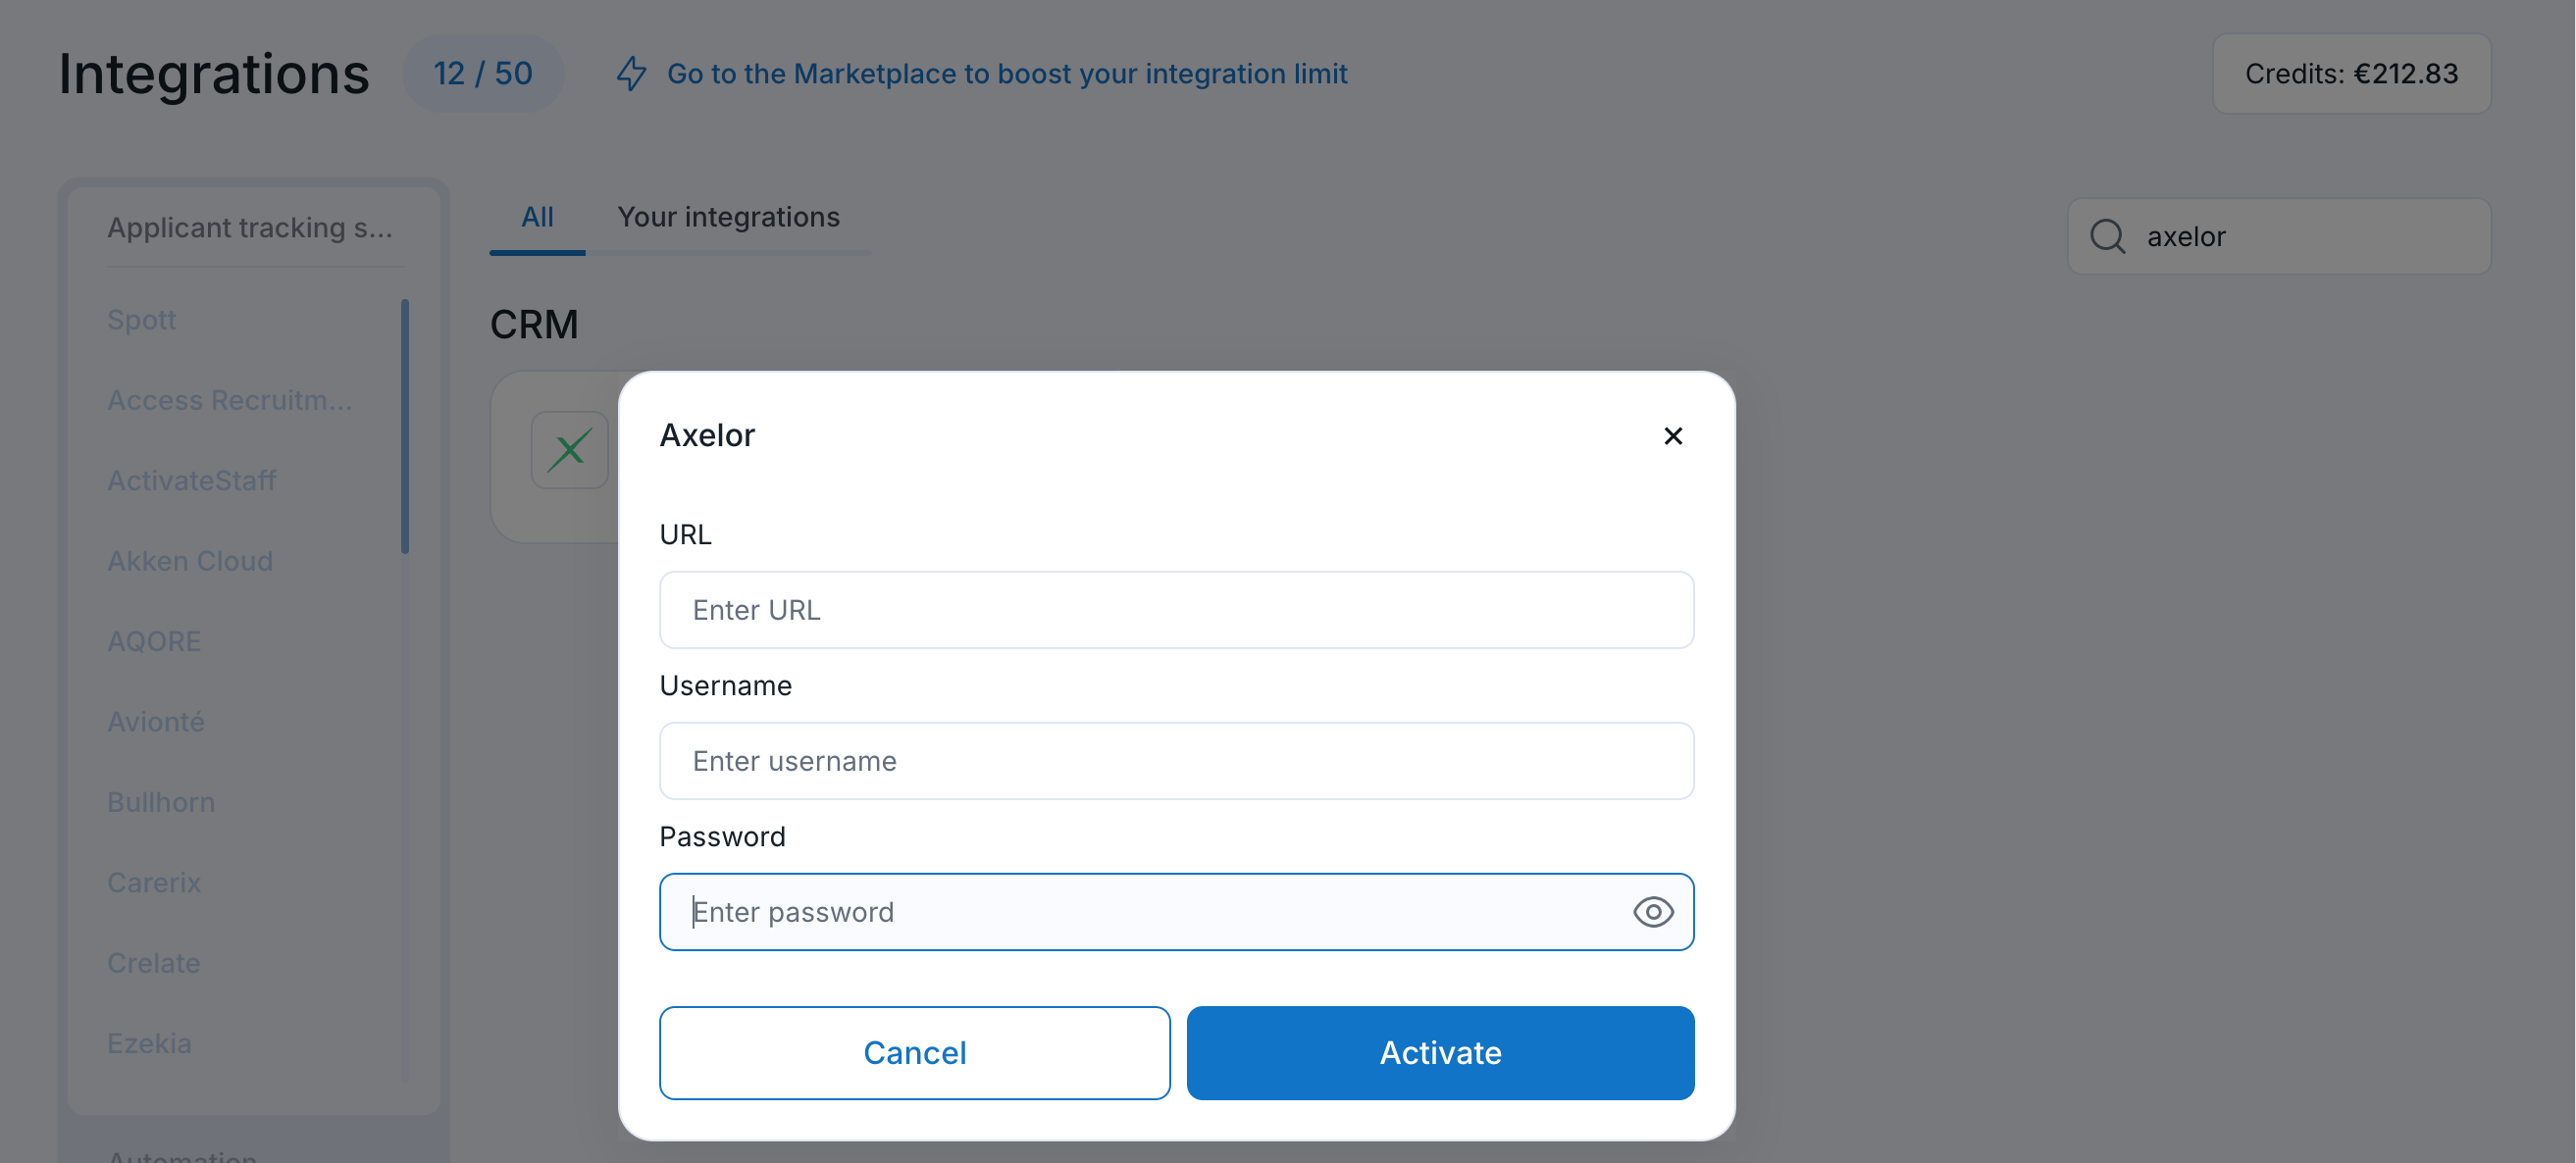
Connect your Axelor instance by entering your CRM URL and administrative login credentials.
- Log in to your Ringover Dashboard.
- Go to Store > Integrations.
- Search for Axelor and click on it.
- Enter your Axelor CRM URL and admin credentials.
- Click Activate.
2. Configure your Axelor integration settings
Customize call logging behaviors, contact creation rules, and synchronization settings to suit your workflow.
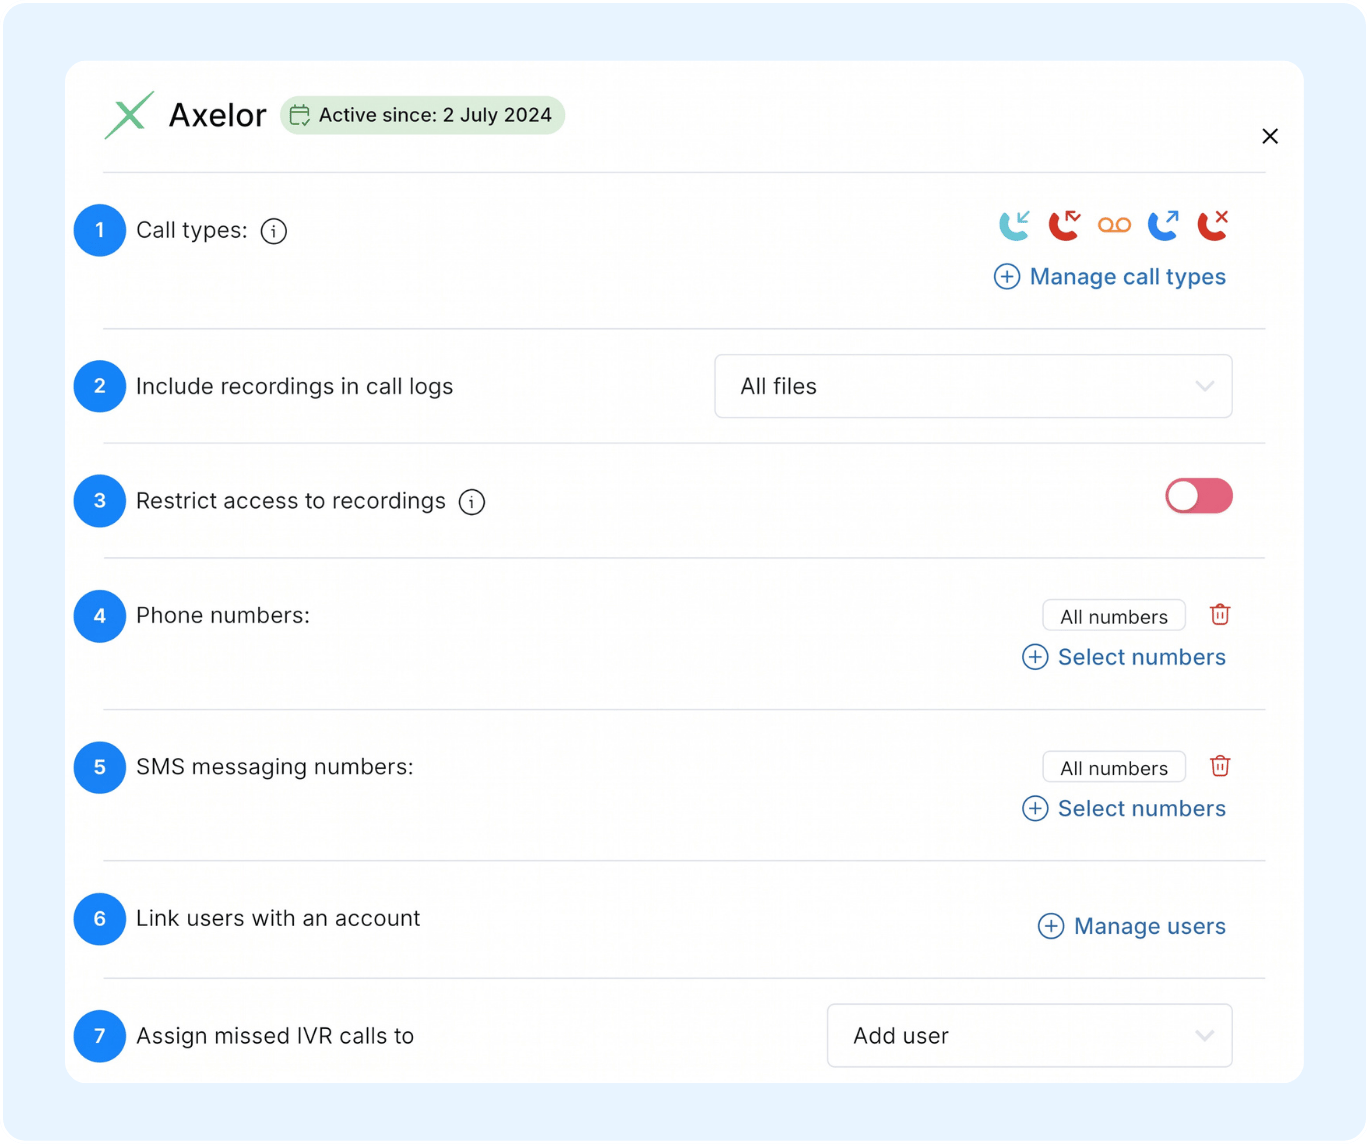
- Call types: Manage and filter categories for incoming, outgoing, or missed calls.
- Include recordings in call logs: Choose which audio recordings (e.g., "All files") are attached to call logs.
- Restrict access to recordings: Toggle switch to limit user access permissions for audio recordings.
- Phone numbers: View and manage connected phone lines or select specific numbers.
- SMS messaging numbers: Select and manage phone numbers designated for SMS messaging.
- Link users with an account: Map Axelor users or agents to their corresponding system account.
- Assign missed IVR calls to: Choose a default user or queue (e.g., "Add user") to assign unhandled IVR calls.
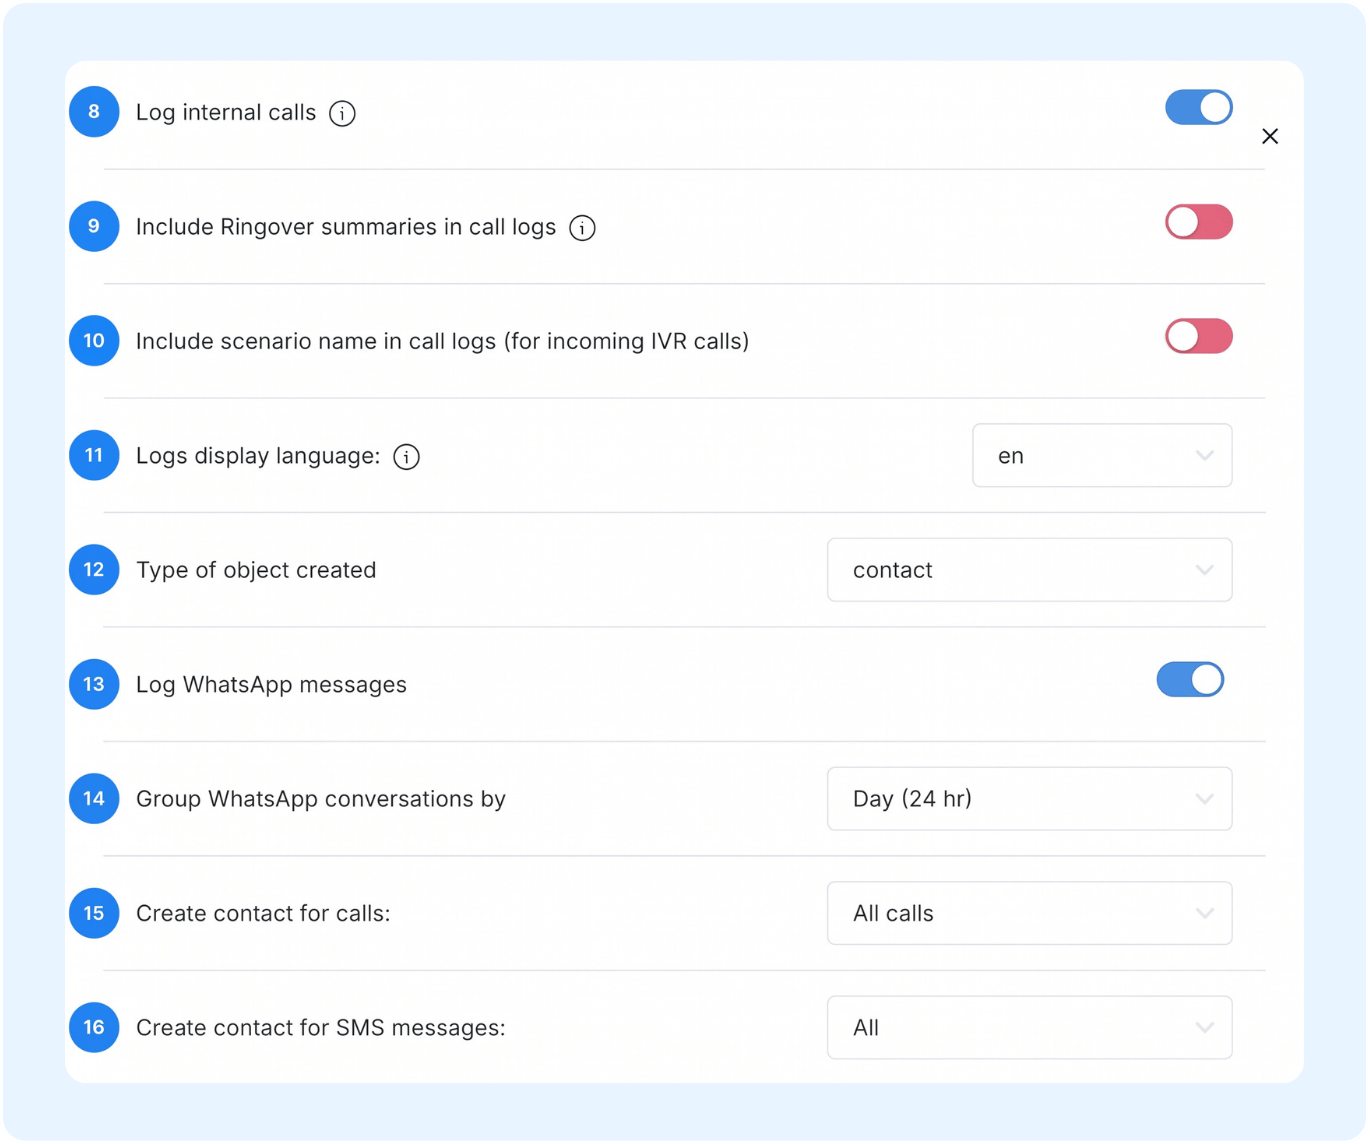
- Log internal calls: Toggle switch to automatically log internal team calls within Axelor.
- Include Ringover summaries in call logs: Toggle switch to attach Ringover call summaries to call logs.
- Include scenario name in call logs (for incoming IVR calls): Toggle switch to append the specific IVR scenario name to incoming call logs.
- Logs display language: Select the language used to display call log details (e.g., "en").
- Type of object created: Select the default CRM object created for new contacts (e.g., "contact").
- Log WhatsApp messages: Toggle switch to automatically save WhatsApp chat messages to CRM logs.
- Group WhatsApp conversations by: Select how WhatsApp messages are grouped into threads (e.g., "Day (24 hr)").
- Create contact for calls: Choose which calls trigger automatic contact creation (e.g., "All calls").
- Create contact for SMS messages: Choose which incoming/outgoing SMS messages trigger automatic contact creation (e.g., "All").
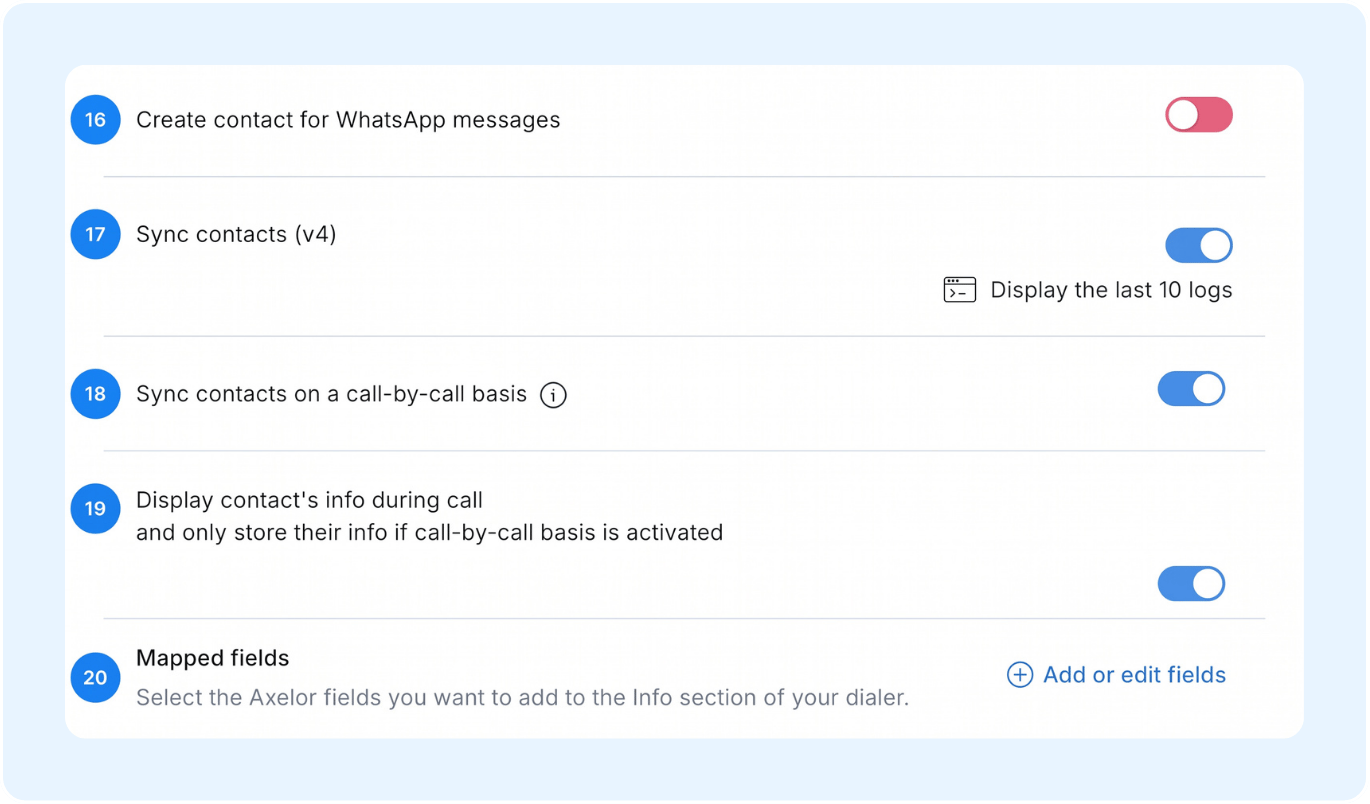
- Create contact for WhatsApp messages: Toggle switch to automatically generate new CRM contacts from WhatsApp conversations.
- Sync contacts (v4): Toggle switch to enable general contact synchronization with Axelor.
- Sync contacts on a call-by-call basis: Toggle switch to trigger contact synchronization individually as each call occurs.
- Display contact's info during call and only store their info if call-by-call basis is activated: Toggle switch to show contact details on the dialer during calls while conditionally restricting storage unless call-by-call sync is enabled.
- Mapped fields: Select Axelor fields to display in the dialer's Info section (e.g., "Localization" mapped to
Contact - localization).
💡Install the Ringover Chrome or Firefox Extension to enable Click-to-Call directly on any customer phone number inside Axelor.
🎉 You now know how to set up the Axelor integration and can seamlessly manage all customer calls, SMS, and contacts!