
Empower Recorder allows you to capture, upload, and organize your business meetings directly within your team's workspace. In this guide, you'll learn how to set up the recording assistant, upload existing files, and record live meetings.
Using the Empower Recorder
Access the recorder options
To begin, navigate to the recording panel inside your application.
- Go to your Empower application.
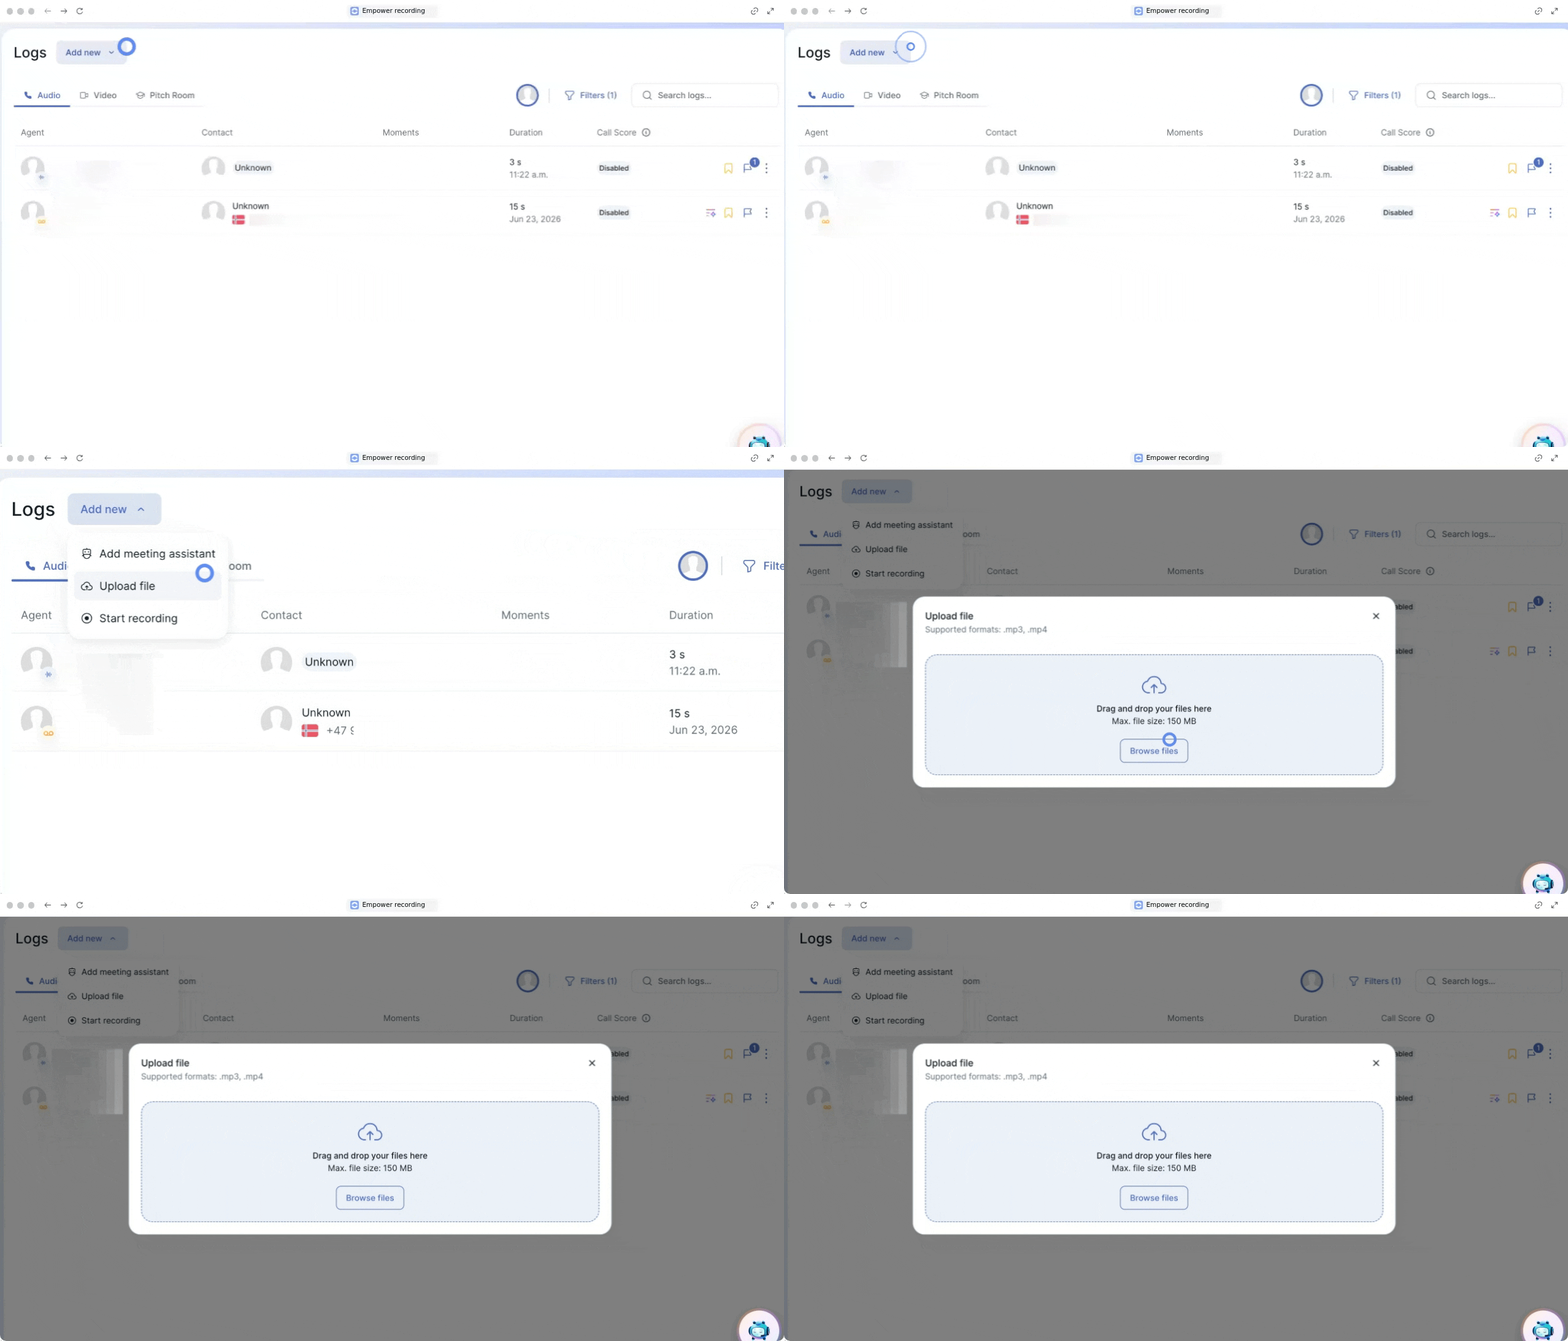
- Click on Add new located to the right of your logs.
- Then, choose your options.

1. Add a meeting assistant
You can invite an AI assistant to join and record a scheduled online meeting.
- Click on Add a meeting assistant.
- Choose the Assistant name.
- Enter the Meeting name.
- Add an optional Welcome message.
- Select whether the meeting is Public or Private.
- Add the Link to this meeting.

2. Upload an existing file
If you already have a recorded audio or video file on your computer, you can import it directly.
- Click on Upload file.
- Drag and drop your files into the interface, or click to upload them from your device.
3. Start a live recording
Record an active conversation or meeting in real-time.
- Click on Start a recording.
- Enter the Meeting name.
- Enter the Participant number.
- Add an optional Flag if needed.
- Click on the Red button to start recording, you can pause and/or stop the record.
- then, save it.
After the recording completes, you will find all your call summaries, transcripts, and insights under the Empower Studio.

🎉 You now know how to use the Empower Recorder and can easily manage all your meeting recordings and details in one place!