
Azure Blob Storage integration allows you to automatically save a copy of your call recordings directly into your Azure storage containers for secure archiving. In this guide, you’ll learn how to locate your Azure credentials, configure the connection, and ensure your prerequisites are met for a successful setup.
Prerequisites
You must have the Owner or Contributor role (or Storage Account Key Operator) to view the required keys. A standard Reader role will not work. Additionally, ensure that:
- Allow storage account key access is enabled in your Azure Settings. Some clients disable this to force Entra ID, which is not supported.
- Public network access is authorized, or Ringover's exit IPs are added to your firewall. Private endpoint-only accounts are not reachable.
Configure the Azure Blob Storage integration
1. Locate your storage account name
The storage account name identifies the specific account where your recordings will be sent.
- Go to the Azure Portal.
- Use the search bar to find and click on Storage accounts.
- Choose the account you wish to use (or create a new one).
- Copy the name displayed on the Overview page.
This name is also the first part of your service URL (https://<account-name>.blob.core.windows.net) and must be 3 to 24 characters, using only lowercase letters and numbers.
2. Copy your access key
Ringover authenticates using a storage account access key (shared key), not via OAuth, SAS tokens, or Entra ID.
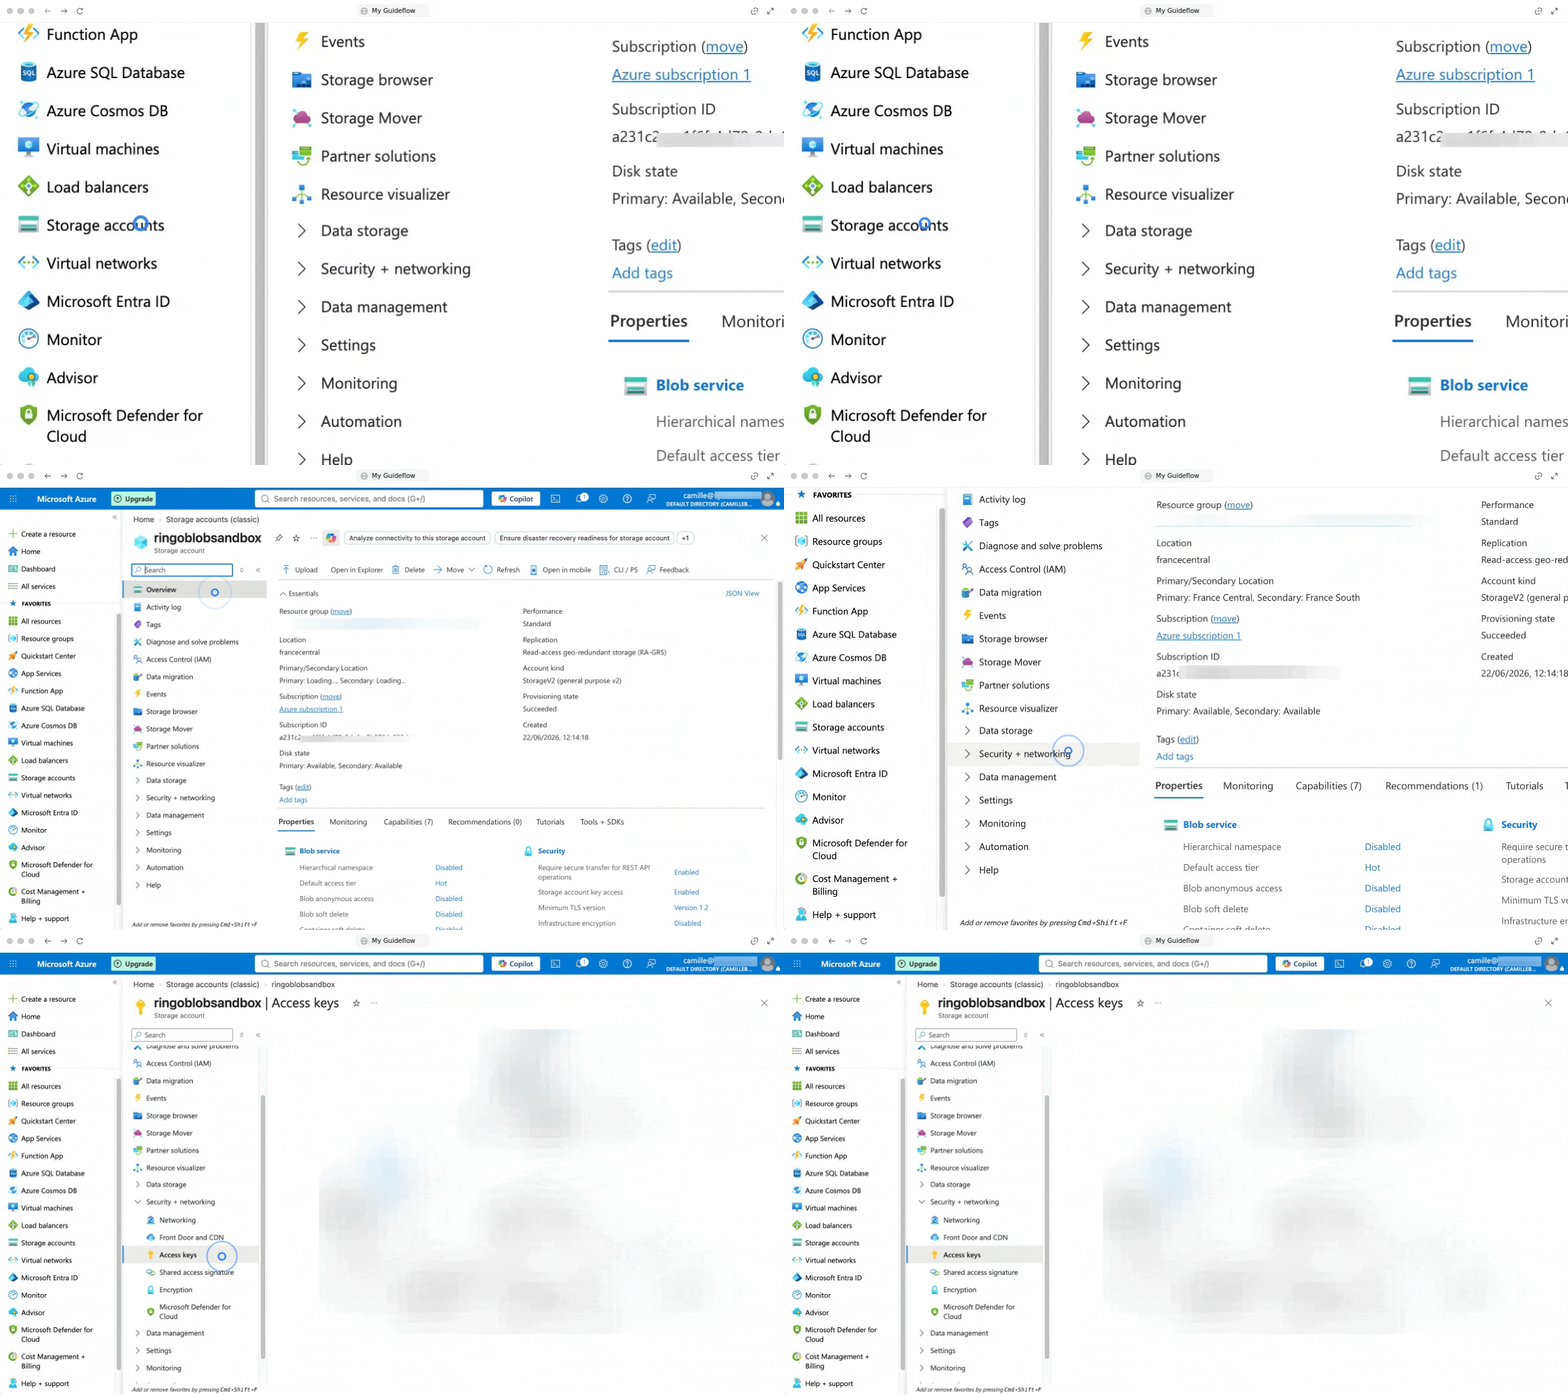
- Go to your selected storage account in Azure.
- Navigate to the left menu and select Security + networking > Access keys.
- Click on Show next to key1 (or key2).
- Copy the value from the Key field (usually ~88 characters ending in "==").
3. Define your container name
The container is the specific folder within your storage account where the audio files will be stored.
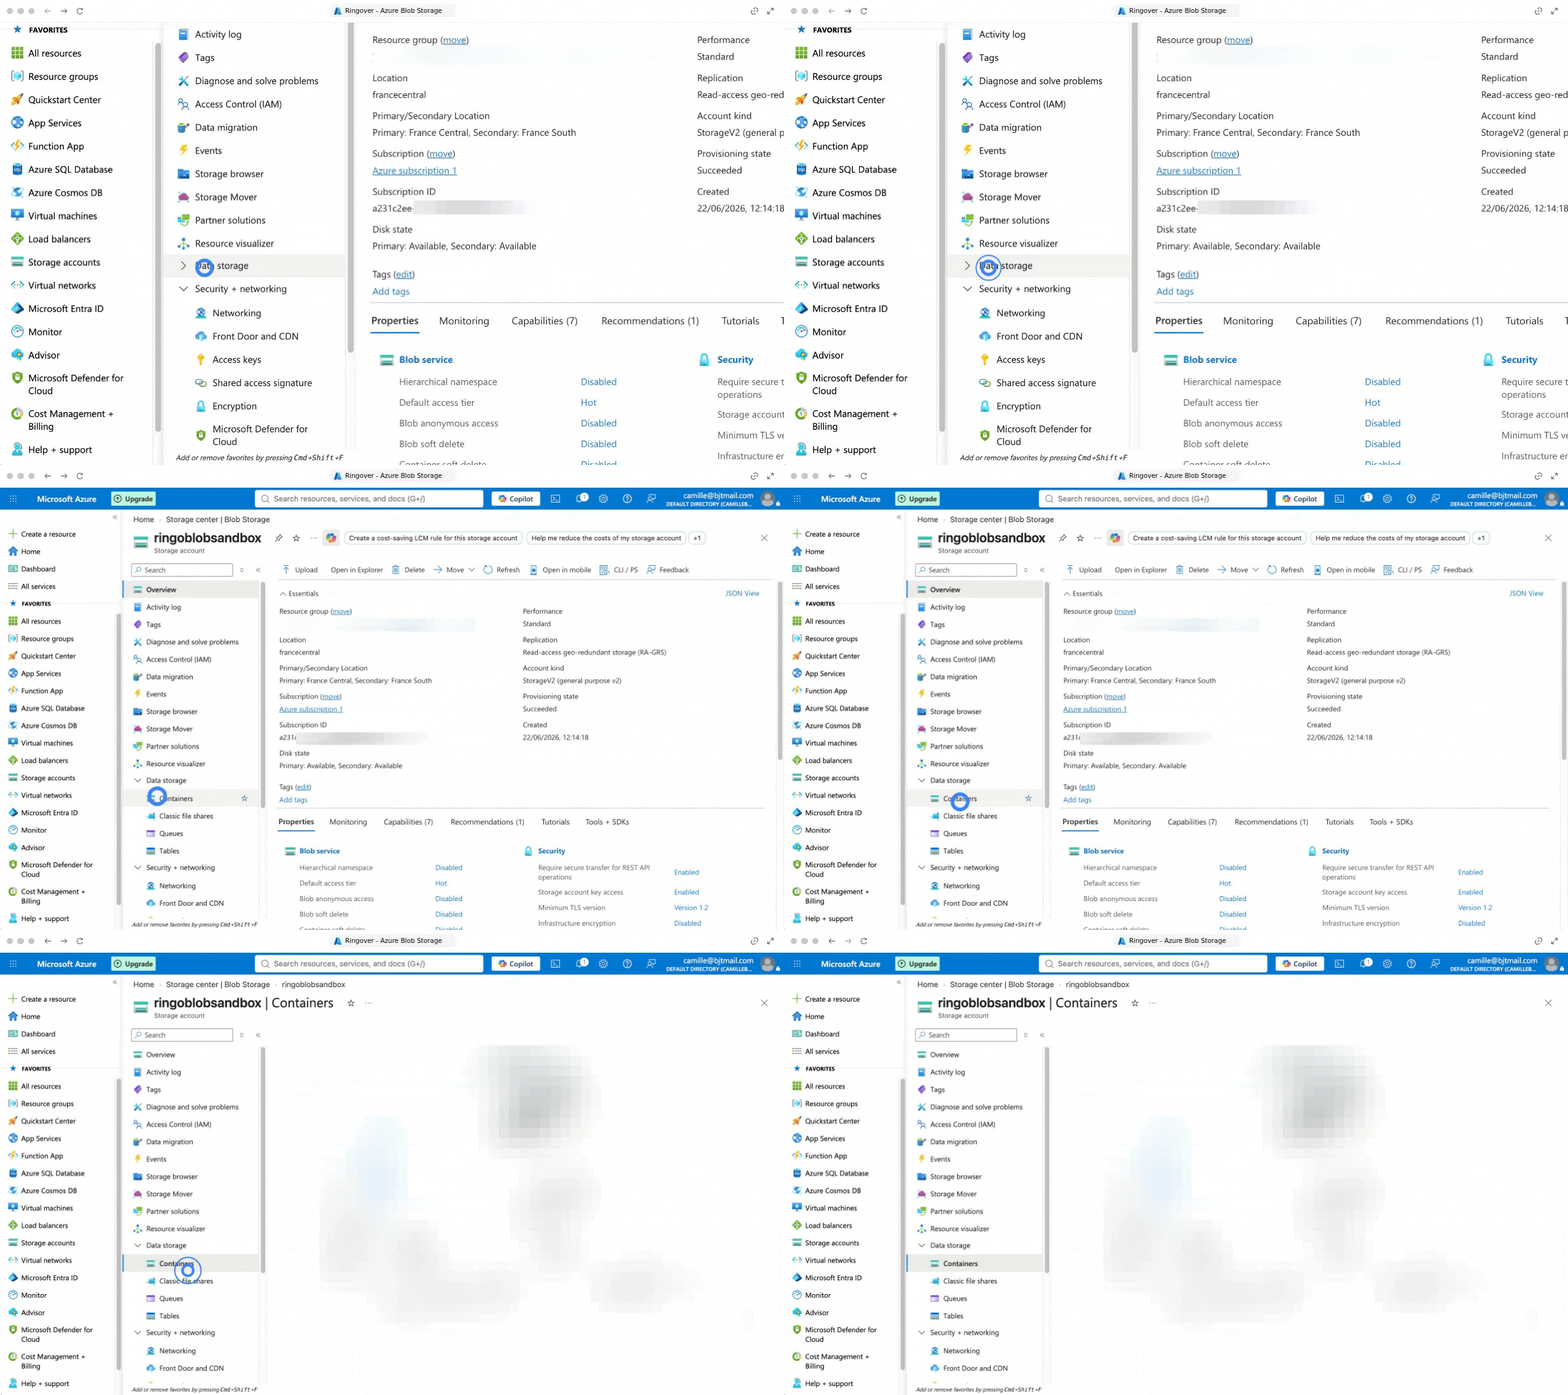
- Go to your storage account menu.
- Select Data storage > Containers.
- Copy the name of an existing container or click + Container to create a new one with Private access.
4. Validate the configuration
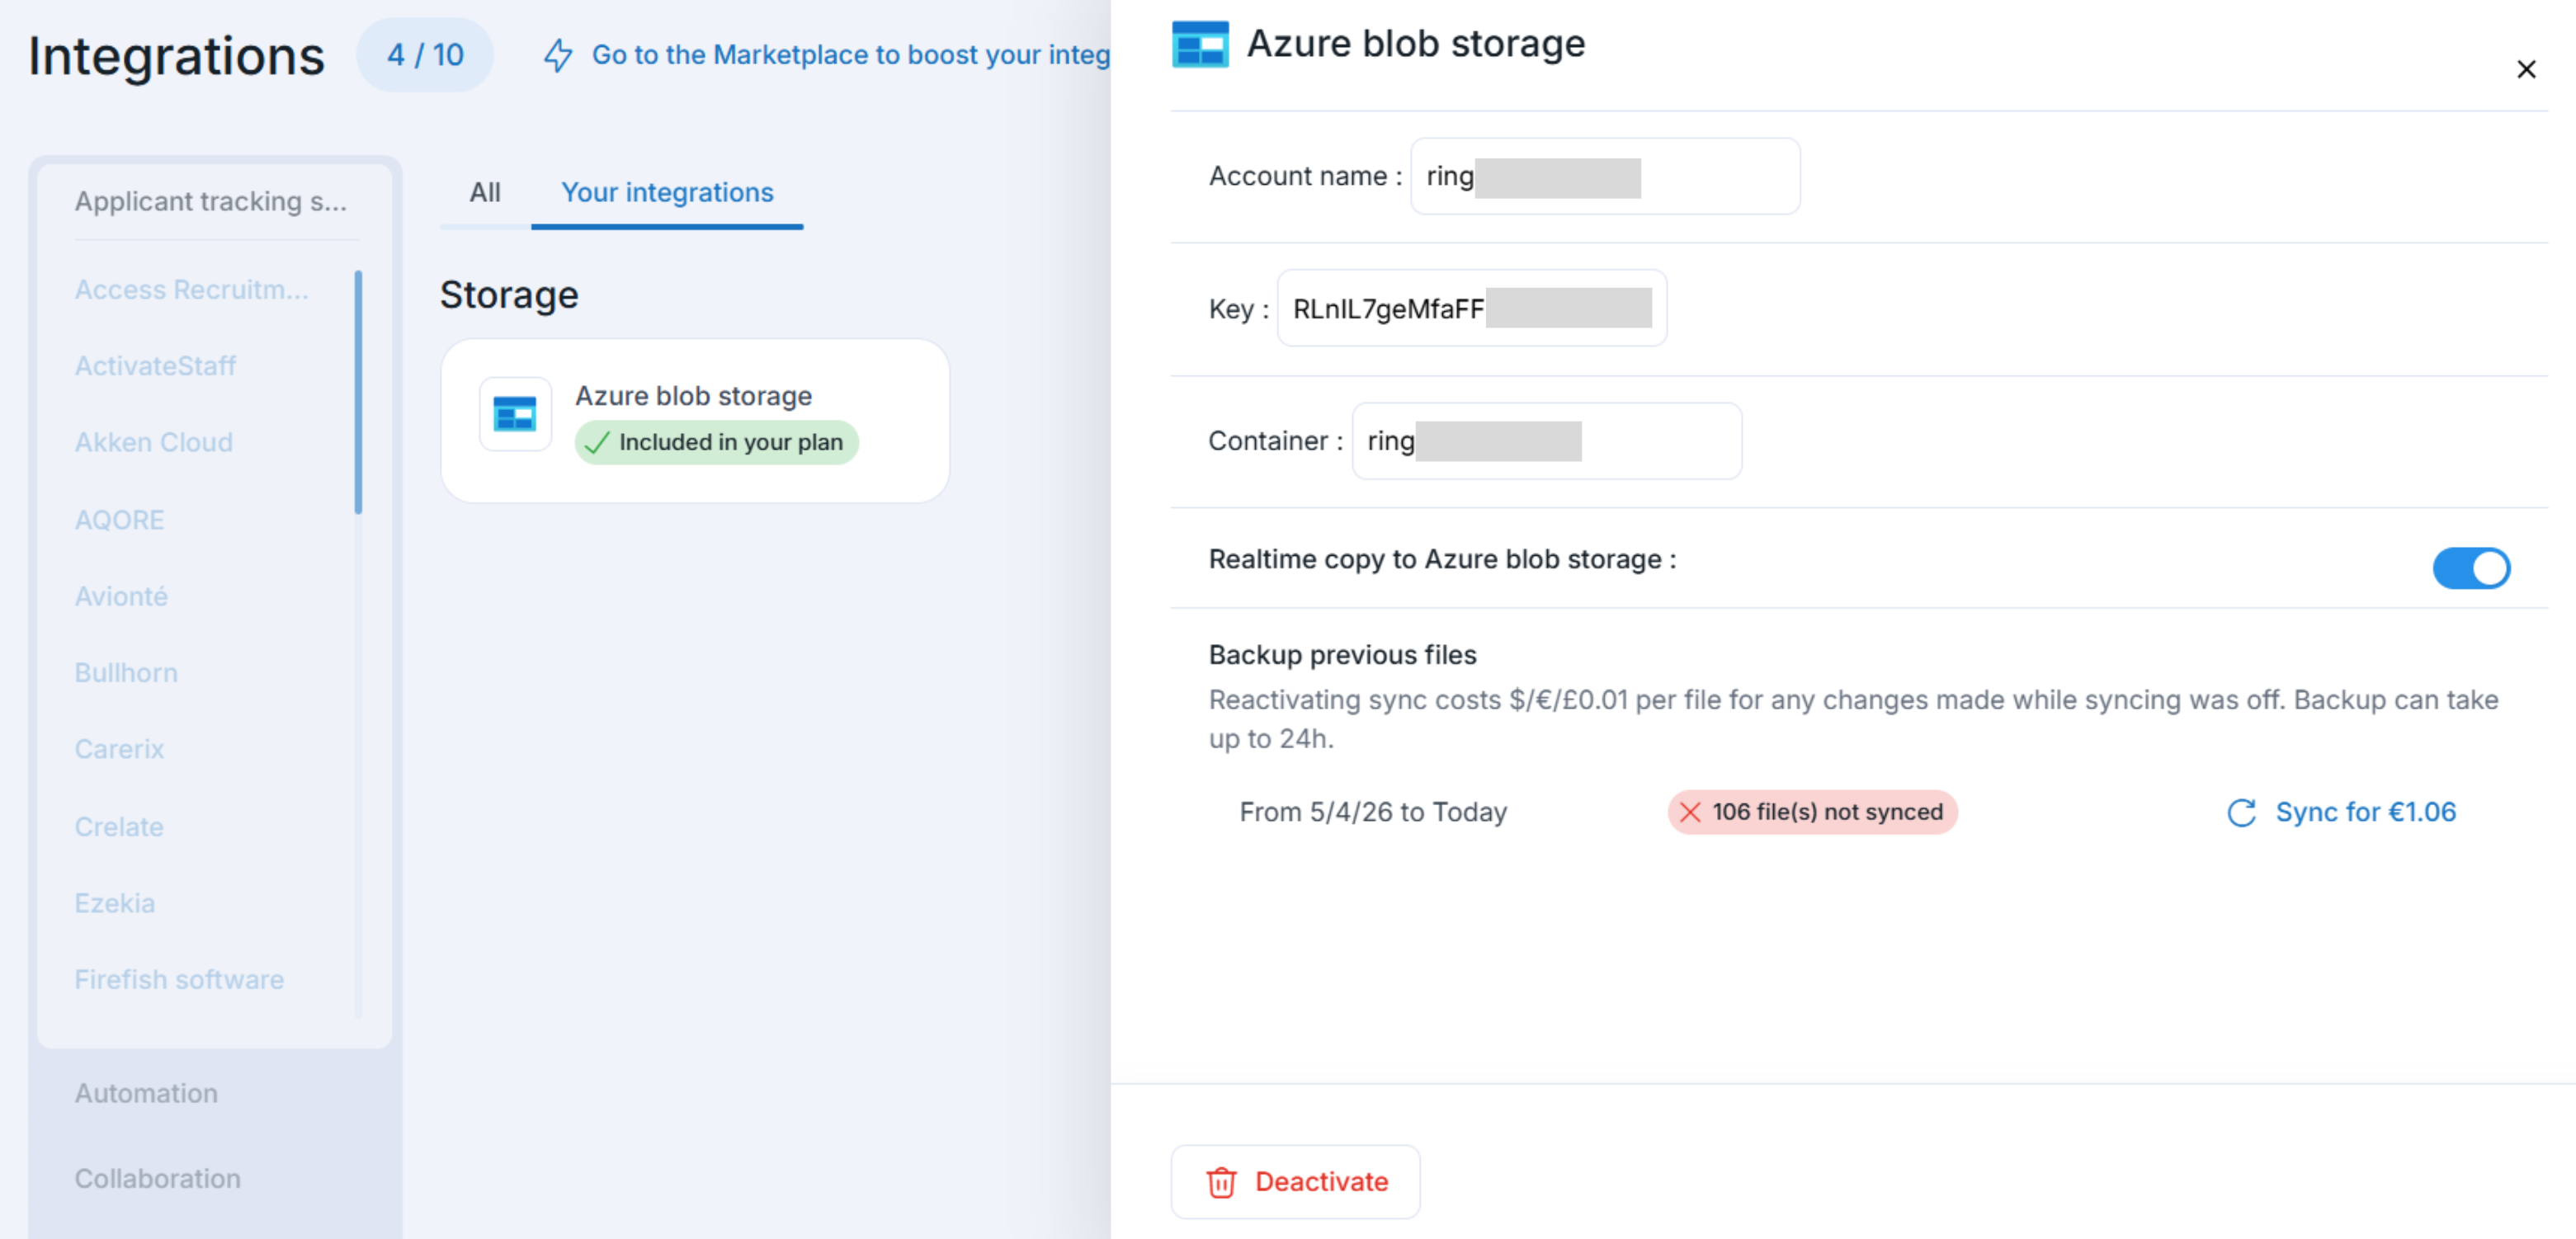
- Go to your Integrations page.
- Activate the Azure blob storage.
- Enter these three values : Storage account name, Access key, and Container name.
Once you enter these three values into Ringover, the system will instantly test the credentials.
- If accepted, files will be deposited privately in the format:
records/{account_id}/{uuid}-{timestamp}-{caller}-{callee}.mp3. - Ringover will only deposit files; it does not delete anything. Retention policies, costs, and access rights are managed directly by you on Azure.
🎉 You now know how to configure your Azure Blob Storage integration and can automatically and securely archive all your call recordings!